Wednesday, January 30, 2008

Matka Chai for that Liquid Comfort fix

It is time to Click! Well, it has been for several weeks now. And I've been suffering from photographer's block (does that even exist?) ... I woke up this morning and realized that today is the 30th ... and I hadn't Clicked yet! Crap!


The theme for this month is Liquid Comfort - as Bee & Jai put it "What liquid indulgence is it, that comforts you on a wet gloomy day?" or a hot summer day :) or just about any day! ... well, I know my many liquid comforts - the mocha-with-extra-chocolate that barista/bartender extraordinaire Matt Neyens makes for me on most weekends, the ginger lemonade that I crave in summer, the rum punch that fast became a fave in Belize, yummy mexican hot chocolate, my mum's rasam (*drool*), a glass of Vieux Telegraphe, the list goes on ... Oh! How could I forget apple-ginger chai - insanely warm and comforting, often the only beverage I can contemplate drinking before heading off on a long run.

So, chai was my choice. Now all I needed to do was take a pic or 3, right? Well, I've been creatively challenged. And I think I still am. The pix turned out ok, but not as well as I would've liked. But I did get around to drinking my chai this morning, so I guess I can't complain :)


So, here goes ... after several drippings of chai all over the house ...


There are few things as comforting as matka chai - it seems like the aroma and flavours of the tea are intensified by the terracotta, even the shape of the matka makes for such a comfortable grip. Plus it seems to keep the chai warm forever :)


***

Apple-Ginger Chai

In a Matka, no less!

Servings: 1

1 T full-bodied black tea - I typically use single-estate Darjeeling or Nilgiris tea
1" ginger - grated
1/4 apple - diced

2 cardamom pods - opened to the seeds

1/4" stick of cinnamon

a tiny piece of nutmeg

1 white peppercorn
1 cup milk
1 t honey


Heat the milk on medium-low in a saucepan.

After a minute of heating, add the spices and stir.
After a couple of minutes, add the ginger and apple bits.

A couple of minutes later, add the tea.

Lightly mash the apple bits to release the juices.

Let the milk boil, stir continuously as we let the tea steep.
(I typically set the heat on low and let the milk simmer for several minutes)

Take off the stove, strain contents into a matka or cup and stir in the honey.


Variations

* Additional spices like allspice and anise can be used for seasoning the chai.
* Demerara sugar makes for a nice variation instead of honey.


Camera Details:
Nikon D70
28-105 kit lens


Yeesh! Can I get any more last-minute than this???

Monday, January 28, 2008

Citrus Love - Part Un (a.k.a. Daring Bakers' Adventure - January)


One of these days, I'll get started on my Daring Bakers Challenge the day after the topic is announced - I mean it! I've only done 2 of these so far, but apparently I live on the edge even when it comes to cooking. Seriously, I'm a last-minute adrenaline junkie - proved unequivocally by the fact that I just finished my DBC about 30 minutes ago!

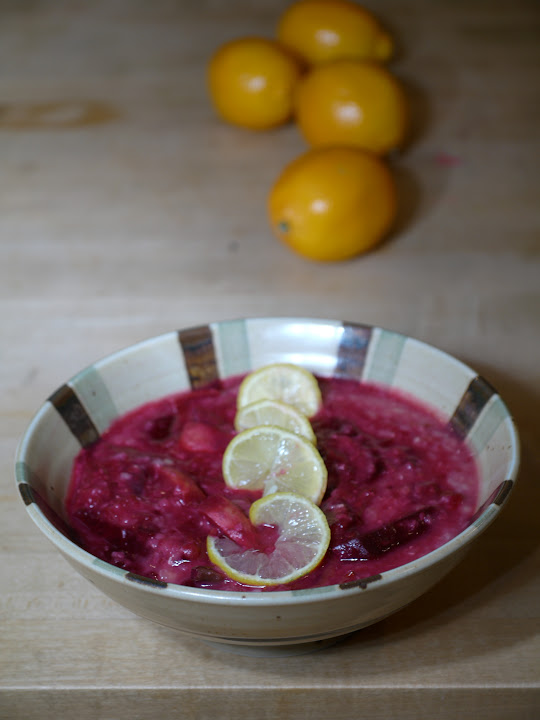
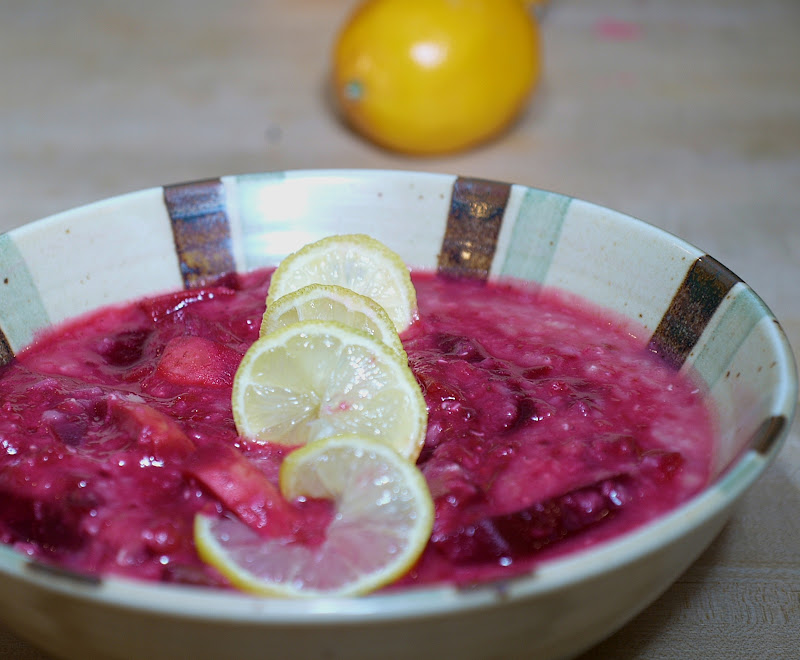
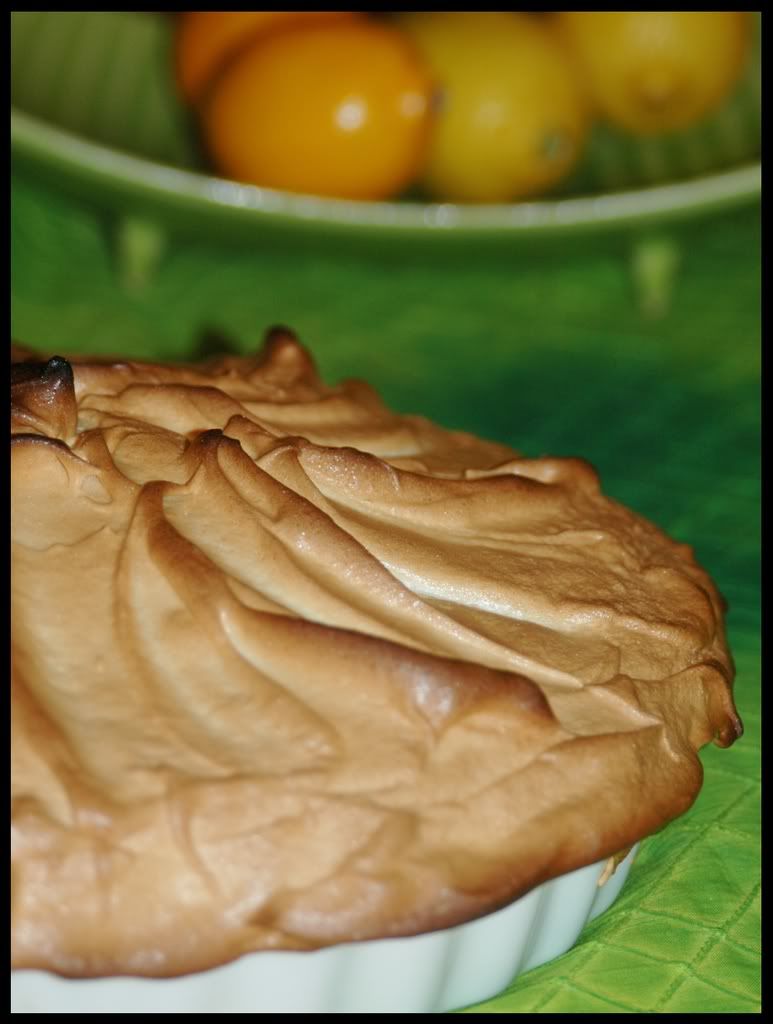
Lemon Meringue Pie ...

Hmm ... I wasn't sure what I thought of this when I first saw the topic. I love lemons, but most of the lemon desserts I lean towards are a lot lighter - lemon bars, light whipped lemon curd ... and this whole meringue thing sounded a bit daunting. But I got all excited about making tartlets, that's always fun - a bite-sized or one person dessert is usually fun to put together. But then I couldn't find any tartlet pans and today is a heavy snow day ... so that plan was abandoned and I went back to baking a regular pie instead.

Jen of The Canadian Baker picked the recipe for this challenge - the more I read it, the more appetizing it sounded. And a little daunting too! Especially since it has been a while since I baked a pie - many many months, actually!

As I read the recipe more, I started having a few doubts. The pie crust recipe sounded different from the ones I'm used to, but the instructions were really clear, guess I couldn't go wrong with that. The other thing that I was iffy about was the meringue - I'm not a big meringue fan by any means - it just doesn't do much for me. I'd rather top my lemon curd with caramel or some chopped nuts, those flavours appeal a lot more to me.

So, I started my baking in the eleventh hour :) The recipe was really easy to follow, the instructions straightforward. Thanks, Jen for sending this recipe our way!

Jen's only requirement was that the pie remain lemony. I pretty much followed the recipe to a tee, something I almost never do :)

Additions/Modifications:

We could make one pie or tartlets (in a tin or free-form)

We could compliment your pie with a sauce.

We could use a piping bag to apply the meringue if you like.

Decoration allowed - lemon zest or fruit are totally acceptable.

Changes are allowed to accommodate for altitude or for health/allergy reasons.

I made just one large pie, I still have some dough leftover that I might work into tartlets later this week. I read several posts about disappointing crusts, so I watched out for that while working the dough. I ended up baking the crust for an extra 3-4 minutes - that seemed to do the trick to avoid a soggy, chewy crust. This one seems reasonably flaky though I might stick with a couple of other crust recipes for future pies.


Lemon Meringue Pie
from Wanda's Pie in the Sky by Wanda Beaver

Servings
one 10" pie

Ingredients:

Crust:

¾ cup (180 mL) cold butter; cut into ½-inch (1.2 cm) pieces
2 cups (475 mL) all-purpose flour
¼ cup (60 mL) granulated sugar
¼ tsp (1.2 mL) salt
⅓ cup (80 mL) ice water

Filling:

2 cups (475 mL) water
1 cup (240 mL) granulated sugar
½ cup (120 mL) cornstarch
5 egg yolks, beaten
¼ cup (60 mL) butter
¾ cup (180 mL) fresh lemon juice
1 tbsp (15 mL) lemon zest
1 tsp (5 mL) vanilla extract

Meringue:

5 egg whites, room temperature
½ tsp (2.5 mL) cream of tartar
¼ tsp (1.2 mL) salt
½ tsp (2.5 mL) vanilla extract
¾ cup (180 mL) granulated sugar

Making the crust:

Make sure all ingredients are as cold as possible. Using a food processor or pastry cutter and a large bowl, combine the butter, flour, sugar and salt. Process or cut in until the mixture resembles coarse meal and begins to clump together. Sprinkle with water, let rest 30 seconds and then either process very briefly or cut in with about 15 strokes of the pastry cutter, just until the dough begins to stick together and come away from the sides of the bowl. Turn onto a lightly floured work surface and press together to form a disk. Wrap in plastic and chill for at least 20 minutes.

Allow the dough to warm slightly to room temperature if it is too hard to roll. On a lightly floured board (or countertop) roll the disk to a thickness of ⅛ inch (.3 cm). Cut a circle about 2 inches (5 cm) larger than the pie plate and transfer the pastry into the plate by folding it in half or by rolling it onto the rolling pin. Turn the pastry under, leaving an edge that hangs over the plate about ½ inch (1.2 cm). Flute decoratively. Chill for 30 minutes.

Preheat oven to 350ºF (180ºC). Line the crust with foil and fill with metal pie weights or dried beans. Bake for 20 to 25 minutes. Carefully remove the foil and continue baking for 10 to 15 minutes, until golden. Cool completely before filling.

Making the filling:

Bring the water to a boil in a large, heavy saucepan. Remove from the heat and let rest 5 minutes. Whisk the sugar and cornstarch together. Add the mixture gradually to the hot water, whisking until completely incorporated.

Return to the heat and cook over medium heat, whisking constantly until the mixture comes to a boil. The mixture will be very thick. Add about 1 cup (240 mL) of the hot mixture to the beaten egg yolks, whisking until smooth. Whisking vigorously, add the warmed yolks to the pot and continue cooking, stirring constantly, until mixture comes to a boil. Remove from the heat and stir in butter until incorporated. Add the lemon juice, zest and vanilla, stirring until combined. Pour into the prepared crust. Cover with plastic wrap to prevent a skin from forming on the surface, and cool to room temperature.

Making the meringue:

Preheat the oven to 375ºF (190ºC). Using an electric mixer beat the egg whites with the cream of tartar, salt and vanilla extract until soft peaks form. Add the sugar gradually, beating until it forms stiff, glossy peaks. Pile onto the cooled pie, bringing the meringue all the way over to the edge of the crust to seal it completely. Bake for 15 to 20 minutes, or until golden. Cool on a rack. Serve within 6 hours to avoid a soggy crust.


Opinion?

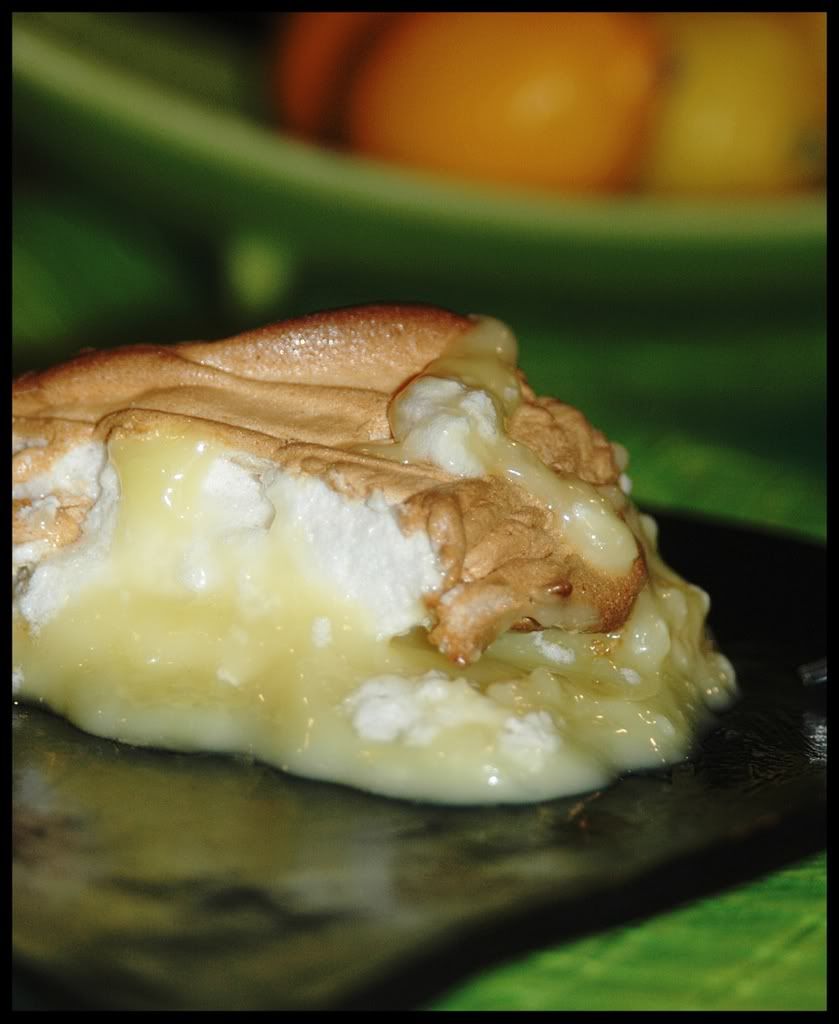
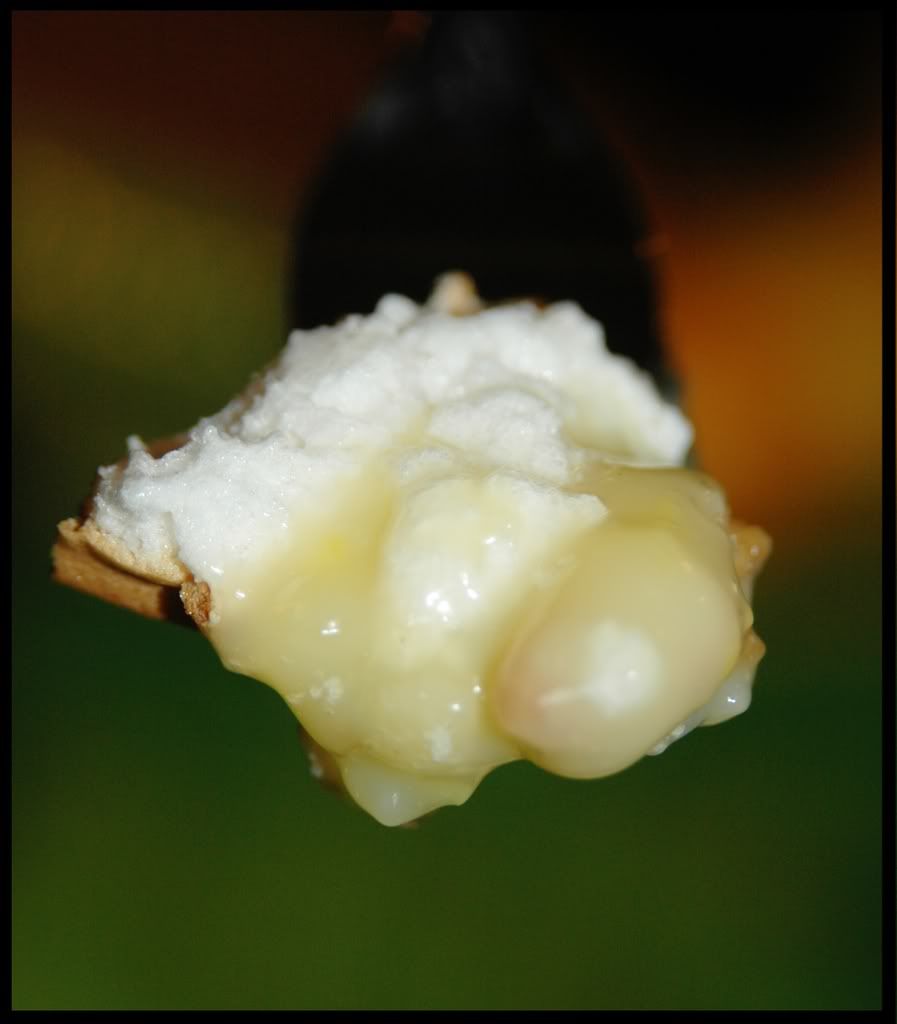
The pie turned out great! The crust is perfect (I nosh as I type :)), I think letting it cool to room temperature before adding the filling made a huge difference. The pie did get mushy as it sat around, but the crust stayed reasonably crisp. And the meringue turned out great. Still, too much of meringue for me, but as a one-off dessert, I like it :) The lemon filling is fabulous - really rich and decadent, but incredibly satisfying and tangy. And I'm really glad I used Meyer lemons, the sweet-tart flavour is perfect.

Is this going to be a repeat?

The lemon pie definitely is - more likely as tartlets, think I'll skip the meringue next time around. Also, I like my usual pie crust recipes better than this one.


The world of DBC!

There are over 450 daring bakers out there now. Can you imagine how many pounds of lemon meringue pie that equates to?! *wow* Please check out our blogroll - there are so awesome attempts out there.

Many thanks to Jen for this recipe - given how I waited till the last minute to finish this challenge, the recipe was totally on my side all the way! :)

Podalanga curry and Dahi Shorba

Yeesh! Seems like I'm cooking a lot more than I have time to blog about - hate it when that happens and I don't get to write about what I made before it slips my mind. That is actually one of the things I love about blogging - I can keep track of my recipes, the variations I incorporate and the new ones that I whip up and often seem incapable of remembering for more than a couple of days! It often seems like my memory retention of a recipe is inversely exponentially proportional to how well something turns out! Crazy, huh? :)

Anyway, sometime last week, I was craving desi flavours, but wanted to try out something I hadn't made before. With constraints like not wanting to hit the store and started to get hungry, I started poking around my collection of postcard cookbooks - these are what I call the 4"x6" desi cookbooks (by Nita Mehta) that focus on specific cuisines and have a plethora of regional recipes. The instructions are not always cogent, but they are quite workable and end up being a great learning experience of regional indian cuisines.


It is always fun to encounter desi recipes from different regions - with very different names and sometimes containing diverse ingredients that end up looking and tasting quite similar to each other. Think about Punjabi kadhi and the south indian mor kozhambu - very different, yet very similar. As I perused the Rajasthani postcard cookbook, I found another recipe that belongs with these two - Dahi Shorba. It is touted as a yogurt soup with mouthwatering spices and sounded like part of the perfect meal. To complement this, I went with a simple curry of snake gourd - I'm used to eating this in a koottu, but figured a curry heavy with some boiled channa dal might do the trick.


Dahi Shorba
Spicy yogurt soup

Servings: 1

1 cup homemade dahi (or any thick yogurt)
1 t besan flour

1/4 cup water

1/2 t red chilli powder

1/2 t turmeric (haldi powder)

1/4 t amchoor powder

1/2 t salt
1/2 t sesame oil

1/2 t mustard seeds (rai)

1/4 t asafoetida

4-5 curry leaves

1/2 t grated ginger

chopped cilantro for garnishing


Mix the curd, besan, water, red chilli powder, turmeric, amchoor and salt.

Beat this mixture well and run through cheesecloth or a fine sieve.
Heat the oil in a saucepan, add the mustard seeds.
Once it splutters, add the asafoetida, curry leaves and ginger.
Add the besan-curd mix into the saucepan, stir till it boils and continue to simmer for 2-3 minutes.
Garnish with the chopped cilantro.


Podalangai Curry
Got to love that snake gourd

Servings: 2

2 short snake gourds - deseeded and cut into small pieces

1 large green chilli - cut into small pieces
1 t mustard seeds

1 t urad dal

2 T channa dal - soaked for 10 minutes in boiling water

1 T dried coconut flakes

salt to taste

1/2 asafoetida (hing)

1 t sesame oil


Heat the oil in a wok, add the mustard seeds.

Once the seeds splutter, add the urad dal, asafoetida and green chilli pieces.
Drain the water from the channa dal and add it along with the coconut.
Cover and cook on low for 6-7 minutes.
Season with salt.


Opinion?

The dahi shorba was fabulous - had flavours similar to kadhi, but felt much lighter. Can't wait to make this again!
The snake gourd was yummy - like always! I think I prefer the koottu version, but this turned out to be a healthy and tasty alternative. Plus it went well with the shorba! *yay*


I'm sending these off to Claudia from Fool for Food as my WHB entry for this week. WHB (Kalyn's brainchild ) is a fabulous weekly event focusing on vegetables, herbs, flowers and plants.

Saturday, January 26, 2008

Celebrating our tiranga ...

59 years of being a republic.

Where is India right now?


Population of 1.1 billion (2006)

Infant mortality rate has dropped from 60 per 1000 (2003) to 35 per 1000 (2007)

Gross National Income of $906.5 billion (2006)

GDP growth was 9.4% in 2007

Software exports totalled $28 billion

BPO exports exceeded $8 billion

Cellular market surged to 160 million subscribers

And then there is the other side ...

350-400 million people in India live under the poverty line, about 75% of them in rural areas

More than 40% of the population is illiterate

India is No.115 of 157 in the 2008 Index of Economic freedom (can that be good?)

Malnutrition affects more than half of all rural children, even as obesity is starting to threaten their more affluent peers

Second highest number of people living with HIV/AIDS (5.1 million)

Unemployment rate is at 7.8% (2006)

External debt of $132 billion (2006)

Less than 93 women exist for every 100 men in the population


Some interesting reads (I don't agree with all the opinions in the op-eds, but they make for thought-provoking reading nevertheless):


A little depressing? I guess. But change takes time. And the process of change is often hard. Plus, we probably won't see the full impact of it in our lifetime. But I'd like to believe in a vision or two :)

You must be the change you want to see in the world.

- Mahatma Gandhi

And with all that rambling, you're probably wondering where the food connection is! Well, Pooja got me started on this, it's all her fault :) I started off thinking tricolour when she announced her saffron, white and green event, and that led to more thoughts about our republic day and independence and the state of the country, etc, etc.

The good news is that I do have a tricolour submission for Pooja (sorry it is late!), and it tasted *good* - can't quite go wrong with fruits!


A simple fruit kebab with mandarin oranges, apples and kiwis made for my tiranga - and a pomegranate-yogurt dip served as a good creamy foil for the fruits.


Happy Republic Day!

Friday, January 25, 2008

Thayir Saadam (Curd Rice) - quintessential comfort food


There is Thayir Saadam

* A mix of rice and yogurt, often with seasonings and garnishings - an essential aspect of the traditional south indian meal. And often considered a soporific - eat a meal of rice and yogurt with pickle and soon you'll be ready to take a nap!
* A Chennai Tamil term used to denote a boring, dorky, risk-averse person. "Seriyaana thayir saadam!" - a phrase heard when ridiculing someone who goes by the book.


And then there is a Milquetoast

* One who has a meek, timid, unassertive nature

That sounds like our thayir saadam alright! :)


***

Growing up in Chennai, on a primarily rice-based diet, we ended most meals with a dollop of curd rice - often we just mixed the curd into the rice on our plates, sometimes my mum would mix the rice in advance - maybe season it, add some more molagas or even some grapes - every variation led to satisfying flavours. And the longer the rice sat and the flavours seeped in, the better it tasted!

Thayir saadam now even seems to have a hipness factor to it -
Krd Rys in to-go boxes - guess Chennai truly can't do without it!

***

Comfort food

* Food that comforts or affords solace,
hence any food (frequently with a high sugar or carbohydrate content) that is associated with childhood or with home cooking
[Oxford English Dictionary]
*
Food prepared in a traditional style having a usually nostalgic and sentimental appeal [Merriam-Webster Collegiate Dictionary]

***

Guess thayir saadam scores on all counts here - carbohydrates? Hell, yes! Nostalgia - full of it! Lots of pleasant memories of growing up and of home cooking - apparently, I often have this stupid grin on my face when I'm digging into a bowl of curd rice - can't help it, can I? The flavours, the memories, the aromas, *so* good!

A key aspect of curd rice has always been the home-made yogurt - freshly set yogurt is the best - soft, smooth, room-temperature, melting in the mouth!


Thayir Saadam
Call me a milquetoast, but I love it!

Servings: 2


1 cup brown rice (any kind would work here)

1.5-2 cups of home-made curd
1 t mustard

1 t urad dal

5-6 curry leaves

2-3 green chillies - chopped

1" ginger - grated

1 t sesame oil


Garnish

2 T pomegranate arils


Wash the rice and cook it in 2+ cups of water till it is totally done and soft.

Heat the oil in a work, add the mustard and let it splutter.
Add the urad dal and curry leaves and saute for a minute.
Throw in the ginger and green chillies and saute a bit more.
Mash the rice before stirring it into this garnish mixture.
Let the rice cool down a bit before stirring in the yogurt.

Garnish with the pomegranate arils. Or maybe with sliced grapes. Or even cherry tomatoes. Or just cilantro. There is so much one can use here!


We often eat this with some pickle - avakkai, vadu mangai and gongura are favourites.


This goes to Meeta for her Monthly Mingle - the theme this time is Comfort Foods.


Am also sending this to the Skinny Gourmet for her Food for Thought event - in honour of how evocative this simple dish is - all the fabulous memories it brings back of growing up in Chennai, humid summer days, home food, family dinners ...

Monday, January 21, 2008

Brazilian Chocolate Bananas


A few nights ago, I was craving chocolate, maybe with some fruit, something sweet, something easy to make ... and I stumbled upon this recipe for brazilian coffee bananas in one of my favourite books The Ultimate Dessert Cookbook by Rosemary Wilkinson. And it was even tagged quick and easy - can't beat that!


Wait ... almost 10 pm - do I *ever* need coffee at 10 pm? I'm the person who drinks a mocha at 10 am and bounces off the walls the rest of the day! The last thing I needed was espresso at night! But I did want my dessert - truly, madly, deeply. So, I went with chocolate instead and used one of Becky's magic truffles - *so* good! Yesss, I was a bit bouncy, dark chocolate and all! But still, so much better than espresso, right? :)


This dessert was sinfully rich and took all of 5 minutes to make. Can't quite beat that!


Brazilian Chocolate Bananas
Zippy decadence!

Servings: 1

2 small overripe bananas
1 small dark chocolate truffle

1/2 cup nonfat greek yogurt

3 toasted peeled almonds

Peel and cut the bananas into thin slices.

Set aside 3-4 slices for the topping.
Mash the remaining banana pieces with a fork till thick and pulpy.

Melt the chocolate truffle in a saucepan (or stick it in the microwave for a minute).
Mix the molten chocolate with the mashed bananas.
Spoon some of the banana mixture into a serving dish, top it with some yogurt and repeat this layering till the bananas and yogurt are used up. Swirl the last layer of yogurt before topping it with the sliced bananas and almonds.

Any good? Any good?

*drool*! So tasty, so easy, so happy!


Variations?

* Well, if you want the bananas to be richer, it might be a good idea to add some liqueur - maybe amaretto? Or even some brandy.
* If you want to go with the original coffee version, replace the chocolate with 1 t of coffee granules or powder mixed with 1 t of muscovado sugar in a little hot water - stir this into the mashed bananas instead of the chocolate.

Saturday, January 19, 2008

Banana Soy Muffins with pomegranate pear syrup

Weekend Breakfast Blogging had my attention over the last couple of days - after the soy pancakes turned out great, I really wanted to make another soy-based breakfast recipe. Kind of hard to work primarily with soy flour though - it has no gluten content, which means no elasticity and there is no assistance during fermentation which is what helps the bread rise when baking. In addition to these, gluten helps keep the shape of the bread since it firms up when cooked.

Gluten resources for those interested:


Gluten on Wikipedia
Gluten composition in cereals and gluten disease
Gluten free recipes

Anyway, after poking around several cookbooks and sites, I couldn't quite find any cake or bread recipe that didn't use a combination of soy flour with either wheat or rice or triticum flour. Oh well, guess I just had to try it out - and hope that the end result is somewhat edible. I decided to play it safe and try a banana muffin recipe with soy flour. And to make things even simpler, I microwaved them - that's what happens when you clean your kitchen shelves and find this odd looking microwaveable muffin tray :)


Banana Soy Muffins
Microwaved, no less!

Servings: 6 muffins

1/2 cup soy flour

1/4 cup egg whites (I used Nulaid)

1 t baking powder
1 t olive oil
2 small overripe bananas
6-7 almonds - chopped

Grease the muffin tray with oil spray.

Beat all ingredients together till the batter is smooth and thick.

Dole out equal portions into each of the muffin holes (is there a real name for these?).

Microwave for 8-9 minutes.

Drizzle some pomegranate-pear syrup over each muffin and let them sit for a few minutes before noshing :)


Any good?


They are pretty good! I'm eating one as I type and I'm really liking it :) The shapes are kind of wonky, they almost look like a hybrid of muffins and scones! But they turned out pretty soft and moist, not really chewy (hell, I need some gluten for that!), but the slightly sweet flavour of the soy flour along with the bananas made the muffins pretty tasty even without the syrup! And it took all of 15 minutes!


This recipe is a definite keeper. And I have a submission for WBB (Nandita's brainchild) - this goes to Rajitha who is hosting this month's event - themed Soy. Yay!

Friday, January 18, 2008

Is this tofu craze here to stay?

Over the last few months, a lot of tofu has been cooked - marinated in a variety of sauces, sauteed with a plethora of spices, baked into crispy bars ... and pretty much every single option has been extremely palatable. I'd love to think I had something to do with it, but the truth is that tofu is the ultimate sponge! It absorbs spices so easily and then adds its own tinge - every mouthful ends up with this mishmash of flavours.

Hey, speaking of Mishmash - Shn just celebrated a year of blogging, if you haven't had a chance to check out her fabulous cakes and cooking, run there right now :)

Ok, back to tofu love ... I wanted to try something new, something different with the tofu - not the usual chunks. I started off thinking that I wanted to make some kind of fresh vegetable rolls - shredded and grated vegetables in a cabbage wrap, maybe? Hmm ... no cabbage! How about kale? Or chard? Nope! Low on greens :( Wait, there is spinach - would that work? Well, even somewhat large spinach leaves don't really make for decent rolls. Not even with toothpicks stuck into them! *sigh*


So, I had to bail on the whole rolls fantasy. Oh well! Instead, I just settled for the shredded tofu salad served over a bed of wilted spiced spinach. Guess those cabbage wraps will have to wait for another day!


Shredded Tofu Salad
Served on a bed of wilted spinach

Servings: 2

80 gms extra-firm tofu (about 1/5 of a regular block of tofu)

1 small head of broccoli

1/2 red onion

1/2 red bell pepper

1 T grated ginger

1 t sambal oelek
1 T soy sauce

1 t sesame oil or oil spray
salt


1 T vinegar
1 t cayenne pepper

10-12 fresh spinach leaves - washed and dried


Grate the tofu using a medium sized grater and set aside.

Finely dice the onion and bell pepper.
Shred the broccoli into small pieces.

Heat the oil in a wok and saute the onions and ginger till browned.
Add the broccoli and bell pepper and saute for 2-3 minutes.
Stir in the tofu along with salt to taste.
Add the sambal oelek and soy sauce and saute for about 4-5 minutes till the tofu starts to brown.


In the meantime, pour the vinegar into a saucepan and heat on low.

Stir in the cayenne pepper.
Add the spinach leaves and cook covered, on low for a couple of minutes till the spinach is partly wilted.

Serve the tofu salad on a bed of wilted spinach leaves.


Good?

This is my absolute favourite way to eat tofu! Once shredded, it totally sucked in all the flavours and was super moist and juicy. The spinach actually ended up being a great touch - the vinegary leaves were a perfect foil for the salad.

Wednesday, January 16, 2008

Thai-glazed vegetable skewers


I'm going through that phase again - where I spend hours reading entire cookbooks. *so* fascinating! Of course, it doesn't help that I often end up hungry at the end of it - all those fabulous pictures and descriptions!

A couple of nights ago, I picked up one of my favourite veggie cookbooks - New Vegetarian by Celia Brooks Brown - a collection of truly innovative recipes. This is the same book that has the fabulous fajitas recipe that I'm always drooling over.


*drool*

As I was flipping through the pages of this book, these vegetable skewers pretty much jumped out of the book at me - they looked quite delicious and I had most of the makings - which gave me room for reworking the recipe :)


Thai spices are *so* delightful - spicy, sweet, tangy, a successful olio of flavours. And such a pleasure to work with, there was a time when I was indulging in a lot of thai cooking, but it has been a while now. But these skewers and the fabulous red curry that Jai & Bee just posted about has gotten me jumpstarted on thai dishes once again.


Thai-glazed vegetable skewers
Sweet, spicy, tangy goodness


Servings: 4 skewers


1 red bell pepper - cut into about 12 pieces
1 yellow squash - cut into 12 pieces

1 carrot - cut into 1" pieces

1 lemon - sliced

1/2 red onion - cut into wedges

3 thai chillies (you can go with serrano for a milder flavour, or even skip these)


Thai Barbeque Sauce


3 T coconut milk powder - mixed with 2-3 T of water

1/4 cup dark soy sauce

1 T brown sugar

1 T rice vinegar
3 kaffir lime leaves - chopped

1 stalk lemongrass - finely sliced

1 bird's eye chillies - sliced

1 large garlic clove - chopped

1/2 T sesame oil


Put the barbeque sauce ingredients in a blender and puree till smooth.


Thread the skewers with the vegetables, starting and ending with a lemon slice.
Brush the sauce generously over the loaded skewers and marinate in the refrigerator for atleast 30 minutes.
(Reserve the remaining sauce).

Put the skewers under a preheater broiler and cook, turning occasionally and basting with the remaining sauce, until tender and lightly charred.
(An alternative would be to cook on an outdoor grill or a stove-top grill pan).


How was it?

*drool*! I might just say that these are the best veggie skewers *ever* :)

Monday, January 14, 2008

More brussel sprouts love ...


Those fabulous brussel sprouts aren't really in season anymore. Bummer. As much as I'm a huge fan of seasonal cooking, we were still hankering for some yummy sprouts. After some searching, we discovered that the old favourite TJs still has some - such a relief!

What with the snow and feeling somewhat stranded and all, the time felt right for a quick, yet tasty meal - and them sprouts definitely contributed towards that. A simple stir fry seemed quite inviting with this crazy weather outside - snow, wind, hail, what not.


Anyone who reads this blog knows about my
everlasting brussel sprouts love :) Am glad this recipe is a worthy addition to the collection. Especially since it involves another current obsession - soy :)


Quick Veggie Stir Fry
Brussel Sprouts, Mushrooms, Leeks ... Yum!

Servings: 1

5-6 brussel sprouts - quartered

1/2 cup of chopped leeks

3-4 oyster mushrooms - sliced
80 gms of extra firm tofu (about 1/5 of a regular packet)

salt
1 t szechuan suce (recipe below)

1 t sesame oil or oil spray
1/2 cup water


Heat the oil in a wok and saute the leeks till they start to brown.

Add the brussel sprouts and saute for 2-3 minutes.
Add the tofu along with the seasonings and stir for another 1-2 minutes.
Add about 1/2 cup of water and cook covered on low for 3-4 minutes till the water evaporates and the tofu seems marinated and the veggies get browned at the edges.
Add the mushrooms and saute for another 1-2 minutes before taking the wok off the stove.


NOTE:

Oyster mushrooms are really delicate and can break/disintegrate easily - so, it is a good idea to add them to a dish towards the end of the cooking time.


***

Szechuan Sauce
(adapted from Recipezaar)

1 T minced ginger
2 garlic cloves - minced

1 T crushed red pepper

1 T soy flour

1.5 T soy sauce

1 T chilli garlic sauce or sambal oelek

1 t vinegar

1/2 t brown sugar

1/3 cup of water (or vegetable broth)


Combine the ginger and garlic with the soy and chilli-garlic sauces in a saucepan and bring to a boil, stirring constantly.
Mix the soy flour in the water and stir till smooth before pouring it into the saucepan.
Add the vinegar and brown sugar along with the crushed red pepper.
Stir for a minute before taking off the heat.


What did we think?

The aroma was totally fabulous! At one point, I wondered if the taste would be a letdown after the fabulous smells. I was wrong - those fabulous sprouts never let me down :) *so* good!

Soy pancakes?!! Not kidding! :)

After the marathon cooking sessions over the last few days for the mega party last night, tonight called for a simple, light dinner. Hmm ... after poking around a bit, I stumbled upon this crazy soy pancakes recipe from a collection of ultra healthy recipes from the Pro Club! I was always skeptical about trying any of these 20/20 lifestyle recipe handouts available there, but after I spent some time reading them earlier tonight, I must say that I've revised my opinion. Some of these actually look pretty good!

So, soy flour rocks! It makes for a really light batter - quite perfect for pancakes, actually. And it is the perfect texture to serve as a thickening agent - an attractive alternative to corn starch. And apparently, since it can add moisture to baking products, apparently it is also a perfect alternative to eggs in most recipes! That is really good to know, I can't wait to try some breads and cakes with soy flour! Weeeeeee! *exciting*!

The recipe that caught my eye tonight was one for savoury pancakes with a cilantro chutney. Hmm ... adais and oothappams are probably closest to what I could consider savoury pancakes, so this looked really intriguing. The original recipe called for cauliflower, but I decided to go with a base of onions and red peppers instead - turned out to be a great idea. And the cilantro topping was perfect!


Savoury Soy Pancakes
They'll melt in your mouth!!!


Servings: 4 pancakes

1/2 cup soy flour (defatted variety)
1/3 onion
1/2 red bell pepper
1 thai green chilli
1/2 t salt
Oil or oil spray

Grind the onion, bell pepper and green chilli into a puree.
Pour this puree into a mixing bowl and add the soy flour, stirring constantly.
Add 2-3 T of water to form a really thick batter.
Season with the salt.
Heat a griddle and pour out dollops of the batter onto it.
Flatten the batter to form small pancakes and lightly douse with oil spray.
Let each side brown, before flipping or removing the pancakes.

NOTE: The batter needs to be really thick, not runny - soy flour does not really make for thin crepes of sorts and can totally disintegrate if the batter is too thin.


***

Cilantro chutney
Go green!


Servings: 1 cup

1 cup cleaned and trimmed cilantro leaves
1" ginger
2 cloves garlic
2 T lemon juice
1 green chilli

Grind all the ingredients in a blender, adding a little water if needed.
Season with salt if needed.


Good? Better?
*drool*! These were awesome! Seriously! Can't wait to eat them again! And the whole process took about 1/2 hour.

Seriously, soy flour rocks! And another WHB entry (Kalyn's brainchild) - this goes to Rinku from Cooking in Westchester.


Friday, January 11, 2008

And the beet obsession continues ...


Over the last several weeks, I've been feeling a lot of beet love - like this time and this and several more that I didn't write about - Maybe this blog should really be Cooking from Beet to Z? :)

Well, January hasn't had a beet post yet, and this simple daal recipe was so light and flavourful that we just have to talk about it! I was originally hoping to concoct a marinated beets + moong sprouts salad, but on a cold winter night, the craving was for something warm and heartier. Seriously, it feels like January has been one giant wet blanket, cloudy and rainy all the time, I'm totally ready for a sunbreak!


In this recipe, we went with a simple stir fry of red onions, beets, some yellow squash and cherry tomatoes finally topped off with cooked masoor daal. The seasoning was really simple too - cumin and a dash of fenugreek. But the best part of it was the generous squeeze of Meyer lemon juice at the end - this totally livened up the dish and imparted this sweet-sour flavour that went really well with the dominant beet tastes.


Beet Daal
With a generous dash of citrus love!

Servings: 2

1 cup of masoor daal

1/2 red onion - sliced long

2 beets - peeled and julienned

1/2 yellow squash - sliced long
4-5 cherry tomatoes

3-4 thai green chillies - sliced long
1 t cumin seeds

1 t sesame oil

1/2 t fenugreek seeds - freshly roasted and ground

kosher salt
juice of 1 Meyer lemon

Cook the masoor daal on the stove or in a pressure cooker till done (I typically use 1.5 cups of water for a cup of masoor daal)


Heat the oil in a wok and roast the cumin seeds till brown.

Add the onions and green chillies and saute till the onions start to brown.
Throw in the beets and squash and saute for 4-5 minutes.

Now add the tomatoes along with the fenugreek and cook covered on low for another 2-3 minutes.

Season with salt and saute for another 30 seconds.


Stir in the lemon juice just before serving.


Good?
We loved it! Simple flavours that made for a delicious daal!

Tuesday, January 8, 2008

Care for some kohlrabi?

I know I've eaten kohlrabi in some form earlier in my lifetime, but I remember nothing about it. Every once in a while, I think about it, wonder why I haven't done much it and then move on. But it was a different story last week - I was trolling PCC wearing my find-new-vegetables hat and I sighted bunches of pretty purple kohlrabis sitting around. I grabbed a bunch right away and got all excited about what I could do with it - saute? bake? gratin of some kind? *so* many options!


I love cabbage. I like turnips too. In fact, I love most of those rugged green vegetables - brussel sprouts, collard, cauliflower, broccoli ... pretty likely that I'll like these cabbage cultivar. Whoa! Apparently, kohlrabi actually means cabbage+turnip - clever? (not!) :)

As I was browsing one of my vegetarian cookbooks, I came across a recipe for a traditional caponata - it usually contained eggplants, tomatoes, olives, maybe some wine and some turbinado sugar to cut the tartness of the tomatoes. Well, I kind of started off thinking I would replace the eggplant with kohlrabi, but I ended up going much further - skipping the tomato seemed like a good idea, I ended up using some sumac instead. And things just got cooking from there.


Kohlrabi Caponata (of sorts!)
"Cabbage+turnip" over pasta?!!


Servings: 2

2 kohlrabis - peeled and sliced
1/2 red onion - sliced long

1/2 carrot - diced

10-12 gren olives

10-12 capers
3 cloves garlic - smashed

1/4 cup red wine

1 T turbinado sugar

1 t balsamic vinegar
1 T extra virgin olive oil

kosher salt

freshly ground pepper
a couple of drops of truffle oil
cooked spaghetti to serve with the caponata


Heat the oil in a wok and saute the onions till they start to brown.

Add the smashed garlic along with the kohlrabi and carrots and simmer covered for about 6-7 minutes.

Toss in the red wine and simmer for another 3-4 minutes till the liquid reduces to 1/4 of the original quantity.

Add the olives, capers, sugar and vinegar and saute a li'l more.

Finally season with the salt and pepper, maybe even some red pepper flakes.

Top the pasta with the caponata or toss them all together, your choice! :)


Any good?
It was fabulous! The earthy and peppery flavours of the kohlrabi blended with the sweet-sour sauce and danced on our palates. *so* good! I can't wait to dig into that kohlrabi again.

Oooo ... new vegetable - this means I need to ship this off to Vani for Weekend Herb Blogging!

Truffles from heaven

Ok, all I did was take the pictures! :)


Becky churned out these fabulous truffles today - she made some milk chocolate ones as well as the ohh-so decadent darkies. They are like pure velvet - incredibly decadent and silky, and the flavours are just explosive. Hmm ... I could wax eloquent about these all night, given the cocoa high I'm on!


I don't even have a recipe, maybe I'll bug Becky for it, but I'd rather she just made these for me on a regular basis :)

Sunday, January 6, 2008

Got to love that squash!

The world of squashes is a beautiful place, filled with succulent vegetables in all shapes and sizes, a plethora of greens and yellows and oranges, striped and mottled, round, fat, skinny, scalloped, pear-shaped ... ohh ... *so* good!

Yes, I bought some squash last week :) Acorn this time. Well, I got some zucchini and yellow squashes too, but that's it! And this is the story of an acorn squash that got made into this fabulous ... squashed squash?!!

So, did you know that the terms "summer" and "winter" for squashes only relate to current usage and not seasonal availability? Summer types are on the market during all of winter, winter squashes are on the market in late summer/fall. So why confuse us with non-seasonal seasonal terminology? Just because the terms summer and winter relate more to how long the squashes could "keep" - if the squashes were hardy enough to last well into december, they came to be known as winter vegetables.


Anyway, back to the acorn squash - we wanted a simple side to go with maybe some flatbread or rotis. And an acorn was waiting to be used up! This is one of the easily microwaveable/bakeable squashes - about 8 minutes and it is uniformly cooked. And it isn't too hard to scoop the meat out. We went for a strong garlic flavour with a touch of sugar to cut off the mildly bitter aftertaste that the squash seemed to have - it worked really well!

Squashed Acorn Squash
With a sweet garlic aftertaste!

Servings:2

1 acorn squash
4 cloves garlic - chopped
1 t thyme
1 t muscovado sugar
2 t olive oil
salt
1 t cayenne pepper

Slice the squash in half and scoop out the seeds.
Rub the inside of the squash with 1 t olive oil and the thyme.
Place the squash halves flat face down in a bowl containing water about 1" deep and microwave for 8-9 minutes.
If the insides are not uniformly softened and cooked, microwave for another 1-2 minutes.
Heat 1 t of olive oil in a saucepan and saute the garlic till you can smell it ... *drool*!
Add the squash meat along with the sugar and saute for 2-3 minutes.
Season with salt and cayenne and saute for another 1-2 minutes.

That's it!


Good?
*nod* Surprisingly good! The garlic+sweet flavours kicked ass!


Thanks, Namratha for reminding me about sending this to Fresh Produce of the Month hosted by Marta - this month's theme is squash.

Friday, January 4, 2008

Pomegranate Chocolate Pots

Several days ago, I wanted to work this recipe for the really fun Royal Foodie Joust that Jenn organizes every month. Such an entertaining event - the whole idea of picking a trio of ingredients for each month. Some of the combinations are insanely imaginative and the results often sound fabulous - nothing like stretching the boundaries, huh? :)

So, I made this dessert over a week ago, but never got around to posting it and sending it to Jenn. But it turned out pretty good, so might as well talk about it, huh?
The ingredients for December were pomegranate, pistachio and mint. They seemed like pretty good candidates for pandering to my sweet tooth.


I poked around an all-time favourite - The Ultimate Desserts Cookbook and stumbled upon this Chocolate Chestnut Pots recipe that I ended up reworking to suit my needs.

I never met a chocolate I didn't like.
Deanna Troi in Star Trek: The Next Generation

Anyway, I think this whole recipe thing was just my excuse to work with chocolate. *drool* Chocolate makes me happy and excited and hyper and I often skip around town once I eat some. *so* good! And yes, I can be a bit of a chocolate snob - I definitely prefer dark or extra-dark or bittersweet, I check for fair trade logos on the chocolate, I check the cocoa butter content and I double-check the emulsifiers. Can't help it, I like cocoa :)

As I started working this recipe, I flipped out a bit about the butter and eggs that this recipe seemed to want. After all, I wanted to go on this mini detox kick for a while :) So, I ended up skipping the egg yolks and using Earth Balance instead of butter - so much for someone who craves "real" cocoa butter in her chocolate :)


Pomegranate Chocolate pots with Pistachio-Mint Cream
I could drown in a pot of chocolate :)

Servings: 6


10 oz dark chocolate (bar)

4 T Madeira or Muscat

Arils of 1 pomegranate

2 T earth balance (or butter)
2 eggs - whites only


Pomegranate Juice
Grind up the pomegranate arils and strain it to get the juice out (P.S.: Freshly squeezed pomegranate juice tastes awesome!) You will need about 1.25 cups of juice for this recipe.


Egg Whites
Beat the egg whites till they form stiff peaks and set them aside.


Chocolate Pots


In a heavy-bottomed saucepan, melt the chocolate on low.
Once it starts to soften, add the madeira by the spoon, stirring constantly.
Continue stirring till the chocolate has melted completely.
Take the chocolate mixture off the heat.
Now add the margarine or butter 1 T at a time till completely melted and blended into the chocolate mixture.
Now add the pomegranate juice, 1/4 cup at a time, stirring it in slowly.
Add the beaten egg whites, a spoonful at a time, folding it in gently.
Now pour the chocolate mixture into ramekins or small cups and let them cool before topping with the cream.

Pistachio Mint Cream


2 T whipping cream or creme fraiche

10-12 pistachios

5-6 mint leaves

Grind up the pistachios and mint in a pestle.

Beat the cream till stiff and whipped.

Fold in the pistachio mixture gently till blended with the whipped cream.

NOTE:
The one mistake I made was here - I continued beating the cream after adding the pistachios and mint. This just made the cream clot up and get hard. Instead, I should've just folded the nuts and mint into the whipped cream and let it stay soft, yet fluffy.

Top the chocolate pots with the cream and set in the refrigerator for atleast 2 hours.

Another NOTE:
Remember to take the chocpots out of the fridge about 20 minutes before eating.


Good?
*drool*! The only thing that could've been better was the cream - I'll work on that next time :)


Am shipping this off to Deepa for Jihva for Ingredients (Indira's brainchild) - the current theme is chocolate.