Showing posts with label daring bakers. Show all posts

Tuesday, April 1, 2008

Dare to bake a mini cake? :)


Ok, it is time to stop being so damn tardy. No more last minute bakeoffs. No more late posts.

I'm s.e.r.i.o.u.s.

I'll admit that I was initially disappointed when I found March's DB Challenge to be a party cake. Hmm ... I was craving savoury. *grumble* *grumble*. And then the baker kicked in :) Yay! A party cake! And tomorrow is Monte's b'day. Perfect. Wait ... more than perfect! That even gives me an excuse for this delayed post!

Morven picked Dorie Greenspan's Perfect Party Cake from her insanely droolworthy book Baking: From My Home To Yours. If you haven't checked out this book, now is the time to get it. Dorie's recipes are really well written out and she had a fabulous collection in this book.

The really neat thing about Morven's pick was that it gave us a lot of liberty in playing with the flavour and filling of the cake. Sweet! All I needed to do was channel my zen to inflate my cake and then I could totally party with it! Dorie suggested a raspberry filling, but I had this stash of wild boreal blueberries sitting in my fridge, so I decided to use that instead. Also, I went in for a mini-cake - I didn't have tiny "cakelet" pans, so I baked a regular layer cake and used a wide cup for cutting out the mini cakes. Worked pretty well!

I decided to take the plunge and veer away from the buttercream and coconut toppings. Instead, for the filling, I went with a lightly sweetened and buttered bluberry filling. And for the topping, I went in for a "fake" bitter chocolate ganache. Ok, no cringing allowed here - I made a ganache with chocolate and silken tofu and chilled it before slathering it all over the cakes. It turned out surprisingly good, the 72% dark totally rocked here. And I have no qualms indulging in this "tofanache" if I feel like going light!

This recipe was insanely easier than expected. Then again, with Dorie behind it, I shouldn't have been surprised! Thanks Morven, for the fine pick :)

***


***

The Perfect Party Cake
(adapted from Dorie Greenspan's Baking: From My Home To Yours)

For the Cake

2 1/4 cups cake flour
1 tablespoon baking powder
½ teaspoon salt
1 ¼ cups whole milk or buttermilk (I prefer buttermilk with the lemon)
4 large egg whites
1 ½ cups sugar
2 teaspoons grated lemon zest
1 stick (8 tablespoons or 4 ounces) unsalted butter, at room temperature
½ teaspoon pure lemon extract

For the Buttercream

1 cup sugar
4 large egg whites
3 sticks (12 ounces) unsalted butter, at room temperature
¼ cup fresh lemon juice (from 2 large lemons)
1 teaspoon pure vanilla extract

For Finishing

2/3 cup seedless raspberry preserves stirred vigorously or warmed gently until spreadable

About 1 ½ cups sweetened shredded coconut

Getting Ready

Centre a rack in the oven and preheat the oven to 350 degrees F. Butter two 9 x 2 inch round cake pans and line the bottom of each pan with a round of buttered parchment or wax paper. Put the pans on a baking sheet.


To Make the Cake

Sift together the flour, baking powder and salt.
Whisk together the milk and egg whites in a medium bowl.
Put the sugar and lemon zest in a mixer bowl or another large bowl and rub them together with your fingers until the sugar is moist and fragrant.
Add the butter and working with the paddle or whisk attachment, or with a hand mixer, beat at medium speed for a full 3 minutes, until the butter and sugar are very light.
Beat in the extract, then add one third of the flour mixture, still beating on medium speed.
Beat in half of the milk-egg mixture, then beat in half of the remaining dry ingredients until incorporated.
Add the rest of the milk and eggs beating until the batter is homogeneous, then add the last of the dry ingredients.
Finally, give the batter a good 2- minute beating to ensure that it is thoroughly mixed and well aerated.
Divide the batter between the two pans and smooth the tops with a rubber spatula.
Bake for 30-35 minutes, or until the cakes are well risen and springy to the touch – a thin knife inserted into the centers should come out clean
Transfer the cakes to cooling racks and cool for about 5 minutes, then run a knife around the sides of the cakes, unfold them and peel off the paper liners.
Invert and cool to room temperature, right side up (the cooled cake layers can be wrapped airtight and stored at room temperature overnight or frozen for up to two months).

To Make the Buttercream

Put the sugar and egg whites in a mixer bowl or another large heatproof bowl, fit the bowl over a plan of simmering water and whisk constantly, keeping the mixture over the heat, until it feels hot to the touch, about 3 minutes.
The sugar should be dissolved, and the mixture will look like shiny marshmallow cream.
Remove the bowl from the heat.
Working with the whisk attachment or with a hand mixer, beat the meringue on medium speed until it is cool, about 5 minutes.
Switch to the paddle attachment if you have one, and add the butter a stick at a time, beating until smooth.
Once all the butter is in, beat in the buttercream on medium-high speed until it is thick and very smooth, 6-10 minutes.
During this time the buttercream may curdle or separate – just keep beating and it will come together again.
On medium speed, gradually beat in the lemon juice, waiting until each addition is absorbed before adding more, and then the vanilla.
You should have a shiny smooth, velvety, pristine white buttercream. Press a piece of plastic against the surface of the buttercream and set aside briefly.

To Assemble the Cake

Using a sharp serrated knife and a gentle sawing motion, slice each layer horizontally in half.

Put one layer cut side up on a cardboard cake round or a cake plate protected by strips of wax or parchment paper.
Spread it with one third of the preserves.
Cover the jam evenly with about one quarter of the buttercream.
Top with another layer, spread with preserves and buttercream and then do the same with a third layer (you’ll have used all the jam and have buttercream leftover).
Place the last layer cut side down on top of the cake and use the remaining buttercream to frost the sides and top.
Press the coconut into the frosting, patting it gently all over the sides and top.

Serving

The cake is ready to serve as soon as it is assembled, but I think it’s best to let it sit and set for a couple of hours in a cool room – not the refrigerator. Whether you wait or slice and enjoy it immediately, the cake should be served at room temperature; it loses all its subtlety when it’s cold. Depending on your audience you can serve the cake with just about anything from milk to sweet or bubbly wine.


Storing

The cake is best the day it is made, but you can refrigerate it, well covered, for up to two days. Bring it to room temperature before serving. If you want to freeze the cake, slide it into the freezer to set, then wrap it really well – it will keep for up to 2 months in the freezer; defrost it, still wrapped overnight in the refrigerator.


Playing Around

Since lemon is such a friendly flavour, feel free to make changes in the preserves: other red preserves – cherry or strawberry – look especially nice, but you can even use plum or blueberry jam.


Fresh Berry Cake

If you will be serving the cake the day it is made, cover each layer of buttercream with fresh berries – use whole raspberries, sliced or halved strawberries or whole blackberries, and match the preserves to the fruit. You can replace the coconut on top of the cake with a crown of berries, or use both coconut and berries. You can also replace the buttercream between the layers with fairly firmly whipped sweetened cream and then either frost the cake with buttercream (the contrast between the lighter whipped cream and the firmer buttercream is nice) or finish it with more whipped cream. If you use whipped cream, you’ll have to store the cake the in the refrigerator – let it sit for about 20 minutes at room temperature before serving.


***
Additional Notes

If you want to bake mini-cakes, either use smaller cake pans or bake a regular 9" layer cake and cut out smaller cakes from it using cake rings or a sharp-rimmed cup.

***

Opinion?

The cake rose perfectly. I can only credit that to my sis (the real baker) who insisted that I pound the cake pan a zillion times till all the air bubbles are released, which I did, to Vodka's utter consternation! Slicing the cake to make layers was ... a piece of cake! The lemon flavours (I skipped the extract and went with lemon juice and zest) were outstanding. The boreal berries were divine, like always - they're much smaller than regular blueberries, not as sweet, but have a fabulous earthy flavour that makes for a fine topping on most desserts. And the "tofanache" made me quite happy. It isn't meant for everything - there are times when nothing but the real ganache would suffice, but in this case, it did a pretty good job.

***


Is this going to be a repeat?

I would totally bake this cake again - maybe I'll even use some buttercream next time around! Besides, I have a ton of leftovers from the cake that I can't wait to work with - that's often the fun part, isn't it?

Thanks Morven, for this insanely fun pick and even more for letting us exercise our creative license. Picking and choosing fillings and toppings was a party in itself!

And now I'm off to finally spend some time checking out all the other fabulous Daring Bakers' creations!

Monday, January 28, 2008

Citrus Love - Part Un (a.k.a. Daring Bakers' Adventure - January)


One of these days, I'll get started on my Daring Bakers Challenge the day after the topic is announced - I mean it! I've only done 2 of these so far, but apparently I live on the edge even when it comes to cooking. Seriously, I'm a last-minute adrenaline junkie - proved unequivocally by the fact that I just finished my DBC about 30 minutes ago!

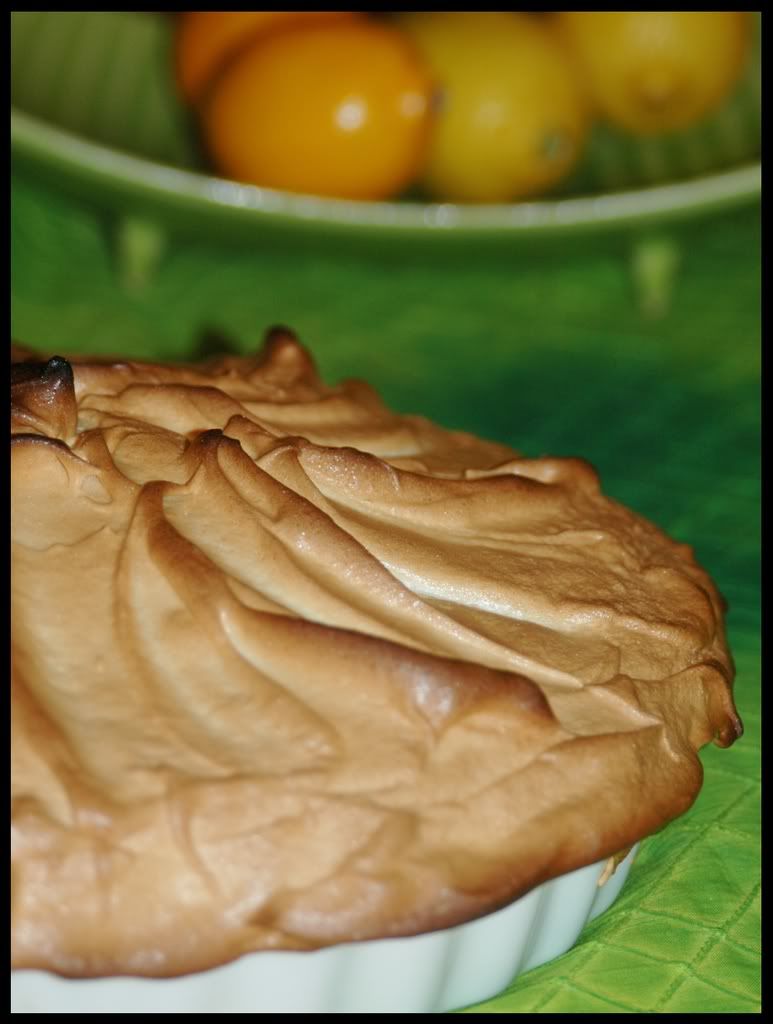
Lemon Meringue Pie ...

Hmm ... I wasn't sure what I thought of this when I first saw the topic. I love lemons, but most of the lemon desserts I lean towards are a lot lighter - lemon bars, light whipped lemon curd ... and this whole meringue thing sounded a bit daunting. But I got all excited about making tartlets, that's always fun - a bite-sized or one person dessert is usually fun to put together. But then I couldn't find any tartlet pans and today is a heavy snow day ... so that plan was abandoned and I went back to baking a regular pie instead.

Jen of The Canadian Baker picked the recipe for this challenge - the more I read it, the more appetizing it sounded. And a little daunting too! Especially since it has been a while since I baked a pie - many many months, actually!

As I read the recipe more, I started having a few doubts. The pie crust recipe sounded different from the ones I'm used to, but the instructions were really clear, guess I couldn't go wrong with that. The other thing that I was iffy about was the meringue - I'm not a big meringue fan by any means - it just doesn't do much for me. I'd rather top my lemon curd with caramel or some chopped nuts, those flavours appeal a lot more to me.

So, I started my baking in the eleventh hour :) The recipe was really easy to follow, the instructions straightforward. Thanks, Jen for sending this recipe our way!

Jen's only requirement was that the pie remain lemony. I pretty much followed the recipe to a tee, something I almost never do :)

Additions/Modifications:

We could make one pie or tartlets (in a tin or free-form)

We could compliment your pie with a sauce.

We could use a piping bag to apply the meringue if you like.

Decoration allowed - lemon zest or fruit are totally acceptable.

Changes are allowed to accommodate for altitude or for health/allergy reasons.

I made just one large pie, I still have some dough leftover that I might work into tartlets later this week. I read several posts about disappointing crusts, so I watched out for that while working the dough. I ended up baking the crust for an extra 3-4 minutes - that seemed to do the trick to avoid a soggy, chewy crust. This one seems reasonably flaky though I might stick with a couple of other crust recipes for future pies.


Lemon Meringue Pie
from Wanda's Pie in the Sky by Wanda Beaver

Servings
one 10" pie

Ingredients:

Crust:

¾ cup (180 mL) cold butter; cut into ½-inch (1.2 cm) pieces
2 cups (475 mL) all-purpose flour
¼ cup (60 mL) granulated sugar
¼ tsp (1.2 mL) salt
⅓ cup (80 mL) ice water

Filling:

2 cups (475 mL) water
1 cup (240 mL) granulated sugar
½ cup (120 mL) cornstarch
5 egg yolks, beaten
¼ cup (60 mL) butter
¾ cup (180 mL) fresh lemon juice
1 tbsp (15 mL) lemon zest
1 tsp (5 mL) vanilla extract

Meringue:

5 egg whites, room temperature
½ tsp (2.5 mL) cream of tartar
¼ tsp (1.2 mL) salt
½ tsp (2.5 mL) vanilla extract
¾ cup (180 mL) granulated sugar

Making the crust:

Make sure all ingredients are as cold as possible. Using a food processor or pastry cutter and a large bowl, combine the butter, flour, sugar and salt. Process or cut in until the mixture resembles coarse meal and begins to clump together. Sprinkle with water, let rest 30 seconds and then either process very briefly or cut in with about 15 strokes of the pastry cutter, just until the dough begins to stick together and come away from the sides of the bowl. Turn onto a lightly floured work surface and press together to form a disk. Wrap in plastic and chill for at least 20 minutes.

Allow the dough to warm slightly to room temperature if it is too hard to roll. On a lightly floured board (or countertop) roll the disk to a thickness of ⅛ inch (.3 cm). Cut a circle about 2 inches (5 cm) larger than the pie plate and transfer the pastry into the plate by folding it in half or by rolling it onto the rolling pin. Turn the pastry under, leaving an edge that hangs over the plate about ½ inch (1.2 cm). Flute decoratively. Chill for 30 minutes.

Preheat oven to 350ºF (180ºC). Line the crust with foil and fill with metal pie weights or dried beans. Bake for 20 to 25 minutes. Carefully remove the foil and continue baking for 10 to 15 minutes, until golden. Cool completely before filling.

Making the filling:

Bring the water to a boil in a large, heavy saucepan. Remove from the heat and let rest 5 minutes. Whisk the sugar and cornstarch together. Add the mixture gradually to the hot water, whisking until completely incorporated.

Return to the heat and cook over medium heat, whisking constantly until the mixture comes to a boil. The mixture will be very thick. Add about 1 cup (240 mL) of the hot mixture to the beaten egg yolks, whisking until smooth. Whisking vigorously, add the warmed yolks to the pot and continue cooking, stirring constantly, until mixture comes to a boil. Remove from the heat and stir in butter until incorporated. Add the lemon juice, zest and vanilla, stirring until combined. Pour into the prepared crust. Cover with plastic wrap to prevent a skin from forming on the surface, and cool to room temperature.

Making the meringue:

Preheat the oven to 375ºF (190ºC). Using an electric mixer beat the egg whites with the cream of tartar, salt and vanilla extract until soft peaks form. Add the sugar gradually, beating until it forms stiff, glossy peaks. Pile onto the cooled pie, bringing the meringue all the way over to the edge of the crust to seal it completely. Bake for 15 to 20 minutes, or until golden. Cool on a rack. Serve within 6 hours to avoid a soggy crust.


Opinion?

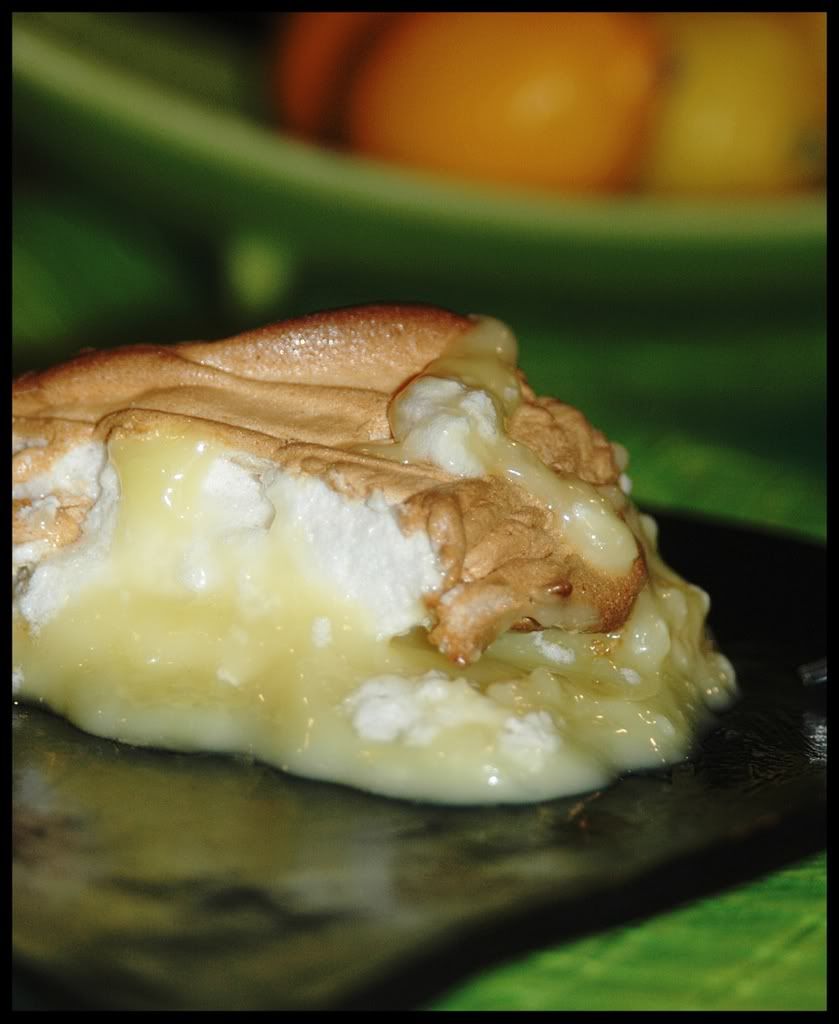
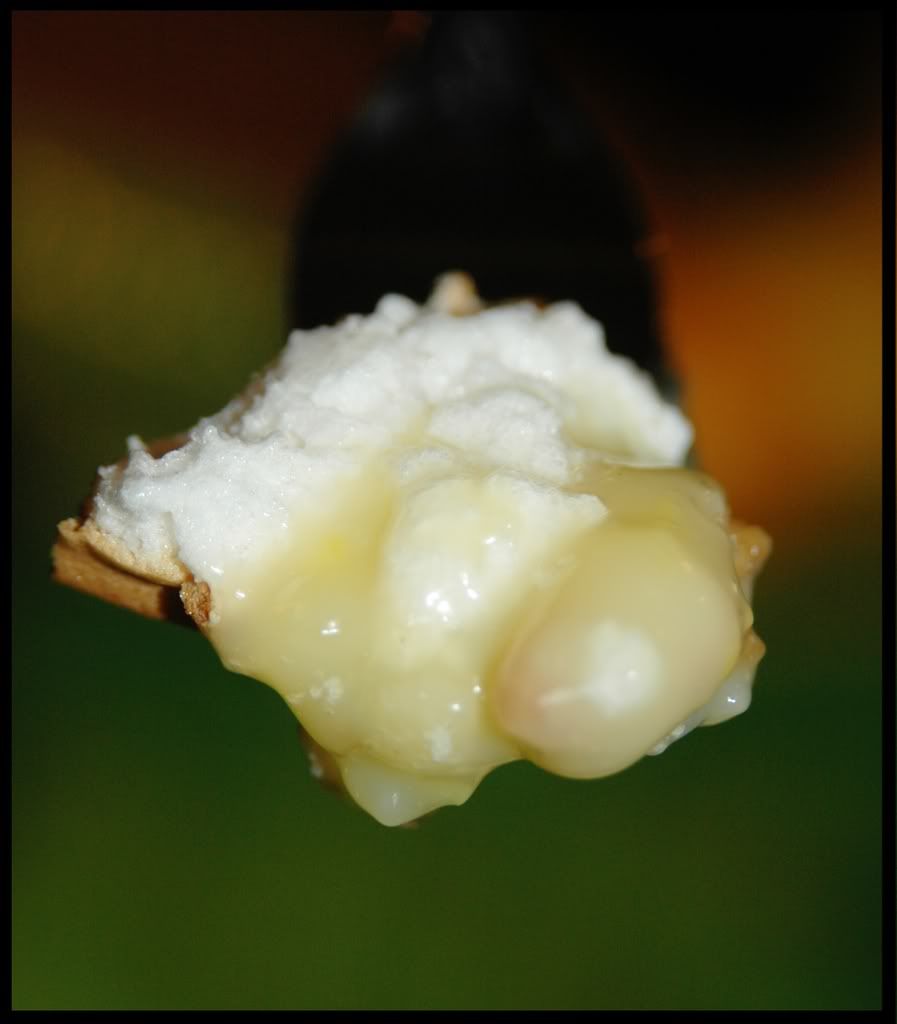
The pie turned out great! The crust is perfect (I nosh as I type :)), I think letting it cool to room temperature before adding the filling made a huge difference. The pie did get mushy as it sat around, but the crust stayed reasonably crisp. And the meringue turned out great. Still, too much of meringue for me, but as a one-off dessert, I like it :) The lemon filling is fabulous - really rich and decadent, but incredibly satisfying and tangy. And I'm really glad I used Meyer lemons, the sweet-tart flavour is perfect.

Is this going to be a repeat?

The lemon pie definitely is - more likely as tartlets, think I'll skip the meringue next time around. Also, I like my usual pie crust recipes better than this one.


The world of DBC!

There are over 450 daring bakers out there now. Can you imagine how many pounds of lemon meringue pie that equates to?! *wow* Please check out our blogroll - there are so awesome attempts out there.

Many thanks to Jen for this recipe - given how I waited till the last minute to finish this challenge, the recipe was totally on my side all the way! :)

Monday, November 26, 2007

A whole lotta bread - Daring Bakers Challenge (Nov 2007)

Mmmm ... aroma of baking bread ... I finally got to this last night! This last month has been crazy - when the Daring Bakers Challenge details were sent out, I really thought 4 weeks is plenty of time to get going on some yummy bread making. Well, I was wrong! This month has just whizzed by - lots of cooking and baking has happened, but I just wasn't able to find the handful of hours needed to work on my potato bread. Until last evening - when I finally went to work for several hours, frantically kneading and rolling until my arm was ready to fall off :)


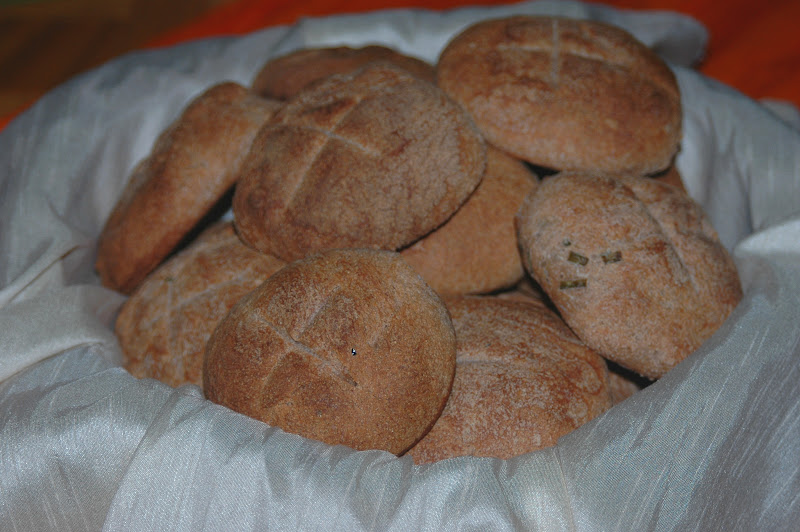
This was my first bakers challenge - I was obviously all freaked out about it, even though baking is one of those zen things for me - kind of restores calm amidst chaos :) I got increasingly excited as I pored through the recipe outlined by Tanna from My Kitchen in Half Cups - this recipe sounded perfect! I settled for baking a bunch of rolls and a small loaf, figured I'd make stuff that Vodka could eat :)

So, Tanna picked this tender potato bread recipe from Home Baking: The Artful Mix of Flour and Traditions from around the World by Jeffrey Alford and Naomi Duguid. I felt a little intimidated, especially with the idea of winging it in terms of how much flour I used to knead into the dough, but the idea of noshing on potato rolls totally kept me going :) Thanks, Tanna, for this awesome recipe - I feel like you picked the perfect Fall bread!


I loved how this recipe blended tradition with creative license - the actual dough recipe was pretty traditional, but we were allowed several variations that could totally redefine the end result:

  • This bread needed to be savory and not sweet.
  • Hand kneading only.
  • No biga, sponge or starter.
  • We could shape this dough anyway you would like.
  • We could make this as a loaf, as rolls, as focaccia. Braid it, twist it whatever.
  • We could season this bread in any way.
  • We could even fill it, like a calzone!

Tender Potato Bread

Ingredients


4 medium yukon gold potatoes - cut into chunks

4 cups (950 ml) water (need to reserve 3 cups (750 ml) cooking water)

1 T plus 1 t salt

2 t active dry yeast

6 ½ cups to 8 ½ cups unbleached all-purpose flour (1 kg to 1350 g)
1 tablespoon unsalted butter, softened
1 cup whole wheat flour (130 g)

Conversion Chart for yeast:
Fresh yeast 1 oz/ 1 tablespoon = active dry yeast 0.4 oz/ 1.25 teaspoon = 0.33 oz / 1 teaspoon
Reference: Crust & Crumb by Peter Reinhart

Directions for making the dough by hand:


Put the potatoes and 4 cups water in a sauce pan and bring to boil.

Add 1 teaspoon salt and cook, half covered, until the potatoes are very tender.


Drain the potatoes, SAVE THE POTATO WATER, and mash the potatoes well. Tanna suggested using a food mill for mashing the potatoes, I ended up using a potato masher - it worked pretty well, but I think I'm getting a food mill this weekend :)

Measure out 3 cups of the reserved potato water (add extra water if needed to make 3 cups). Place the water and mashed potatoes in the bowl you plan to mix the bread in. Let cool to lukewarm – stir well before testing the temperature – it should feel barely warm to your hand. You should be able to submerge you hand in the mix and not be uncomfortable.


Mix & stir yeast into cooled water and mashed potatoes & water and let stand 5 minutes.
Then mix in 2 cups of all-purpose flour and mix. Allow to rest several minutes.

Multiple ways of adding yeast:
* Mix & stir yeast into cooled water and mashed potatoes & water and let stand 5 minutes.
Then mix in 2 cups of all-purpose flour and mix. Allow to rest several minutes. (This is what I went with)
* Add yeast to 2 cups all-purpose flour and whisk. Add yeast and flour to the cooled mashed potatoes & water and mix well. Allow to rest/sit 5 minutes.

Sprinkle on the remaining 1 tablespoon salt and the softened butter; mix well.

Add the 1 cup whole wheat flour, stir briefly.


Add 2 cups of the unbleached all-purpose flour and stir until all the flour has been incorporated.


At this point, I had used 4 cups of the possible 8 ½ cups suggested by the recipe.


Turn the dough out onto a generously floured surface and knead for about 10 minutes, incorporating flour as needed to prevent sticking. The dough was very sticky to begin with, but it kept taking up more flour from the kneading surface and became easier to handle.

I could not have functioned without my dough scraper here - I worked it to keep the floured surface clean and to push random doughlets back into the dough :)


Tanna had warned that was meant to be a soft dough and we needed to be avoid overflouring here. I ended up using about 7 1/2 cups of flour - seemed liked I needed this since I used over 12 oz of potato.

Place the dough in a large clean bowl or your rising container of choice, cover with plastic wrap or lid, and let rise about 2 hours or until doubled in volume.

Turn the dough out onto a well-floured surface and knead gently several minutes. It will be moist and a little sticky.

At this point, I added a couple of handfuls of chopped chives to the dough - figured a mild seasoning was a good idea and fresh chives seemed like a better alternative than dried rosemary.

I divvied up the dough into 2/3 and 1/3 chunks - the larger one for rolls and the smaller one for a loaf.


Oven: Heat to 450 F.

Forming the loaf:


Roll out the dough into a flat oval on a baking stone. Start rolling it from one end till it is rolled like a croissant. Smoothen the loaf before covering it with plastic wrap for about 35 minutes, till almost doubled in size.


To make rolls:


Butter a 13 x 9 inch sheet cake pan or a shallow cake pan. Cut the dough into 12 equal pieces. Shape each into a ball under the palm of your floured hand and place on the baking sheet, leaving 1/2 inch between the balls. Cover with plastic wrap and let rise for about 35 minutes, until puffy and almost doubled.


Baking:

For the small loaf:

Remove the plastic wrap and make slashes with a knife on the top of the loaf before sticking it into the oven.


For the rolls:

Dust rolls with a little all-purpose flour or lightly brush the tops with a little melted butter or olive oil (the butter will give a golden/browned crust). Place the rolls next to the loaf in the oven.


Bake rolls until golden, about 30 minutes.

Bake the small loaf for about 40 minutes.


Transfer the rolls to a rack when done to cool. When the loaf or loaves have baked for the specified time, remove from the pans and place back on the stone, tiles or baking sheet for another 5 to 10 minutes. The corners should be firm when pinched and the bread should sound hollow when tapped on the bottom.


Let breads cool on a rack for at least 30 minutes before slicing. Rolls can be served warm or at room temperature.


End Result:

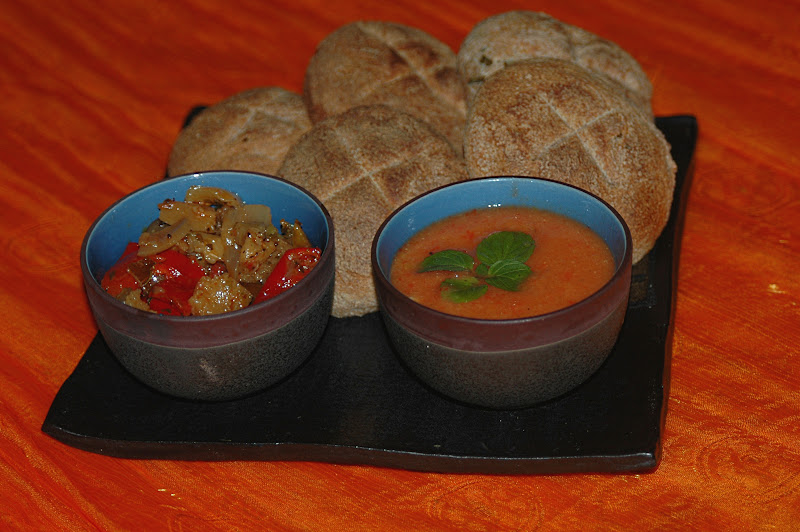
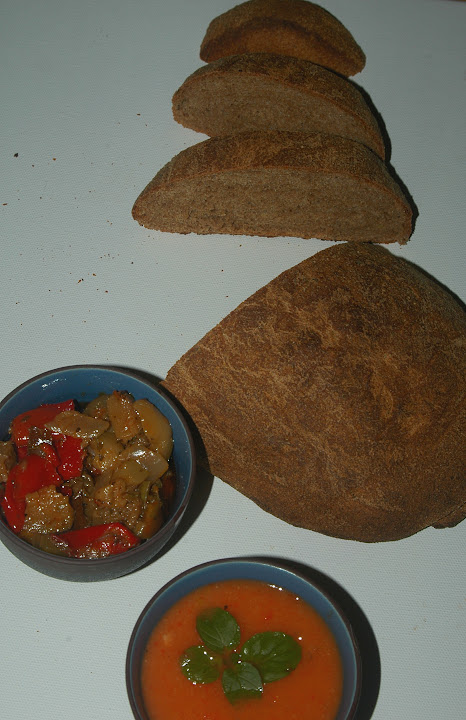
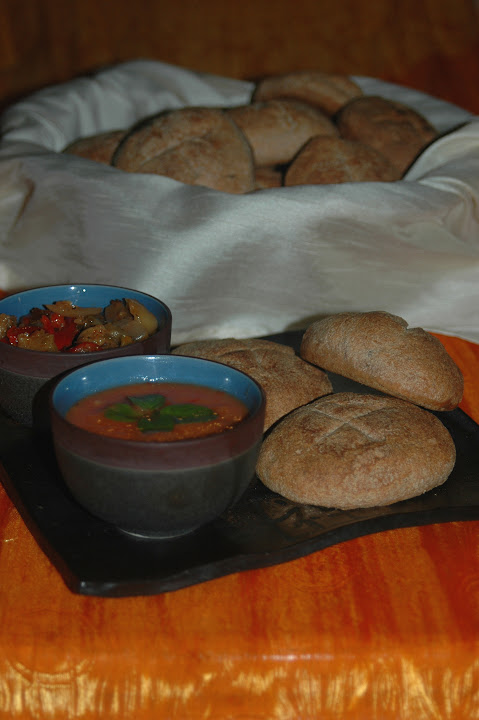
Wow! This was easily one of the yummiest bread recipes I've ever used. Personally, I preferred the rolls to the loaf which felt a little denser - thin slices topped with tapenade worked better for the loaf, while the rolls were just moist, tender, chewy and totally picking up flavors from the dips. Oh, the dips! That was a whole lot of fun - I wanted something beyond the usual olive oil+vinegar or herbed butter this time, so I did what I usually do - stare at all the ingredients around me till I stumble upon something I can use :) If that doesn't work, I usually start poking around all my cookbooks!

Well, this time, there was one forlorn pear-apple waiting to be eaten. Seemed like a light sweet-tart dip would be a fabulous complement for the starchy bread.

Pear and Pepper Chutney
Sweet, Tart and Fiery!

1 pear apple - chopped into chunks
1-2 pieces of marinated bell peppers
1 T red wine vinegar
1 T cider vinegar
2 cloves garlic
1 t brown sugar
a few drops of habanero sauce
a sprig of mint

Heat the vinegars along with the sugar in a pan.
Once the sugar has dissolved, add the pear-apple, garlic and peppers and boil for about 4-5 minutes.
Once cooled, puree the mix and add the habanero sauce (as suits your palate :))
Garnish with fresh mint.

*drool*


This was my first baking challenge and it was a total blast! I can't wait for the next one now :)

Tanna, thanks again for this recipe, for your guidelines and for organizing this. It was a real adventure and I can't wait to try this recipe again - and I'm going for the focaccia next time!

The Daring Bakers blogroll has a zillion other awesome versions of the potato bread - pretty amazing what folks think of even with a set recipe :)


I think this post should go to Andrea for her Grow your Own event - growing those chives and mint was a good thing, the crop was abundant!