Showing posts with label vegan. Show all posts

Tuesday, March 11, 2008

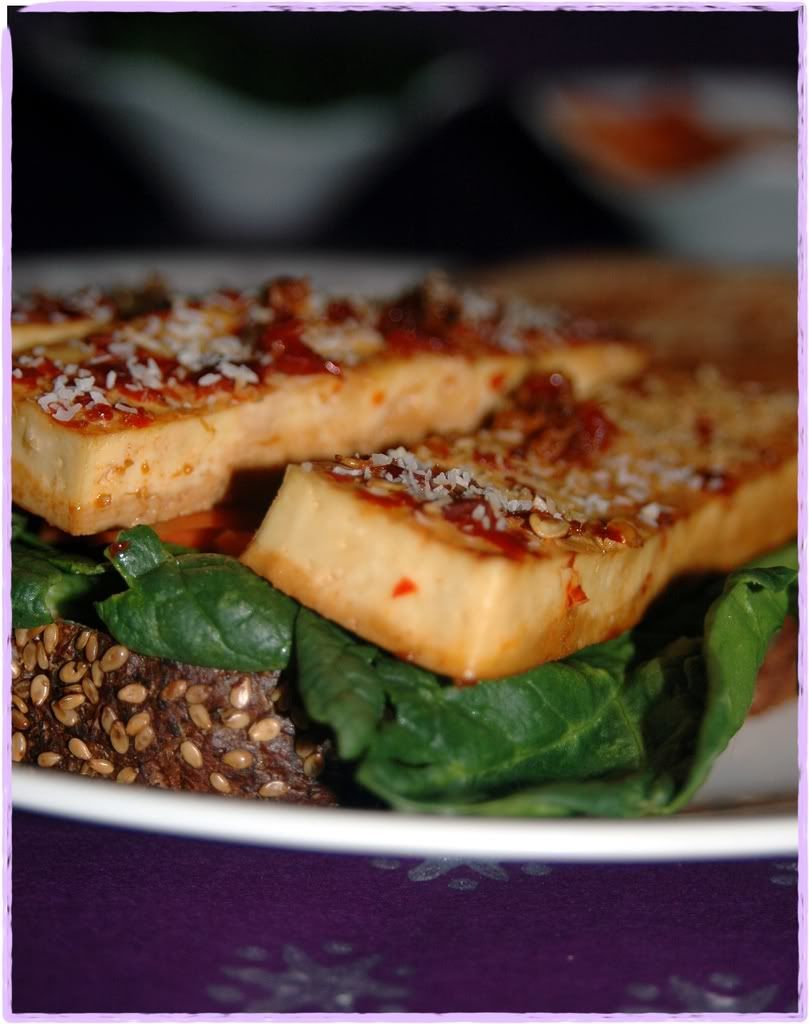
A twist on Banh Mi Chay


The sandwich world can sometimes be a bare desert for vegetarians - often one, maybe two items on a menu at a sandwich joint might be veggie friendly. Can be such a pisser! Until we see one of those silver linings on the meat-filled sandwich cloud - those fabulous vietnamese sandwiches. Mouthfuls of crunchy, flavourful goodness. *sigh*

Tonight called for a quick fix. A quick, delicious fix. A quick, delicious and healthy fix. Hmm ... how about a Banh Mi Chay? That fabulous vietnamese sandwich. Wait, did I say that already?!

Well, like always, any meal calls for variations, right? This one was no exception. I realized I only had this absolutely fabulous multi-grain bread to work with, no hoagie roll - which is what the banh mi usually comes in. That's cool, multi-grain makes me happy, am sure them vietnamese folks wouldn't be too insulted if I used it! And I figured it would be fun to add a few more twists here - maybe some marinated parnsnips? And spinach instead of lettuce or cilantro? And how about some habanero mustard instead of mayo?
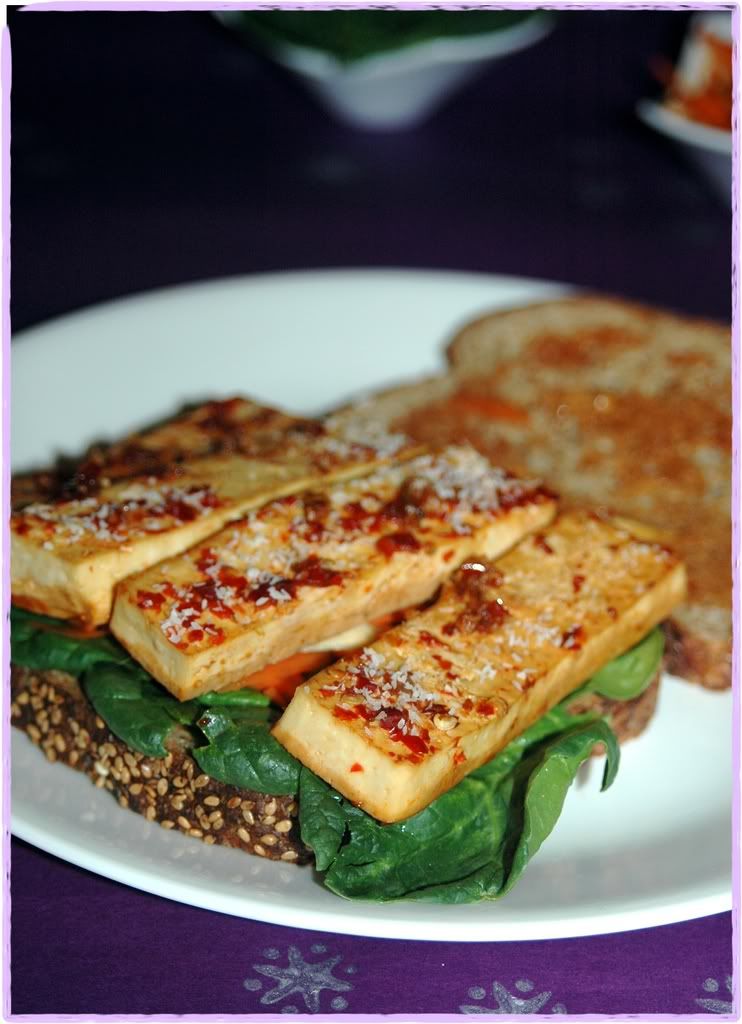
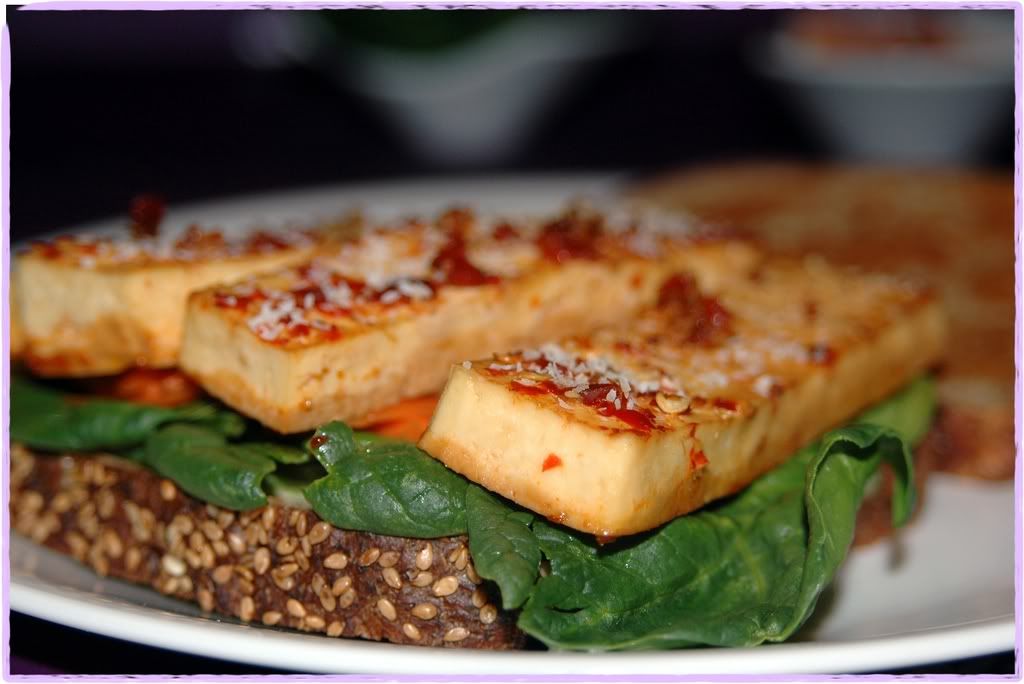

Banh Mi Chay of the day
A new look for the vietnamese favourite!

Servings: 2

4 slices of multi-grain bread
1/2 carrot - sliced into thin long strips
1/2 parsnip - sliced into thin long strips
160 gms of extra firm tofu (2/5 of a block)
a couple of handfuls of baby spinach

Marinade for tofu:
1 T sambal oelek (I make my own, but you can buy this at any store)
2 T soy sauce
2 T muscato vinegar
1 T coconut flakes
1 T minced garlic

Marinade for veggies:
1 T habanero mustard
2 T water
1 t soy sauce
1 T white vinegar
1 t horseradish paste

Slice the tofu into long thick strips about 1/2" thick.
Mix the tofu marinade ingredients, except for the coconut flakes.
Place the tofu in a baking tray, pour the marinade all over it and dust with the coconut flakes.
Broil the tofu till it gets browned.
Mix the marinade for the veggies and soak the carrots and parsnips in it for about 1/2 hour.
Toast the bread before assembling the sandwich.
Layer a handful of the spinach, then the tofu, followed by the veggies on a slice of bread.
Serve it open-face or top the veggies with a second slice of bread.

Opinion?

*yum*! This was seriously the quickest, easiest and tastiest sandwich I've had in a while. The coconut totally added a crispy kick to the tofu and marinade, the spinach was crisp and fresh, the parsnips added an earthy flavour - made for the perfect french countryside salad sandwich :)

Monday, March 10, 2008

Feelin' the bean love

So, what do you do when you get a fabulously fresh batch of green beans from your CSA?

  1. Stash the beans in the fridge till you can find a recipe for it
  2. Be insanely magnanimous and give them to a friend
  3. Skip around in circles all excited about them green beans
  4. Pore feverishly through all those cookbooks trying to find a new recipe that'll showcase the beans
  5. Do 3. and 4. - basically certifying that you're a minor nutcase! :)
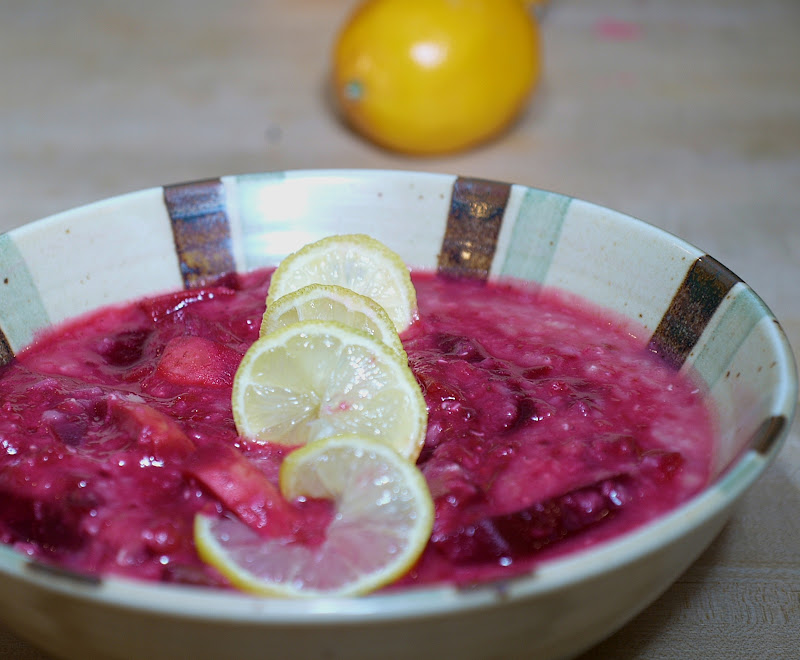
Well, no points for guessing what I did. Kind of hard to keep skipping around in circles while flipping through those cookbooks, but I did it nevertheless! :)

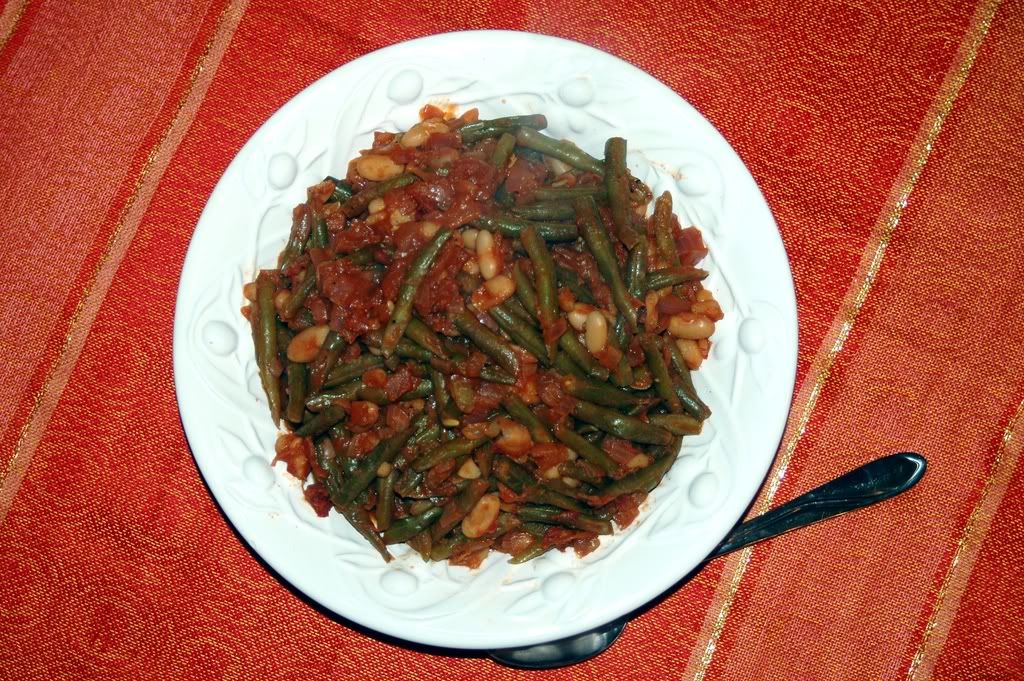
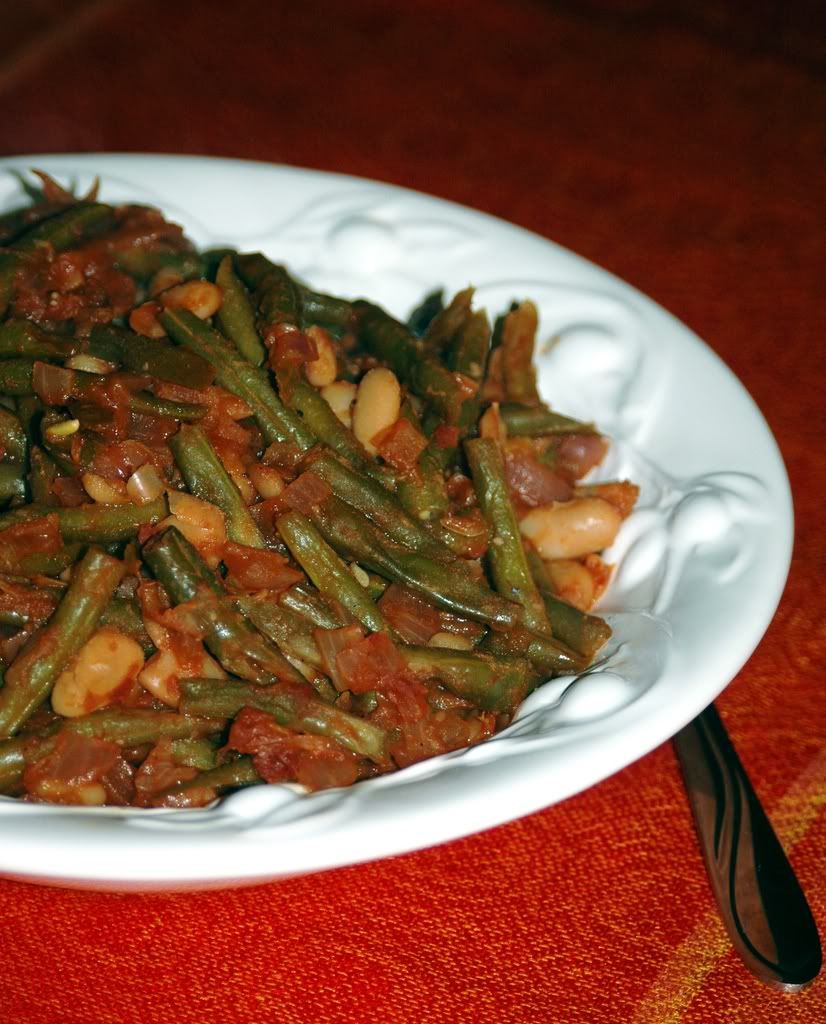
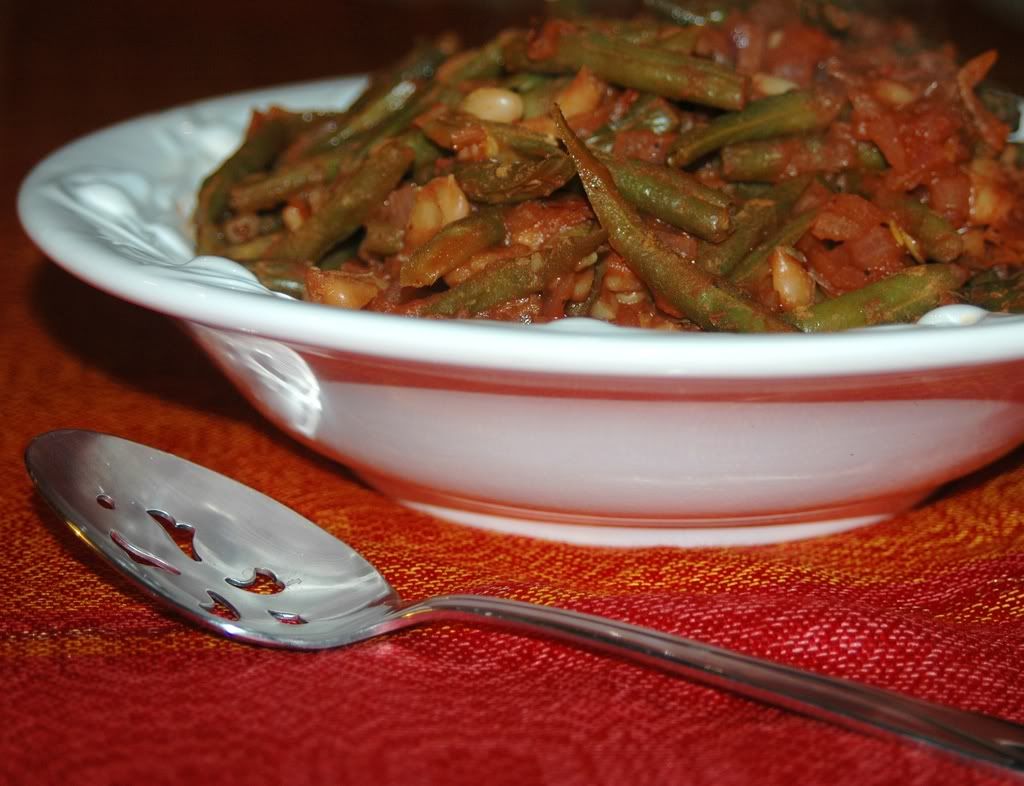
I finally settled on a green beans and garlic recipe - not the traditional pan-asian one, but one with a bit more gravy - a bunch of chopped tomatoes thrown in, along with a batch of cannellini beans for more fiber goodness. A generous dash of white wine totally added a slurpy tingling aftertaste - much better than any vinaigrette could have.


Beans and Beans with Garlic and Tomatoes
Skip as you stir, makes it taste better :)

Servings: 4

12 oz cooked cannellini beans (I just used them drained and rinsed out of a can for this recipe)
1 T olive oil
1 onion - finely chopped
3-4 garlic cloves (crushed)
3-4 tomatoes - peeled and chopped
12-14 oz green beans - sliced diagonally into long chunks
1/2 cup of white wine (I used a chardonnay here)
2/3 cup water (or veggie stock)
1 T fresh parsley
salt
freshly ground black pepper

Heat the oil in a large frying pan and saute the onions and garlic for 3-4 minutes till soft.
Add the chopped tomatoes and continue cooking over low heat for another 3-4 minutes till they start softening.
Add the green beans, wine, water (or stock) and a little salt and stir well.
Cover and simmer for 5-6 minutes.
Stir in the cannellini beans and simmer covered for another 3-4 minutes.
Increase the heat to reduce the liquid and season with the black pepper.
Garnish with the parsley before serving.


Opinion?

The earthy cannellini beans and garlic added a yummy french twist to the green beans - I originally started making this as a side, but it turned out so good that it was the meal of the night, along with some crispy spiced flatbread.


More recipes with beans:

This goes to Kel from Green Olive Tree for WHB (Kalyn's brainchild) - thanks to both for organizing this!
And on a different note, if you haven't had a chance to check out Sig's blog yet, head over yonder to read about our insanely fun blog gathering last week. Thanks Sigster, for jumpstarting this!

Monday, March 3, 2008

Got to love that pome!


No, I'm *not* talking about any fabulous device from that AAPL :)

A couple of days ago, I stumbled upon An Apple A Day hosted by Rosella. Her story is incredibly poignant - after having a stroke at 30, she seems to be doing well now and totally enjoying writing about her life and travails on her blog. And this event is extra special to her - she wants March 3rd, the day she had a stroke last year to be a celebration of healthy living and eating. It isn't any surprise that she chose to focus her event on apples along with a variety of other ingredients.


Even if I knew that tomorrow the world would go to pieces, I would still plant my apple tree.
- Martin Luther King


And I'll be totally fine with that - can't quite imagine life without apples - guess that's one of the best things about living in Washington :)

Apples, to no surprise, are way up there in terms of being a tasty source of goodness. They're full of soluble and insoluble fiber, the skin has a ton of Vitamin C, the pulp contains phenolic compounds ... and they're super delicious to boot!

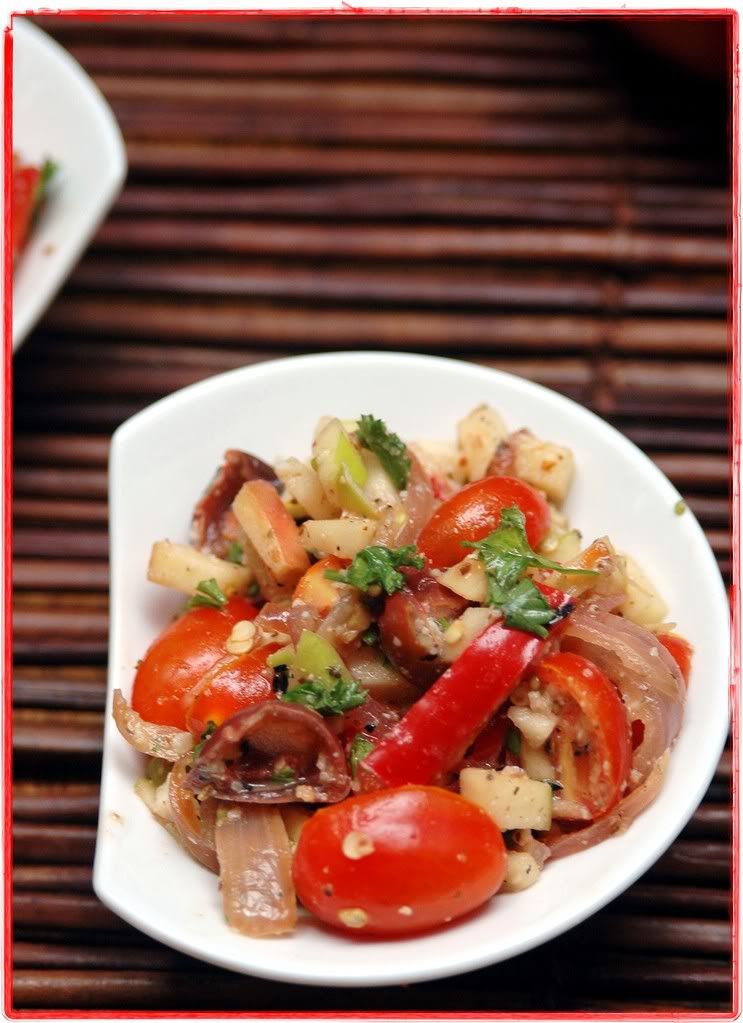
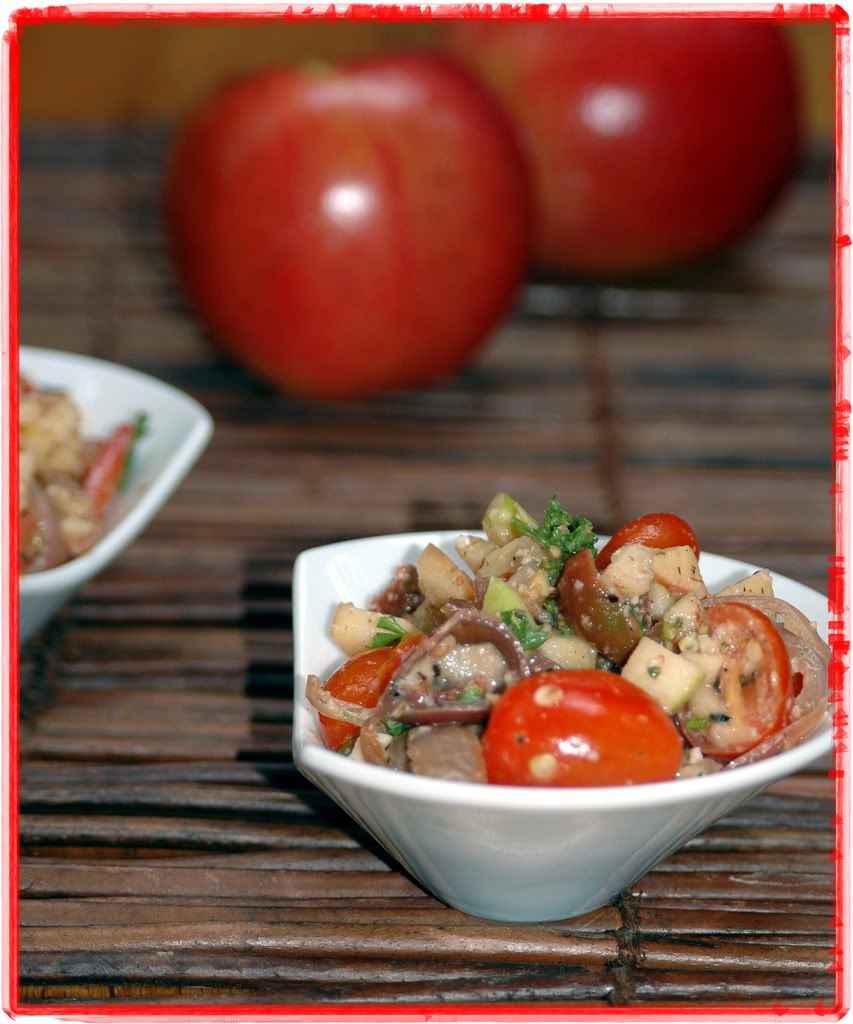
It didn't take much effort to find a fun recipe showcasing apples and a couple of other ingredients from Rosella's list. I was initially thinking of a dessert, but figured a salad was a much healthier idea. This Moroccan salad seemed like the perfect option, brimming with sweet and tart flavours and some spice.


Pepper Apple Tomato Salad
- adapted from Traditional Moroccan Cooking: Recipes from Fez

Servings: 2 as an entree, 4 as an appetizer

1 Granny Smith apple - coarsely chopped
1/2 Gala apple - coarsely chopped
6-8 black cherry tomatoes - halved
20 sugar plum tomatoes - halved
1/2 red onion
1/2 red bell pepper
3-4 pepperoncinis - drained and chopped
10-12 almonds - coarsely chopped or ground
3 cloves garlic - crushed
2 T lemon juice
1 T chopped fresh curly parsley
1 t dried mint
1/2 t dried thyme
3 T red wine vinegar
1 t olive oil
salt
freshly ground pepper

Toss the tomatoes and apples with the lemon juice in a mixing bowl and let it sit for about 10-15 minutes.
Heat the oil in a wok and saute the onions.
Once browned, add the garlic and bell peppers and saute for another 3-4 minutes.
Add the contents of the wok into the mixing bowl and toss with the tomatoes+apples.
Add the chopped banana pepper and almonds and toss again.
Season with parsley, mint, thyme, salt and pepper.
Add the vinegar, 1 T at a time, checking the flavours before adding more.


Opinion?

*yum*! Those moroccans know how to fix a mean apple salad. This was fabulous. And is fabulous (as I struggle to type while feeding my face) :)

Off this goes to Rosella - hope you feel better and may the good times roll!

Saturday, February 23, 2008

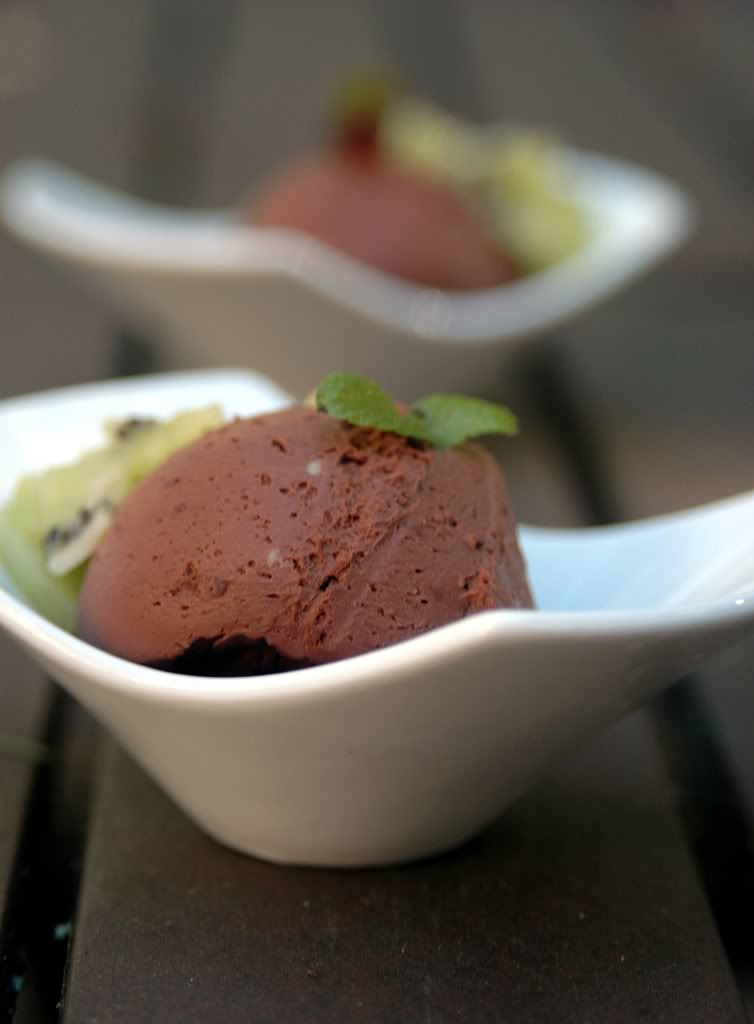
Taste & Create VI - Chocolate Tofu Pudding!

This whole idea of trying out recipes from fellow bloggers is really fun - I've been indulging in this a lot more lately, sometimes trying to follow the recipe as closely as possible, other times I add my twist - as is what I often do with most recipes :) Either way, it is always really exciting to try something suggested by a fellow blogger, see how it turns out and be able to talk about our successes and misadventures.

So, when Chris suggested that I should check out Taste & Create started by Nicole, I was intrigued. This event basically pairs up food bloggers who proceed to try out a recipe (any recipe) from each other's blogs. The first time I checked out the list of bloggers who were interested in trying this out, I realized there were *tons* of folks out there who I had never visited. Obviously, we all reach a saturation point in terms of how many blogs we can check out, how many posts we can read, how many comments we can submit, even how many recipes we can try out! But the whole random pairing aspect of this event seems pretty neat - the way I look at it, I might be hooked up with a blogger whose food tastes vary vastly from mine, but an event like this could entice me to expand my horizons and try out something I wouldn't have stumbled upon otherwise. Or maybe I would just find a totally new twist to something I've made many times over!

Well, the latter is what happened in my first Taste & Create experience. I was partnered with Katie who blogs at Other People's Food - sounds like her blog is tailor made for the Taste & Create experience :) Katie seems to be awfully versatile at picking really interesting recipes from fellow bloggers and trying them out - something I've been attempting to do a lot more of lately. Thanks Katie, for being an awesome blog-discoverer :)


As I was being sorely tempted by all the delicious fish recipes on Katie's site, I stumbled on this post about chocolate tofu pudding. Chocolate + tofu? Sounds a bit insane! The recipe calls for using silken tofu - something I've started experimenting with in soups and sauces, it even works as a great option for making a light version of a flaky pastry shell - more about that in the week to come.

So, I went ahead and tried out Katie's recipe - I ended up using molasses instead of maple syrup and stuck with dark chocolate chips instead of a combination of semi-sweet and dark. Simple, elegant, easy.


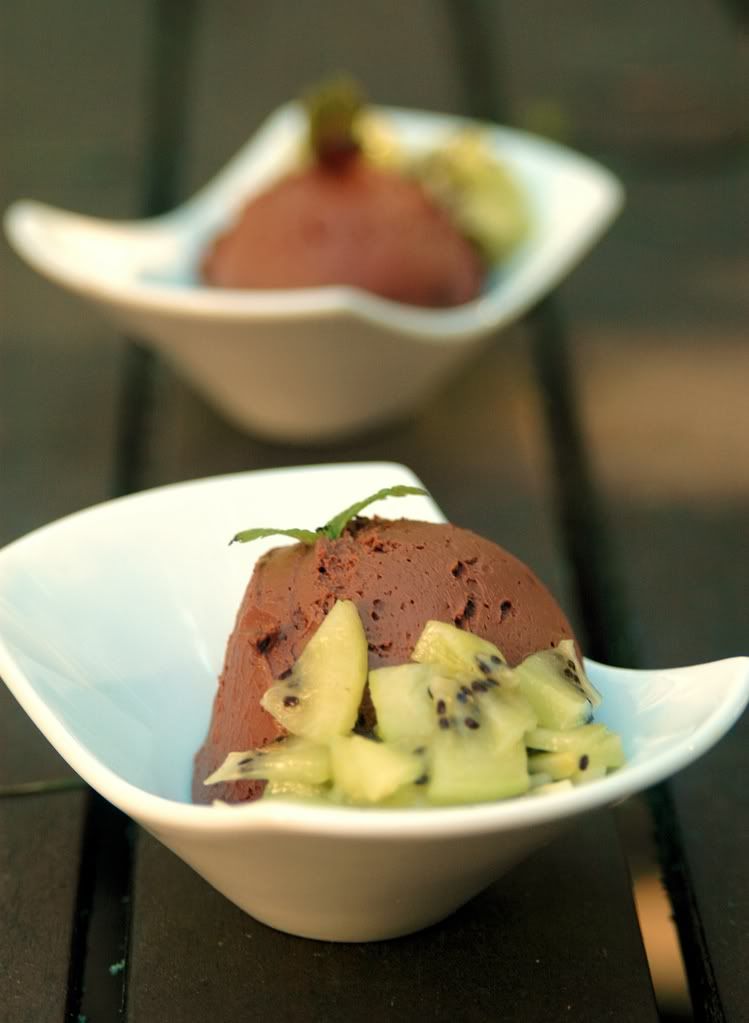
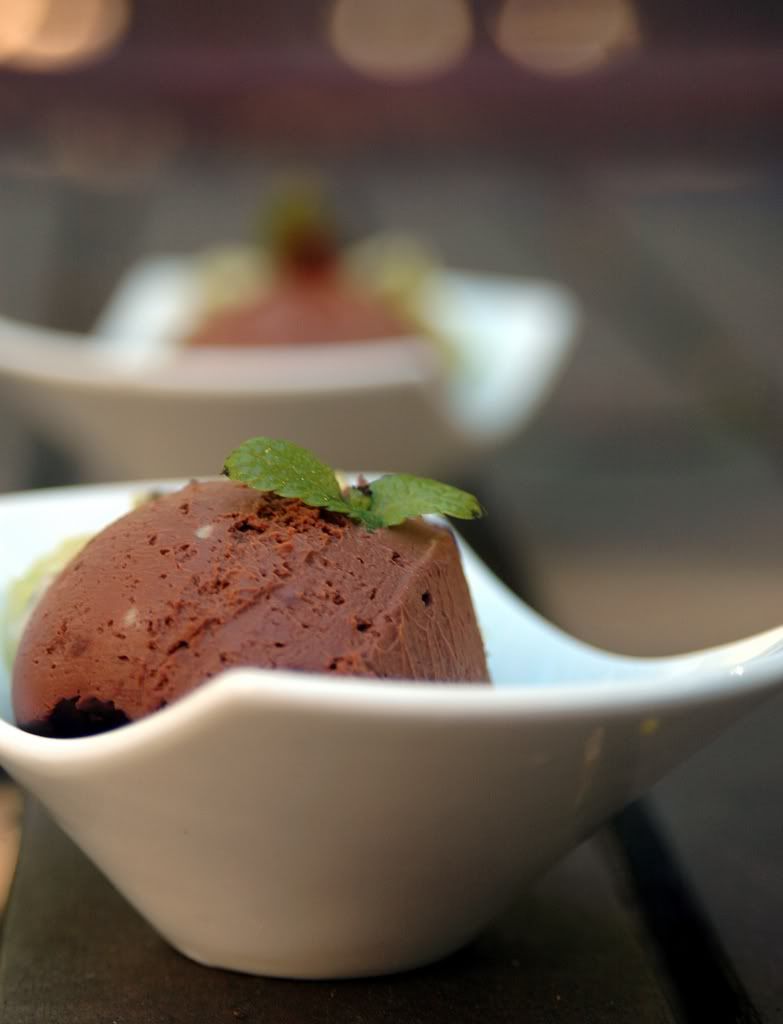
Chocolate Tofu Pudding
Silken chocolate? Can it get any better?!

Servings: 2

1/2 container of silken tofu (200 gms)
2/3 cup of dark chocolate chips (Guittard is divine, Ghirardelli works too)
1 t molasses (I used this instead of maple syrup)
1 t vanilla extract

Heat the chocolate in a double boiler till completely melted.
Stir in the molasses and vanilla extract till smooth.
I noticed that the molasses increased the thickness of the chocolate dramatically and it took a ton of effort to keep stirring it to keep it smooth! Totally unexpected side effect :)
Beat the silken tofu to a smooth paste and stir it into the chocolate mixture.
I noticed that the tofu still seemed a bit chunky after stirring it into the chocolate, so I ended up running the mixture through a blender again before pouring it out into ramekins.
Chill for atleast an hour.

Whoa! The pudding ended up being super thick and creamy! I'm assuming the molasses had a lot to do with this. Sweet! :)

Serving suggestion:

Ladle a scoop or two of the pudding into a bowl along with a side of chopped kiwis. Garnish with a sprig of orange mint.


Opinion?

Oh.My.God.

This was fabulous! Creamy, smooth and fabulously decadent! And to think that I added no fat other than what the chocolate had - this whole silken tofu + molasses mojo makes me super happy! I can't wait to play around more with these.

Thanks Katie & Nicole for a really fun Taste & Create experience!

Friday, February 22, 2008

Burger Time!

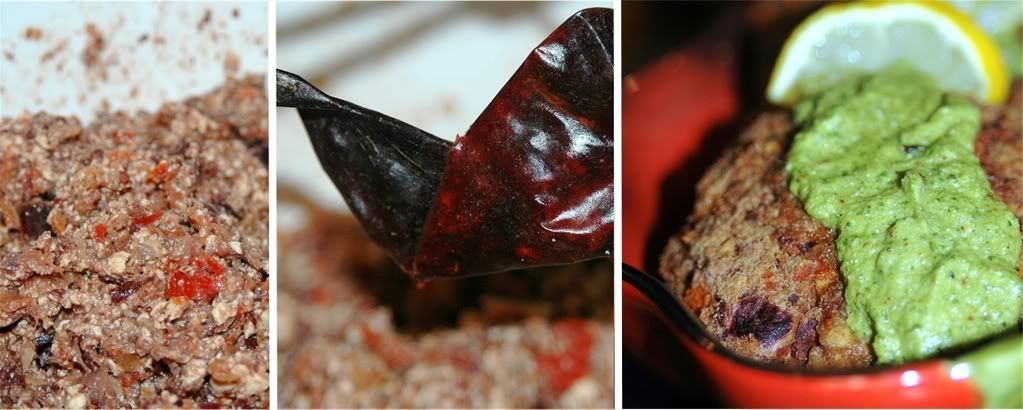
Homemade burgers have got to be one of the most cooking fun projects ever. Not only do they make for a tasty alternative way to work with varieties of beans, it is so cathartic to make those "burger-dough" rounds and flatten them into patties. Hmm ... burger dough - is there an official word for that? :)

Black bean burgers have always been a favourite - all the more since I've managed to perfect that recipe to a science! This time around, I wanted to work with kidney beans - so incredibly earthy, chewy and flavourful. And I was contemplating making these patties vegan - just a little olive oil, maybe use soy flour instead of indulging in bread crumbs as a binding agent.


Every once in a while, impromptu cooking works to perfection - no recipe to work off of, we just start throwing stuff together and things fall into place. Ingredients mingle and dance, flavours stand out, all happy goodness! Love it when that happens! Don't you? :)

As the burgers started coming together, I started wondering about making some kind of dressing to go with it -maybe an aoili? I realized I had a slew of sunchokes from PO that I was yet to try out in anything but a salad - was there anything I could do with it?

The first time I saw sunchokes, I couldn't help but wonder "What are these crazy things? They kind of look like round wonks of ginger, but they're not. They smell super earthy. And they look *nothing* like artichokes! Hmmm ...." Well, a dig into Joy of Cooking told me more about them:

The Jerusalem artichoke, also known as a sunchoke is the tuber of a native sunflower. And it has no relation whatsoever to Jerusalem, the tuber was originally named Girasole by the europeans who discovered it. The current name is some kind of folk pollution of Girasole which is the italian word for sunflower. Yay for vegetable etymology! :)

Ok, back to our dressing - it kind of evolved naturally - with a mix of sunchokes and garlic, a dash of vinegar, some hot sauce, feta cheese ...


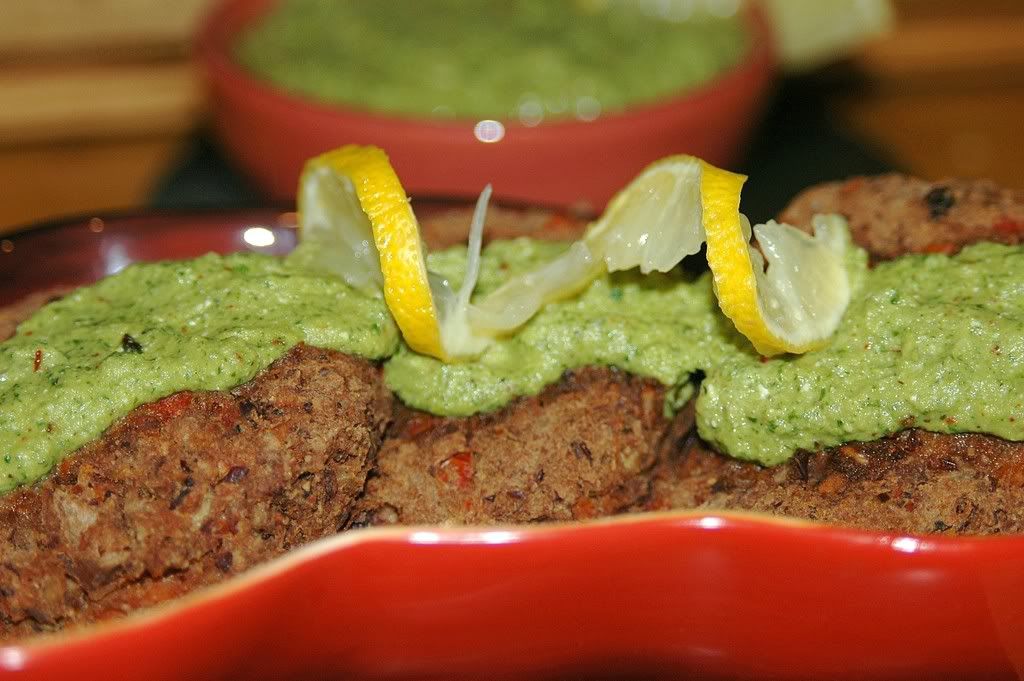
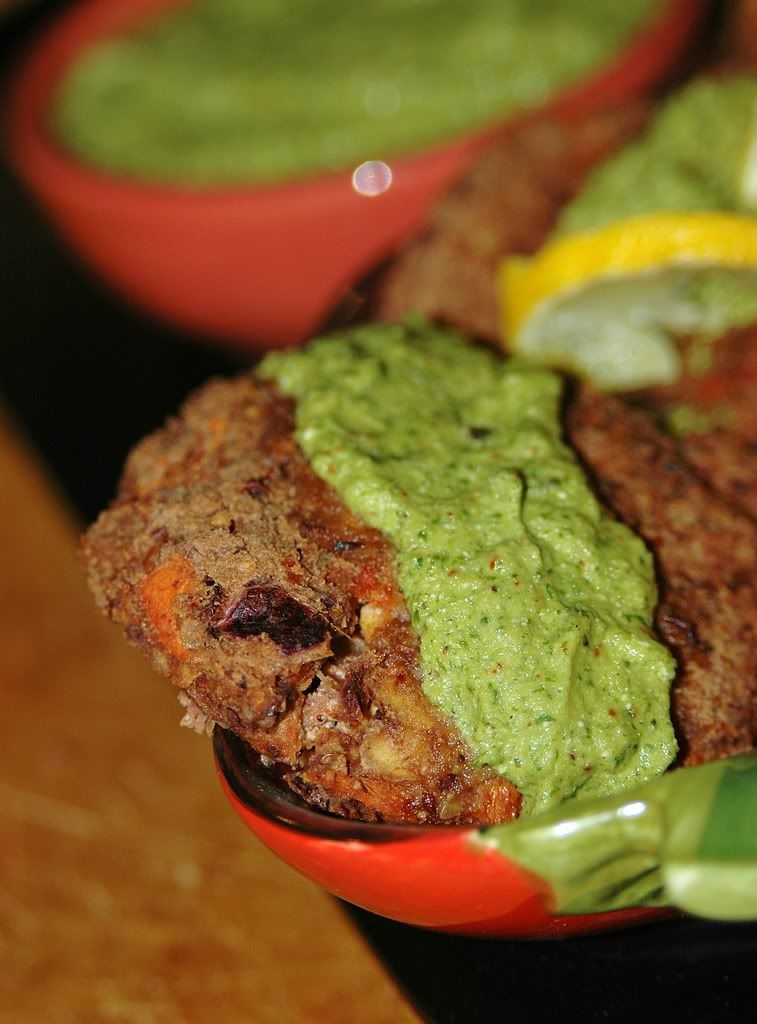
3-Chilli Burgers with Sunchoke-Garlic Chutney
3 kinds of chillies? Wooooo!

***

3-Chilli Burgers

Servings: 10-12

1 can of kidney beans - drained
1 onion - chopped
1 red bell pepper - chopped
2 carrots - chopped
1/4 cup walnuts
1/2 block (200 gms) of tofu - finely shredded (we use Nasoya extra firm tofu)
2-3 T soy flour
1 guajillo chilli
1 dried indian red chilli
1 chili padi (thai bird's eye chilli pepper)
1 t olive oil
1 t cumin seeds
salt for seasoning

Heat the oven to 350 F.
Heat the oil in a wok and add the cumin seeds.
Once they splutter, throw in the onions and saute till browned.
Now add the bell peppers, carrots and walnuts and saute for 1-2 minutes.
Add the kidney beans after rinsing and discarding the water and saute for another minute.
Run the veggies+beans through a food processor to make a coarse, chunky mixture.
Mix in the shredded tofu.

Roast the 3 chillies till they start to brown - grind them into a coarse, sticky powder.
Mix this powder along with salt into the bean mixture.

NOTE: You might want to check the spice level as you add this chilli powder. We like it super hot, you may not :)

Add the soy flour, 1 T at a time, mixing constantly till the mixture looks firm enough to be made into patties.

Lightly grease a baking tray lined with foil.
Make a ball of a handful of the "burger dough" at a time and flatten it into a thick patty and place it on the baking tray.
(This mixture freezes really well too, in case you don't want to make it all into patties right away)
Bake the patties at 350 F for about 12-14 minutes till they feel firm.

***

Sunchoke Chutney
sunchokes ... garlic ... parsley ... feta ... mmm!

4-5 sunchokes - peeled and chopped
5-6 garlic cloves - peeled
1 green chilli - chopped
2 T red wine vinegar
1 cup curly parsley
1/4 cup feta cheese (we used a reduced fat version)

Cook the sunchokes, garlic and green chilli in a covered saucepan with the red wine vinegar for 3-4 minutes.
Once cooled, grind the vegetables along with the parsley to a fine paste.
Mix in the feta cheese and season with salt, maybe even a dash of chilli powder.


What did we think?

These burgers rock! So simple, yet so tasty! I think they're my current favourite now - yes! I choose them over the black bean ones!

As for the sunchoke chutney - it was fabulous - one of the best dips *ever*! Creamy, earthy, a vague artichoke flavour, love it.

***

More burger recipes:

Black Bean Burgers
Spicy Kidney Bean Burgers @ Jugalbandi
Pav Bhaji Burgers @ One Hot Stove
Chipotle Bean Burgers @ We [heart] Food

***

This goes to Lia at Swirling Notions for Weekend Herb Blogging (that awesome food blog virus started by Kalyn!)

Monday, February 4, 2008

Green = good, Green+Tofu = better!

Eat your spinach, you no good infink. Eat it. EAT IT. Eat it.
- Poopdeck Pappy


Saag Paneer has always been a household favourite - aromatic and flavourful greens cooked up with toasted, crunchy cheese bits. Saag and Palak are used interchangeably so often, more so because there is no exact equivalent for those greens in the U.S. For the most part, palak is just spinach and saag is a combination of spinach and mustard greens. But most folks I know often use a variety of greens when making saag - the more flavourful and diverse the greens, the merrier, right? :)

In line with the recent push for healthy, high-protein and high-fibre recipes, I embarked on a variation of this popular greens dish from North India. I had a bunch of collard greens as well as some spinach and microgreens - this olio of leaves could definitely make for interesting saag, right? Also, in an effort to cut back on the fat, I decided to try this out with tofu instead of paneer. That was a big sacrifice - there are few things as delicious as fresh homemade paneer - the subtle residual lemon smell blending with the pungency of the curds ... *so* good!

Anyway, the idea was the toast the tofu bits till they turned out crispy - that was the closest I could think of as a paneer alternative. Also, I went with a blend of cashews and almonds to enhance the creaminess of the palak instead of just cashews - it seemed like this would enhance the diverse palak flavours.


Saag Tofu
High Protein Vegan Bliss

Servings: 4

1 bunch of collard greens
1/2 bunch of spinach
2 handfuls of microgreens (arugula, baby endive, baby chard, mizuna, tatsoi, sorrel, etc)
1 medium sized tomato
1/2 red onion
1/2 block of tofu (160 gms)
4 cloves of garlic
1" ginger
3-4 green chillies
1 t cumin seeds
1/4 cup cashews+almonds
1 T coriander-cumin powder
1 t turmeric powder
1 t red chilli powder (cayenne would work)
1/2" stick of cinnamon
2 cloves
1 cardamon pod
1 T sesame oil

Lightly roast the cinnamon, cloves and cardamon before grinding them along with the cashews and almonds into a fine masala.
Grind the ginger and garlic into a thick paste.
Blanch the tomato in hot water, peel and puree.
Blanch the spinach and microgreens in hot water for 2-3 minutes before grinding to a fine paste.

Heat the oil in a heavy-bottomed saucepan and roast the cumin seeds.
Once they brown, add the onions and green chillies.
Saute for a few minutes till the onions turn brown.
Add the ginger-garlic paste and saute a bit more.
Now add the red chilli powder, turmeric and coriander-cumin powder and stir for a minute.
Throw in the tomato puree along with the collard greens.
Simmer covered for 6-7 minutes till greens are cooked.
Cool before pureeing this mixture - you could leave it somewhat coarse or make it into a smooth paste.
Add the spinach-microgreens puree along with the masala (spices+nuts mixture) and simmer for 2-3 minutes.
Season with salt.

Dice the tofu, lightly douse with oil spray and toast or broil till the pieces get crispy and brown on the edges.
Add the tofu to the saag and cook on low for a couple more minutes.

Season with cilantro or even a dollop of malai or creme fraiche.

Serve over seasoned rice (jeera rice is a great option) or with rotis.


Any good?

This was great! For some reason, it felt much lighter than regular saag, but totally flavourful. And the mix of greens was awesome ... got to love those collards! :) The only thing I would change going forward is to make the dish a little thicker. I got carried away with adding water when I was trying to puree the greens - sometimes patience is a noble virtue!


***

Similar greens recipes

Sailu's Food - Palak Paneer
Mahanandi - Palak Paneer
Nupur's Spinach recipes

***

Off this goes to Ulrike from Kuchenlatein for WHB (Kalyn's brainchild).

Saturday, January 19, 2008

Banana Soy Muffins with pomegranate pear syrup

Weekend Breakfast Blogging had my attention over the last couple of days - after the soy pancakes turned out great, I really wanted to make another soy-based breakfast recipe. Kind of hard to work primarily with soy flour though - it has no gluten content, which means no elasticity and there is no assistance during fermentation which is what helps the bread rise when baking. In addition to these, gluten helps keep the shape of the bread since it firms up when cooked.

Gluten resources for those interested:


Gluten on Wikipedia
Gluten composition in cereals and gluten disease
Gluten free recipes

Anyway, after poking around several cookbooks and sites, I couldn't quite find any cake or bread recipe that didn't use a combination of soy flour with either wheat or rice or triticum flour. Oh well, guess I just had to try it out - and hope that the end result is somewhat edible. I decided to play it safe and try a banana muffin recipe with soy flour. And to make things even simpler, I microwaved them - that's what happens when you clean your kitchen shelves and find this odd looking microwaveable muffin tray :)


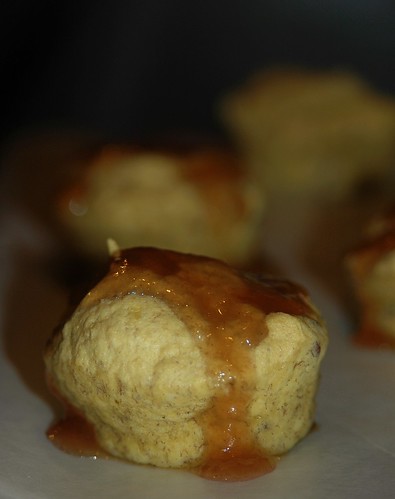
Banana Soy Muffins
Microwaved, no less!

Servings: 6 muffins

1/2 cup soy flour

1/4 cup egg whites (I used Nulaid)

1 t baking powder
1 t olive oil
2 small overripe bananas
6-7 almonds - chopped

Grease the muffin tray with oil spray.

Beat all ingredients together till the batter is smooth and thick.

Dole out equal portions into each of the muffin holes (is there a real name for these?).

Microwave for 8-9 minutes.

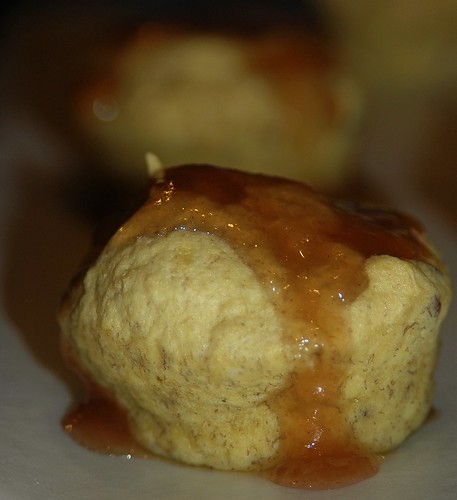
Drizzle some pomegranate-pear syrup over each muffin and let them sit for a few minutes before noshing :)


Any good?


They are pretty good! I'm eating one as I type and I'm really liking it :) The shapes are kind of wonky, they almost look like a hybrid of muffins and scones! But they turned out pretty soft and moist, not really chewy (hell, I need some gluten for that!), but the slightly sweet flavour of the soy flour along with the bananas made the muffins pretty tasty even without the syrup! And it took all of 15 minutes!


This recipe is a definite keeper. And I have a submission for WBB (Nandita's brainchild) - this goes to Rajitha who is hosting this month's event - themed Soy. Yay!

Friday, January 18, 2008

Is this tofu craze here to stay?

Over the last few months, a lot of tofu has been cooked - marinated in a variety of sauces, sauteed with a plethora of spices, baked into crispy bars ... and pretty much every single option has been extremely palatable. I'd love to think I had something to do with it, but the truth is that tofu is the ultimate sponge! It absorbs spices so easily and then adds its own tinge - every mouthful ends up with this mishmash of flavours.

Hey, speaking of Mishmash - Shn just celebrated a year of blogging, if you haven't had a chance to check out her fabulous cakes and cooking, run there right now :)

Ok, back to tofu love ... I wanted to try something new, something different with the tofu - not the usual chunks. I started off thinking that I wanted to make some kind of fresh vegetable rolls - shredded and grated vegetables in a cabbage wrap, maybe? Hmm ... no cabbage! How about kale? Or chard? Nope! Low on greens :( Wait, there is spinach - would that work? Well, even somewhat large spinach leaves don't really make for decent rolls. Not even with toothpicks stuck into them! *sigh*


So, I had to bail on the whole rolls fantasy. Oh well! Instead, I just settled for the shredded tofu salad served over a bed of wilted spiced spinach. Guess those cabbage wraps will have to wait for another day!


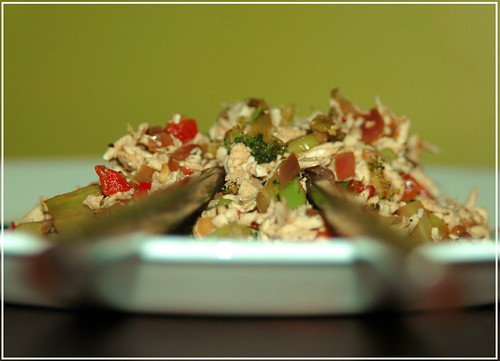
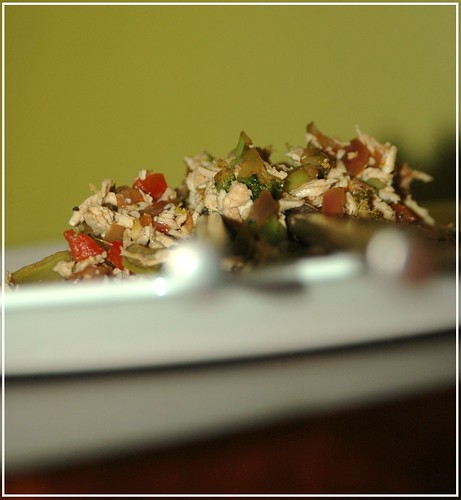
Shredded Tofu Salad
Served on a bed of wilted spinach

Servings: 2

80 gms extra-firm tofu (about 1/5 of a regular block of tofu)

1 small head of broccoli

1/2 red onion

1/2 red bell pepper

1 T grated ginger

1 t sambal oelek
1 T soy sauce

1 t sesame oil or oil spray
salt


1 T vinegar
1 t cayenne pepper

10-12 fresh spinach leaves - washed and dried


Grate the tofu using a medium sized grater and set aside.

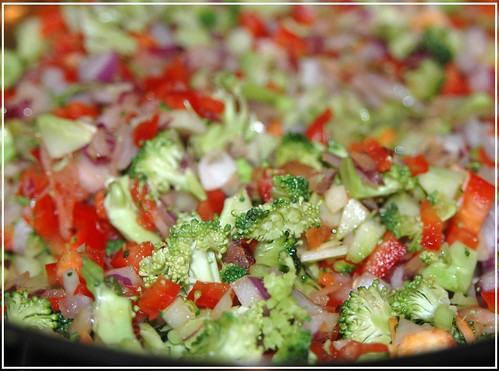
Finely dice the onion and bell pepper.
Shred the broccoli into small pieces.

Heat the oil in a wok and saute the onions and ginger till browned.
Add the broccoli and bell pepper and saute for 2-3 minutes.
Stir in the tofu along with salt to taste.
Add the sambal oelek and soy sauce and saute for about 4-5 minutes till the tofu starts to brown.


In the meantime, pour the vinegar into a saucepan and heat on low.

Stir in the cayenne pepper.
Add the spinach leaves and cook covered, on low for a couple of minutes till the spinach is partly wilted.

Serve the tofu salad on a bed of wilted spinach leaves.


Good?

This is my absolute favourite way to eat tofu! Once shredded, it totally sucked in all the flavours and was super moist and juicy. The spinach actually ended up being a great touch - the vinegary leaves were a perfect foil for the salad.

Wednesday, January 16, 2008

Thai-glazed vegetable skewers


I'm going through that phase again - where I spend hours reading entire cookbooks. *so* fascinating! Of course, it doesn't help that I often end up hungry at the end of it - all those fabulous pictures and descriptions!

A couple of nights ago, I picked up one of my favourite veggie cookbooks - New Vegetarian by Celia Brooks Brown - a collection of truly innovative recipes. This is the same book that has the fabulous fajitas recipe that I'm always drooling over.


*drool*

As I was flipping through the pages of this book, these vegetable skewers pretty much jumped out of the book at me - they looked quite delicious and I had most of the makings - which gave me room for reworking the recipe :)


Thai spices are *so* delightful - spicy, sweet, tangy, a successful olio of flavours. And such a pleasure to work with, there was a time when I was indulging in a lot of thai cooking, but it has been a while now. But these skewers and the fabulous red curry that Jai & Bee just posted about has gotten me jumpstarted on thai dishes once again.


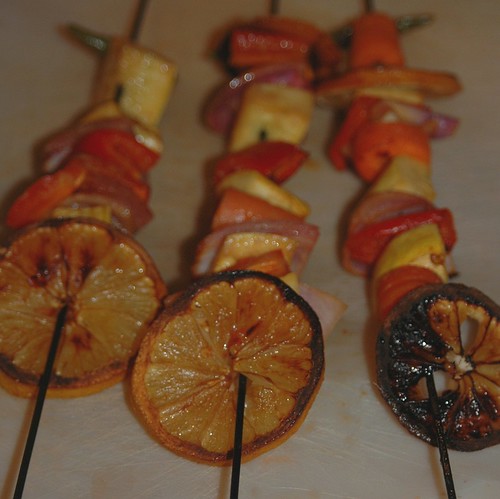
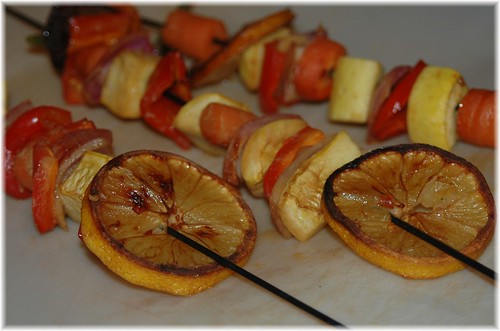
Thai-glazed vegetable skewers
Sweet, spicy, tangy goodness


Servings: 4 skewers


1 red bell pepper - cut into about 12 pieces
1 yellow squash - cut into 12 pieces

1 carrot - cut into 1" pieces

1 lemon - sliced

1/2 red onion - cut into wedges

3 thai chillies (you can go with serrano for a milder flavour, or even skip these)


Thai Barbeque Sauce


3 T coconut milk powder - mixed with 2-3 T of water

1/4 cup dark soy sauce

1 T brown sugar

1 T rice vinegar
3 kaffir lime leaves - chopped

1 stalk lemongrass - finely sliced

1 bird's eye chillies - sliced

1 large garlic clove - chopped

1/2 T sesame oil


Put the barbeque sauce ingredients in a blender and puree till smooth.


Thread the skewers with the vegetables, starting and ending with a lemon slice.
Brush the sauce generously over the loaded skewers and marinate in the refrigerator for atleast 30 minutes.
(Reserve the remaining sauce).

Put the skewers under a preheater broiler and cook, turning occasionally and basting with the remaining sauce, until tender and lightly charred.
(An alternative would be to cook on an outdoor grill or a stove-top grill pan).


How was it?

*drool*! I might just say that these are the best veggie skewers *ever* :)

Monday, January 14, 2008

More brussel sprouts love ...


Those fabulous brussel sprouts aren't really in season anymore. Bummer. As much as I'm a huge fan of seasonal cooking, we were still hankering for some yummy sprouts. After some searching, we discovered that the old favourite TJs still has some - such a relief!

What with the snow and feeling somewhat stranded and all, the time felt right for a quick, yet tasty meal - and them sprouts definitely contributed towards that. A simple stir fry seemed quite inviting with this crazy weather outside - snow, wind, hail, what not.


Anyone who reads this blog knows about my
everlasting brussel sprouts love :) Am glad this recipe is a worthy addition to the collection. Especially since it involves another current obsession - soy :)


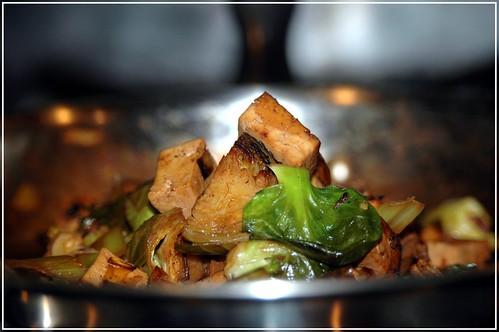
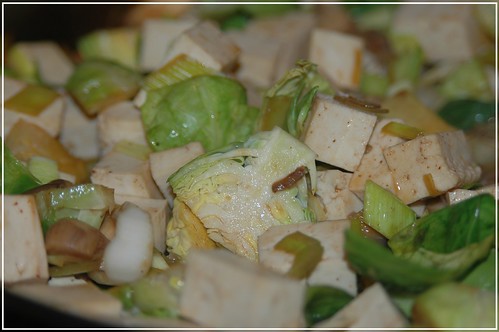
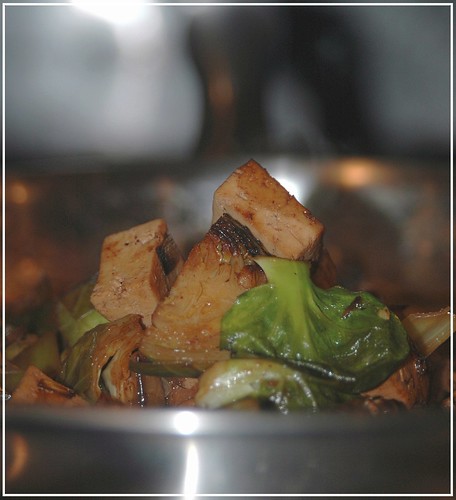
Quick Veggie Stir Fry
Brussel Sprouts, Mushrooms, Leeks ... Yum!

Servings: 1

5-6 brussel sprouts - quartered

1/2 cup of chopped leeks

3-4 oyster mushrooms - sliced
80 gms of extra firm tofu (about 1/5 of a regular packet)

salt
1 t szechuan suce (recipe below)

1 t sesame oil or oil spray
1/2 cup water


Heat the oil in a wok and saute the leeks till they start to brown.

Add the brussel sprouts and saute for 2-3 minutes.
Add the tofu along with the seasonings and stir for another 1-2 minutes.
Add about 1/2 cup of water and cook covered on low for 3-4 minutes till the water evaporates and the tofu seems marinated and the veggies get browned at the edges.
Add the mushrooms and saute for another 1-2 minutes before taking the wok off the stove.


NOTE:

Oyster mushrooms are really delicate and can break/disintegrate easily - so, it is a good idea to add them to a dish towards the end of the cooking time.


***

Szechuan Sauce
(adapted from Recipezaar)

1 T minced ginger
2 garlic cloves - minced

1 T crushed red pepper

1 T soy flour

1.5 T soy sauce

1 T chilli garlic sauce or sambal oelek

1 t vinegar

1/2 t brown sugar

1/3 cup of water (or vegetable broth)


Combine the ginger and garlic with the soy and chilli-garlic sauces in a saucepan and bring to a boil, stirring constantly.
Mix the soy flour in the water and stir till smooth before pouring it into the saucepan.
Add the vinegar and brown sugar along with the crushed red pepper.
Stir for a minute before taking off the heat.


What did we think?

The aroma was totally fabulous! At one point, I wondered if the taste would be a letdown after the fabulous smells. I was wrong - those fabulous sprouts never let me down :) *so* good!

Soy pancakes?!! Not kidding! :)

After the marathon cooking sessions over the last few days for the mega party last night, tonight called for a simple, light dinner. Hmm ... after poking around a bit, I stumbled upon this crazy soy pancakes recipe from a collection of ultra healthy recipes from the Pro Club! I was always skeptical about trying any of these 20/20 lifestyle recipe handouts available there, but after I spent some time reading them earlier tonight, I must say that I've revised my opinion. Some of these actually look pretty good!

So, soy flour rocks! It makes for a really light batter - quite perfect for pancakes, actually. And it is the perfect texture to serve as a thickening agent - an attractive alternative to corn starch. And apparently, since it can add moisture to baking products, apparently it is also a perfect alternative to eggs in most recipes! That is really good to know, I can't wait to try some breads and cakes with soy flour! Weeeeeee! *exciting*!

The recipe that caught my eye tonight was one for savoury pancakes with a cilantro chutney. Hmm ... adais and oothappams are probably closest to what I could consider savoury pancakes, so this looked really intriguing. The original recipe called for cauliflower, but I decided to go with a base of onions and red peppers instead - turned out to be a great idea. And the cilantro topping was perfect!


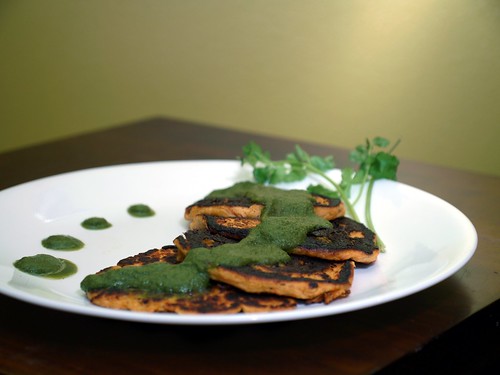
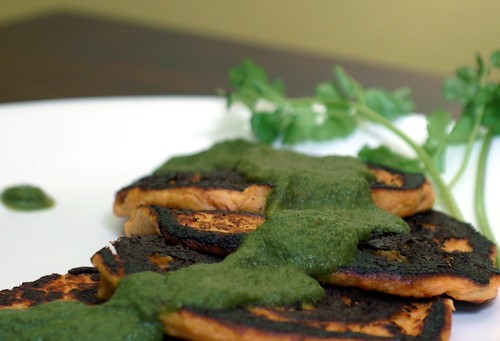
Savoury Soy Pancakes
They'll melt in your mouth!!!


Servings: 4 pancakes

1/2 cup soy flour (defatted variety)
1/3 onion
1/2 red bell pepper
1 thai green chilli
1/2 t salt
Oil or oil spray

Grind the onion, bell pepper and green chilli into a puree.
Pour this puree into a mixing bowl and add the soy flour, stirring constantly.
Add 2-3 T of water to form a really thick batter.
Season with the salt.
Heat a griddle and pour out dollops of the batter onto it.
Flatten the batter to form small pancakes and lightly douse with oil spray.
Let each side brown, before flipping or removing the pancakes.

NOTE: The batter needs to be really thick, not runny - soy flour does not really make for thin crepes of sorts and can totally disintegrate if the batter is too thin.


***

Cilantro chutney
Go green!


Servings: 1 cup

1 cup cleaned and trimmed cilantro leaves
1" ginger
2 cloves garlic
2 T lemon juice
1 green chilli

Grind all the ingredients in a blender, adding a little water if needed.
Season with salt if needed.


Good? Better?
*drool*! These were awesome! Seriously! Can't wait to eat them again! And the whole process took about 1/2 hour.

Seriously, soy flour rocks! And another WHB entry (Kalyn's brainchild) - this goes to Rinku from Cooking in Westchester.


Friday, January 11, 2008

And the beet obsession continues ...


Over the last several weeks, I've been feeling a lot of beet love - like this time and this and several more that I didn't write about - Maybe this blog should really be Cooking from Beet to Z? :)

Well, January hasn't had a beet post yet, and this simple daal recipe was so light and flavourful that we just have to talk about it! I was originally hoping to concoct a marinated beets + moong sprouts salad, but on a cold winter night, the craving was for something warm and heartier. Seriously, it feels like January has been one giant wet blanket, cloudy and rainy all the time, I'm totally ready for a sunbreak!


In this recipe, we went with a simple stir fry of red onions, beets, some yellow squash and cherry tomatoes finally topped off with cooked masoor daal. The seasoning was really simple too - cumin and a dash of fenugreek. But the best part of it was the generous squeeze of Meyer lemon juice at the end - this totally livened up the dish and imparted this sweet-sour flavour that went really well with the dominant beet tastes.


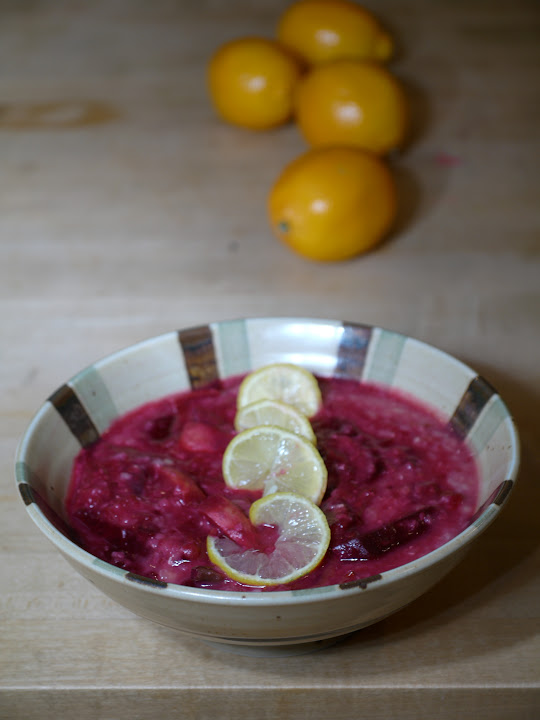
Beet Daal
With a generous dash of citrus love!

Servings: 2

1 cup of masoor daal

1/2 red onion - sliced long

2 beets - peeled and julienned

1/2 yellow squash - sliced long
4-5 cherry tomatoes

3-4 thai green chillies - sliced long
1 t cumin seeds

1 t sesame oil

1/2 t fenugreek seeds - freshly roasted and ground

kosher salt
juice of 1 Meyer lemon

Cook the masoor daal on the stove or in a pressure cooker till done (I typically use 1.5 cups of water for a cup of masoor daal)


Heat the oil in a wok and roast the cumin seeds till brown.

Add the onions and green chillies and saute till the onions start to brown.
Throw in the beets and squash and saute for 4-5 minutes.

Now add the tomatoes along with the fenugreek and cook covered on low for another 2-3 minutes.

Season with salt and saute for another 30 seconds.


Stir in the lemon juice just before serving.


Good?
We loved it! Simple flavours that made for a delicious daal!

Friday, November 30, 2007

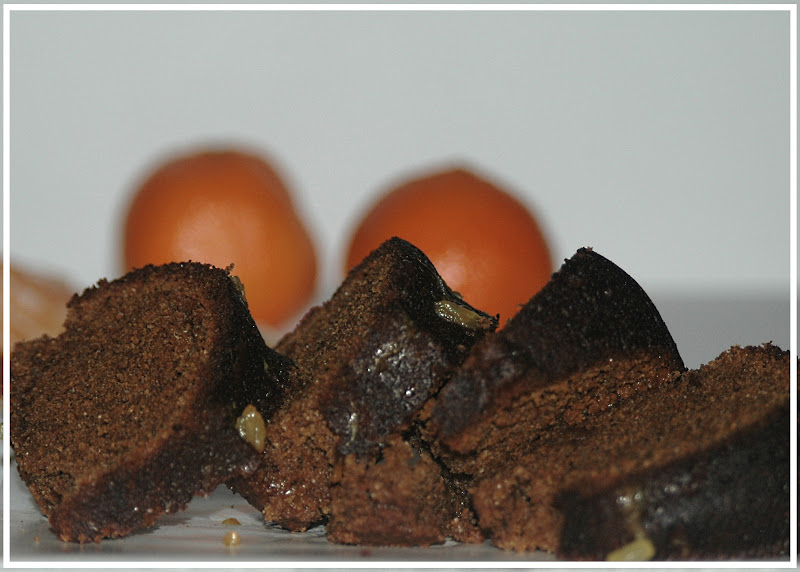
Orange-Almond-Chocolate Cake ... and it is Vegan!


Phew! Ok, I *might* squeeze this post in within the deadline for one of my fave events Vegan Ventures - guess it depends on how fast I can type! Yes, apparently, I love this event, but I haven't submitted a post for it yet. What can I say, I'm a lazy bum? :)

After the last almost-vegan posting, I did my homework well before attempting a truly vegan dessert - I actually found it harder than I'd imagined! As I poked around several dessert recipes, I found a vegan orange-almond cake recipe from an all-time favourite book - Didi Emmons' Vegetarian Planet. But surprise of surprises! Didi wasn't vegan all the way! Her recipe used a couple of kinds of honey! Wow, guess she doesn't quite meet Suganya's standards here :)

BTW, molasses rock! I'm in love with them. Truly, madly, deeply. When I was a kid, I used to have this gooey multivitamin concoction called Vidalin M - I absolutely loved the syrupy flavor of this medicine. And molasses totally reminds me of this :) So, I liberally swallowed a few spoonfuls of molasses as I baked this cake. Yum!

So, I reworked this recipe to skip the honey. I also went with whole wheat flour - this ended up in a slightly denser and more chewy cake, but it actually absorbed the citrus drizzle really well - so no complaints there. I'm glad I skipped the chocolate icing in the original recipe and went for the citrus glaze instead.


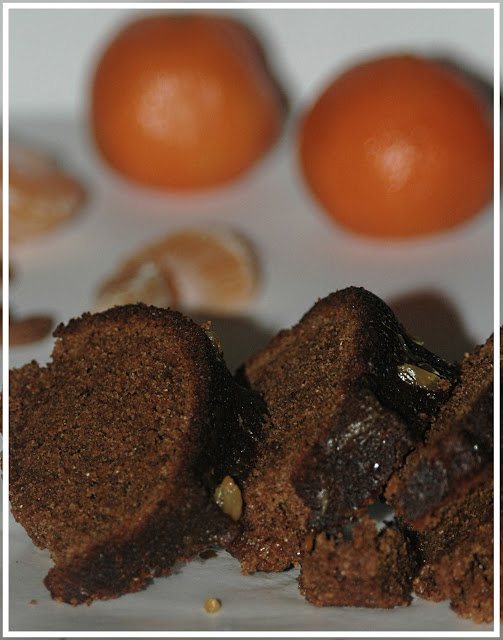
Orange-Almond-Chocolate Cake
No creatures required :)

Servings - makes a whole bundt cake

1 cup almonds - lightly toasted
2 cups whole wheat flour
1/2 cup margarine spread (Earth Balance)
2/3 cup of molasses
1.5 t baking powder
1/2 t baking soda
1/2 t salt
1 cup (+ 1/3 cup) chocolate soy milk
2 T grated orange rind
1 t vanilla extract

Heat the oven to 350 F.

Grind the toasted almonds in a food processor to a fine powder.
In a large bowl, mix the flour along with the almond powder, baking soda, baking powder and salt.
In a smaller bowl, mix the softened margarine along with the soy milk, molasses, vanilla extract and orange rind.
Add half of the liquid mixture to the flour and mix well.
Now add the other half and continue mixing till well blended.
If more liquid is needed, use the extra 1/3 cup of soy milk to get the mixture to blend completely.
The batter is not of a dropping consistency like most cake batters, instead it is really thick and gooey.
Pour (or rather scoop?) the batter into a greased bundt pan and bake for 40 minutes.
Cool for 15 minutes before tipping over onto a plate or cooling rack.

Citrus Drizzle

1 T margarine
1/2 cup orange juice
2 T crushed orange bits
1 T molasses
a few drops of amaretto extract

Heat all of the above in a saucepan with constant stirring until thecontents starts bubbling.
Take off the stove and pour onto the cake.

Ok, this turned out waaaaaayyy better than I expected. The cake was a little chewy courtesy of the whole wheat flour, but that was to be expected. The drizzle turned out really tasty - the orange explosion was *so* good! :) The one thing I'd definitely do differently next time around is probably use regular soy milk instead of the soy chocolate milk - it seemed like the chocolate milk overpowered the almond flavor.


Damn! Past midnight! Oh well, Suganya, you get this anyway :)

Sunday, November 25, 2007

Yams - curried, not candied

Sra threw out this crazy challenge a few weeks ago - Grindless Gravies!! With a zillion conditions to boot! :) I think I spent more time thinking about it than I finally spent cooking! Very clever, Sra - this event has made for more conversation than any others recently :)

So, no ready-made gravies - obviously! And no premade/frozen gravies - clever! And no lentils or yogurt-based gravies - yes, that would make it too easy! :) This was actually getting more interesting by the minute :) As I was poking around several cookbooks, I stumbled upon one of my favorites - Vij's Elegant Inspired Indian Cuisine. And then I stumbled upon Suganya's rendition of a vegetable dish from this book. Hmm ... I could rework this to be more gravy-based and use completely different vegetables that were more in season. I finally went with yams and corn - both part of the Thanksgiving theme and available in plenty at PCC.


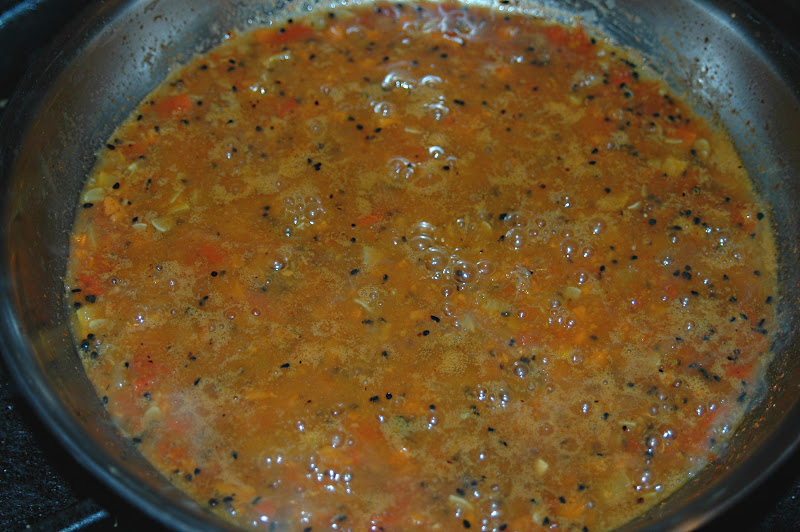
Curried Yams with Corn and Tomatoes

No grinding required :)

Servings: 2

2 medium-sized yams - sliced into thin half-moons
1.5 cups of corn kernels

3 roma tomatoes - finely chopped

1 yellow squash - chopped
3 leaves of bokchoy - chopped
1 t mustard seeds
1 t cumin seeds
1 t kalonji seeds

1 T coriander powder
1 T cayenne pepper powder
1 t sesame oil
salt


Heat the oil in a wok and toss in the mustard seeds.

Once they splutter, add the cumin and kalonji seeds and stir for a minute.

Now add the tomatoes, squash and a handful of the yam pieces along with the powder spices and salt.

Saute until the veggies are softened and pulpy.

Add about 1 cup of water and gently mash the mixture.
Cook for about 5-6 minutes with occasional stirring.

Now toss in the corn and remaining yams and simmer for another 4-5 minutes.
Yams actually cook really easily (a lot faster than potatoes), so careful about overcooking these - the idea here was the preserve some chunky yams in the tomato-squash-yam gravy.


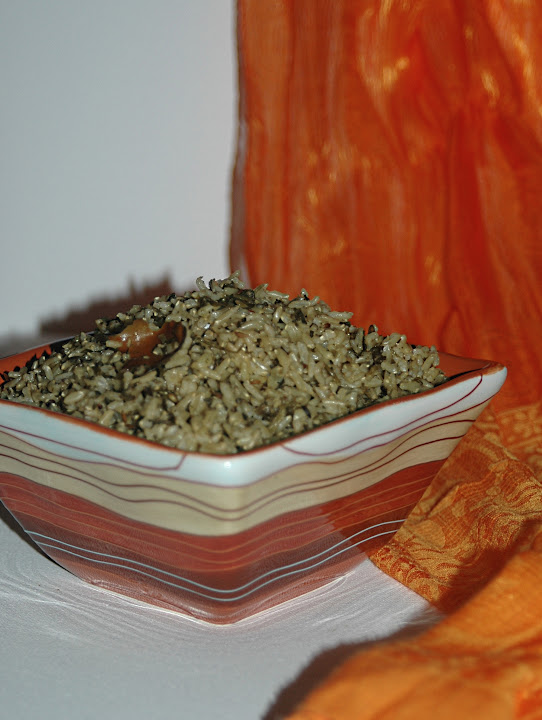
Ok, so, what could we eat with this Sra-dish? :) We had a bag of frozen methi that we wanted to use up - first time ever that we were going to use that! I have such a hard time using any frozen greens, especially methi - it is so earthy, I can't imagine the flavors would be preserved through a freeze-thaw. Well, it wasn't! But the methi pulav turned out pretty good - very nutty and chewy actually because of the brown basmati rice. The end result was pretty decent.


Nutty Methi Pulav

No grinding here either!


Servings: 4

2 cups of brown basmati rice
2 cups of thawed methi leaves

4 red chillies

1 T cumin seeds
1 T garam masala (I use a homemade version, but pretty much any store-bought masala should do too)

1 t olive oil
salt


Wash the rice and dry it in a plate for about 10 minutes.
Heat the olive oil in a saucepan and saute the cumin and red chillies in it.
Add the rice and saute for about 2-3 minutes, constantly stirring.

Now add the methi leaves along with 4 cups of water.
Toss in the salt and garam masala and stir for 1-2 minutes.
Cook covered on low till the water is absorbed and the rice is fully cooked.
(If the rice does not seem completely cooked, add another 1/2 cup of water, stir and simmer for another 3-4 minutes)


We really liked the combination of this rice with the chunky yam curry - I think the only thing that could've made it better would've been a raita. Or maybe a yogurt-based gravy? But Sra wouldn't want that! :D

'k, Sra, have fun with this one! :)

Monday, November 19, 2007

Some more noodlin'


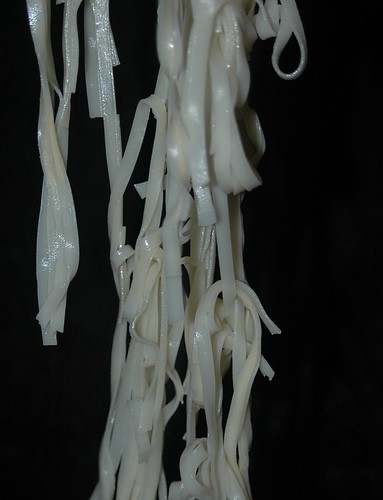
This pic goes to Bee & Jai of Jugalbandi for Click!

Details:
Camera: Nikon D70
Lens: Nikon AF 28-105mm

It has been a while since I cooked noodles of any kind - some sort of (bad) record given how much I love wheat in general - noodles, pasta, rotis, upma ... mmm! They all make me quite happy :) Everytime I read about diets, especially those carb-phobic ones like Atkins and South Beach - I cringe in pain. How can life exist without wheat? I could live without rice, but without wheat?! I would probably shrivel and die, my cells would wilt in despair. Hmm ... I'm getting a little insecure now - maybe I should be making some rotis right away so I know that tomorrow will be a wheat day! :)

So, why am I on this triticum eulogy? It all started when I realized last night that I hadn't Clicked yet. Eeek! One of the coolest events of the food blogosphere and I hadn't gotten in on yet. I decided cook and click and eat wheat - could life get any better? :)


(Noodles cobweb - should this be a Click submission?)

I had just returned from a successful PCC trip, armed with a fabulous brussel sprouts tree - don't you love those? It is such a cathartic experience plucking those sprouts off the branch. I'm a cabbage freak, so I can easily get excited about these mini-cabbage-like vegetables. After poking through a few cookbooks, I hit jackpot with this simple, yet elegant brussel sprouts stir-fry recipe from an all-time favorite The Complete Encyclopedia of Vegetables and Vegetarian Cooking - not a great vegan cookbook, but definitely close to the Moosewood and Field of Greens cookbooks in terms of diversity of recipes.

I upped the zing in the recipe by adding quite a bit of ginger, used onions instead of leeks and added spicy marinated tofu to rework this recipe with noodles.


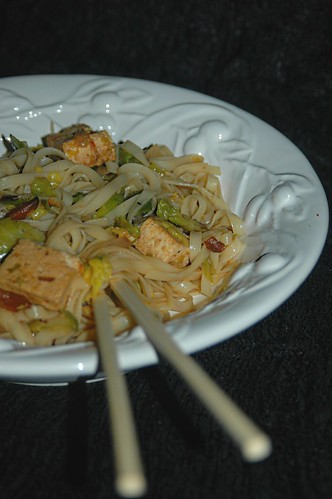
Noodles dressed up with Brussel Sprouts Stir Fry
and ginger, almonds and onions too!


Servings: 4

8 oz Whole wheat egg noodles
12-14 brussel sprouts - cut into 1/3" wide slices
1 small red onion - sliced long

a handful of slivered almonds

1.5" ginger
1 T peanut oil

salt

8 oz extra firm tofu

Marinade
:

1 T sambal oelek (I made this, but you can get it at any asian store)
2 T soy sauce
1 T rice vinegar

1/2 t safflower oil

Preheat the oven to 350 F.


Mix the marinade in a baking pan (maybe a loaf pan).

Dice up the tofu and soak the bits in the marinade.

Stick the baking pan in the oven for about 12-15 minutes (the tofu should start browning about now).
Cook the noodles per instructions - typically 4-5 minutes in water heated to a roiling boil.

Heat the peanut oil in a wok and saute the onions and almonds.
Add the minced ginger and saute for another 2-3 minutes.
Now add the brussel sprouts and saute for a few more minutes.

Add about 2/3 cup of water or vegetable stock - I just used the water left from cooking the noodles - starchy, but good!
Cook partially covered with occasional stirring for about 6-8 minutes.

Add a dash of soy sauce, salt to taste and some red pepper flakes.
Add the tofu and saute for another minute.
Take off the stove and toss the veggies with the noodles before serving.


Opinion?

*really* good.

A few years ago, I took on the challenge of trying to cook brussel sprouts for a couple of brussel-haters. Well, I succeeded - they ate what I cooked and liked it to boot, but always insisted that I had taken the BS flavor out of it - I had reworked the sprouts to act as mere carriers for the spices, which is what made them eat it all :)

Well, this time - the brussel sprouts kept their identity. And yet, they tasted good. And gladly danced with the noodles! But I guess the litmus test would be when I make it for the Pupp - guess I'll have an update on this post sometime soon :)