Showing posts with label breads. Show all posts

Friday, August 29, 2008

Borek-ing again!


A few months ago, I waxed on and on about Boreks - those awesome Anatolian stuffed breads that I could potentially live on forever (along with a plethora of fruits and wine and cheese and nuts and ...) :)

I have no idea why it took a few month to try make these boreks again - maybe because we indulge in other bread variants so often? These are pretty damn close to the more traditional indian stuffed naans and parathas, they even seem like distant cousins to the calzone. I poked around more trying to find variants of this bread/stuffing and found that the traditional Turkish borek recipe actually uses phyllo dough! Very different from the street food recipes that Anissa talks about in her books.


Borek Edition I used a simple feta-parsley-broccoli filling - somewhat traditional and quite delightful. This time around, I chose to go with an interesting olio of flavours - a slew of onions and leeks, olives, some tomatoes, cheese ... and nuts! I wandered by the delightful Vios Cafe a while ago and picked up some Kasseri cheese and greek olives. Seriously, their Kasseri is probably the best I've found in the seattle area and definitely more well-priced than Whole Foods or any other specialty store! Yay for local ethnic markets :)

I used the same dough recipe outlined in Borek I, just with a different filling.


Onions'n'Olives Borek
Bread is *good*! Stuffed bread is mo' bettah! :)

Servings: for 4 stuffed boreks

Filling:

1/4 red onion - chopped
2 cups leek greens - chopped
3 scallions - chopped (along with the stems)
12-15 olives (mix) - pitted and coarsely chopped
1/2 tomato - chopped
1 cup kasseri cheese - grated
1 T red pepper flakes
1 t salt
3 T - ground almonds
1 t olive oil

1-2 t olive oil for cooking the boreks

Saute the onions, scallions and leeks in the olive oil till lightly browned.
Mix these with the rest of the ingredients and let it sit for about 5-10 minutes.

How to work it

Flour the work surface and a rolling pin.
Take a ball of dough and roll it out as thinly as possible, flouring it all the time till a 12" diameter circle is formed.
Sprinkle a handful of the filling over the lower half of the dough.
Fold the plain side of the dough over the filling to make a half circle.

Heat a nonstick griddle over medium heat.
Place the filled dough on the hot griddle and cook for a couple of minutes on one side.
Brush the dough lightly with olive oil.
Flip the pastry over, brush with oil and cook the other side for another 1-2 minutes. Both side should end up crispy and somewhat golden.


Opinion?

About the same opinion as last time - these KICK ASS! They're so easy to make too! Kasseri rules. Adding the ground almonds lend a great consistency to the filling - that's a real winner. And the generous helping of red pepper flakes totally kicked up the heat - love it!

I think Borek III will be happening pretty soon, these things are addictive :)

Tuesday, August 26, 2008

That long overdue bread pudding!


This is turning out to be a relatively quiet morning ... well, except for the fact that Vodka has played nonstop for an hour and is now demanding food - whining, grovelling, even rubbing his nose against his food bin! But this is the time to be that unyielding dog-momma. He has an appointment in a few hours with the oncologist - and yes, it means he needs to show up on an empty stomach. And yes, that means sheer hell for me trying to keep him distracted.

How on earth do you distract a labrador retriever from food, anyway???

So, what could be a better idea than a blog post for distracting myself from distracting him from food, huh? :)


This is a seriously long overdue post - a few weeks ago, I blogged about this awesome mango yogurt ice that we ended up serving with a quick'n'easy bread pudding - and it totally kicked ass. Well, it is finally time to talk about that bread pudding! The mango yogurt ice was truly refreshing and incredibly flavourful, but it definitely needed some substance to go with it, something a bit dense, chewy, moist. And it seemed like a bread pudding was the most obvious answer.

I've always served my bread pudding with a decadent whiskey sauce, but this time was going to be a little different. I wanted to skip using any cream this time around, opting for indian flavours instead. That's how the cardamom ended up being the primary flavour in the bread along with a honey-based sauce. There really was little need to add a super creamy, rich flavour since we were gunning for a light summery dessert anyway.

Cardamom-Honey Bread Pudding
Replete with flavours and aromas of India!

Servings: 4-6 (or maybe just 1?!!)

6 thick slices of crusty, stale french bread
1 t freshly ground cardamom powder
3 T honey (this was from the Ballard Farmers' Market - among the best I've ever tasted!)
1 t vanilla
2 cups nonfat milk
1 egg or 1/4 cup of egg substitute
1/4 t grated nutmeg
a pinch of salt

Shred the bread into 1" cubes and arrange these pieces, tightly packed into a baking dish (preferably glass). The dish I used was a 6"x6" glass pan, about 2" tall.
[Most recipes call for just packing the slices tightly into the dish, but I prefer to shred the bread into cubes before packing them in - this seems to let the bread take in a lot more of the flavours. Plus you end up with many more crispy ends - Yum!]

In a large bowl, whisk the egg, milk, cardamom, vanilla and nutmeg till well-blended. Now, add the honey and whisk some more till the liquid is frothy.
Pour the liquid over the bread and let it stand for about 1 hour, pressing the top every 10-15 minutes with a spatula (this ensures that the top doesn't dry out).

Bake the pudding for 50 minutes or till the top is puffy and browned. Let it cool on a rack for 20-30 minutes before cutting up.

We skipped the traditional whiskey sauce and served it with somewhat-melty mango yogurt ice.


Opinion?
Deeeeee-liiisshhh! This was so damn good! And so easy to throw together. Mango seriously kicks ass. And it totally danced with the cardamom/nutmeg flavours.

*happy*

Friday, July 18, 2008

Eating local and all that good stuff ...


Local ... sustainable ... organic ... earth-friendly ... call-it-what-you-want ... All the buzzwords making the rounds in the food world recently.

A handful of years ago, the air started teeming with the concept of organic foods. Horrendously expensive, but Oh! so right and healthier and tastier ... I can honestly say that with some fruits and vegetables, we could taste the difference - like tomatoes and peppers and most greens. And cherries for sure! But with others ... nah! Couldn't quite savour the difference. But we loved the idea of hitting the local farmers' markets and buying our produce and starters there. Especially after growing up in India where there are vendors trolling the streets selling their produce and it is so very common to walk to the little store at the end of the street to buy veggies for the evening's dinner, it felt so right to shop local, pick and feel the veggies before dropping them into our baskets. I still remember the first time I bought green beans at a local market -

K strides up confidently to this vendor at the Redmond farmers' market, picks up a green bean or 3 and snaps them between her fingers!
Vendor's jaw drops!
K looks up at him, wondering if he's having a seizure! Isn't that how folks check for good beans? That's how the mum did it, right?
Vendor recovers and starts laughing! And slowly asks with a smile "Do you HAVE to snap the beans before you buy them?"
K turns beet red, realizing her cool "snap-the-bean" tactic is not so cool here! And finally learns to just buy the damn green beans without obsessing about snapping them.

Ok, so what does this incident have to do with all that local, organic goodness? Umm ... nothing. I just felt like telling a story, that's all! :)

Today, it seems like we're way past organic, which I personally believe is a great thing. We're not just trying to live by some ostensibly vaguely defined standard of agriculture, but we're going several steps beyond. We're seeking out local foods, sustainable foods that are developed without monocyclic farming methods. We're looking to form bonds with the local farmers that bring those delicious beets and greens and turnips and garlic snapes to our plates.

Yes, I very much like to have a personal stake in what I'm writing about.
~ Michael Pollan


So, talking about eating local ... we love it! Truly, madly, deeply! Pretty much all our veggies come from the veggie patch or a local market, except for the occasional indulgence in something that has been on a plane. Honestly, we don't know if it helps with all that carbon footprint stuff that is making the rounds everywhere, but it sure makes us feel good. Plus, we have a connection with several local vendors, the tomato guy even asks me how the plants are doing - they're quite happy, thankfully! I would feel terrible to tell him that I did the plant in!!!


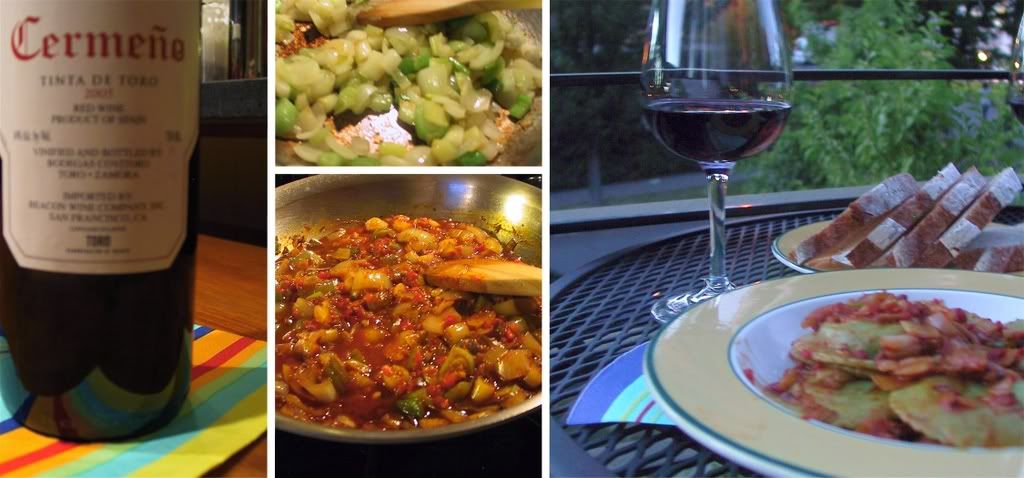
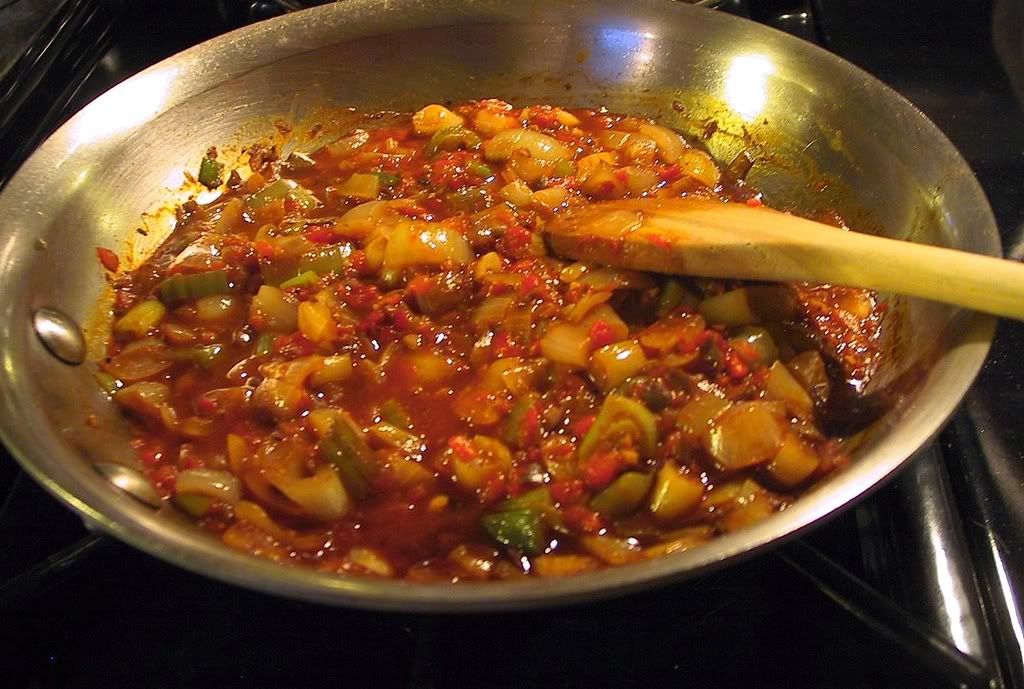
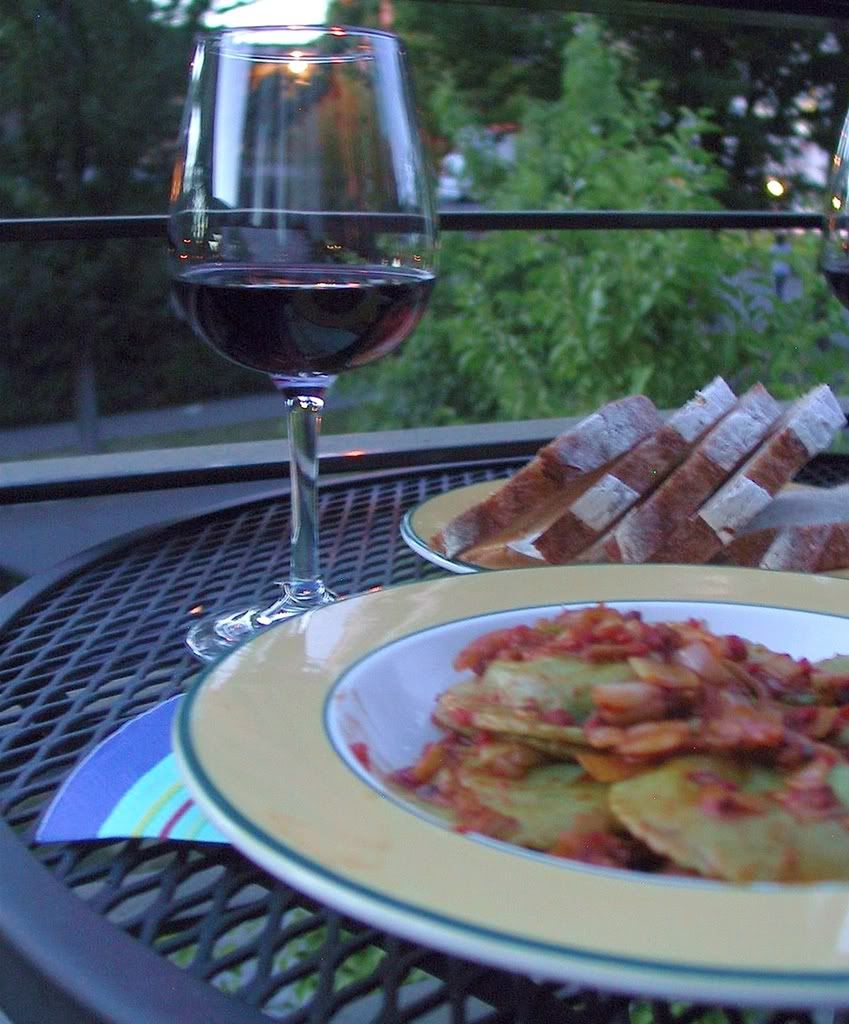
So, this meal was one of those mostly local ones. Took all of 15 minutes to throw it together and tasted so blissful, I'm still talking about it! All that it took to make this meal:

Local:

* A slew of garlic and vidalia sweet onions from the market
* Spinach and Roasted Garlic Ravioli from the pasta guy (La Pasta?) at the Madrona farmers' market
* A fabulous sourdough loaf from La Panzanella
* Roasted Red Pepper tapenade from La Buona Tavola
* Yummy Cirrus Camembert from Mt.Townsend Creamery
* Gouda from Golden Glen Creamery

Not so local:

* A really tasty bottle of Tinta de Toro that Abbie heartily recommended - super fruity and luscious!
* And the rest of the glue (spices, oils, etc) We're not obsessively local about our ingredients, but we definitely keep an eye out for fresh local produce and wines as much as we can. Yes, there is definitely a feel-good factor there :) But the biggest kicks (for us) are the insanely awesome quality of the foods and the whole community-bonding thing.

As for this meal, what more could we ask for - fabulous ingredients, perfect company, warm summer evening. Sheer bliss!


And yes, substandard pictures, but whatever! :)

Wednesday, July 2, 2008

Squash parathas to celebrate ...

a return to blogging?

a manic work life finally easing up?

a fabulous weekend?

summer finally coming to life?

life, in general?

All of the above, I guess! And here's hoping to get through the mountains of recipes waiting to make it out here!


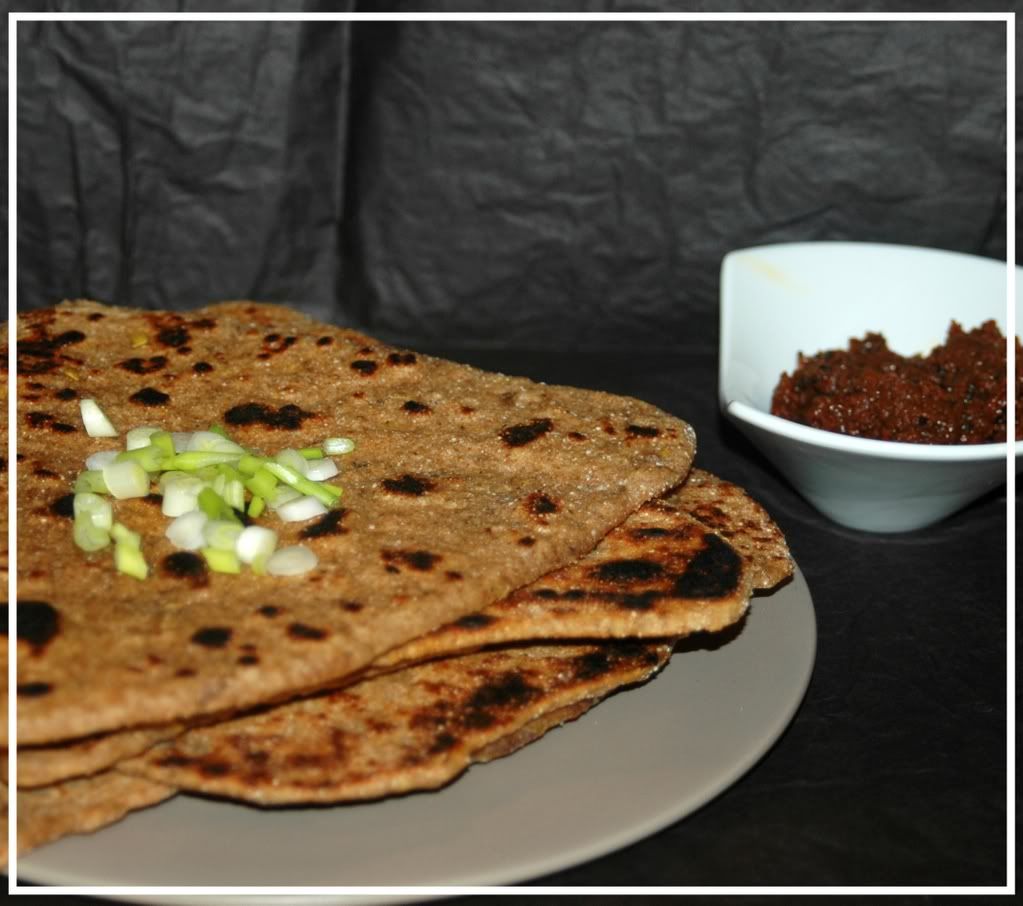
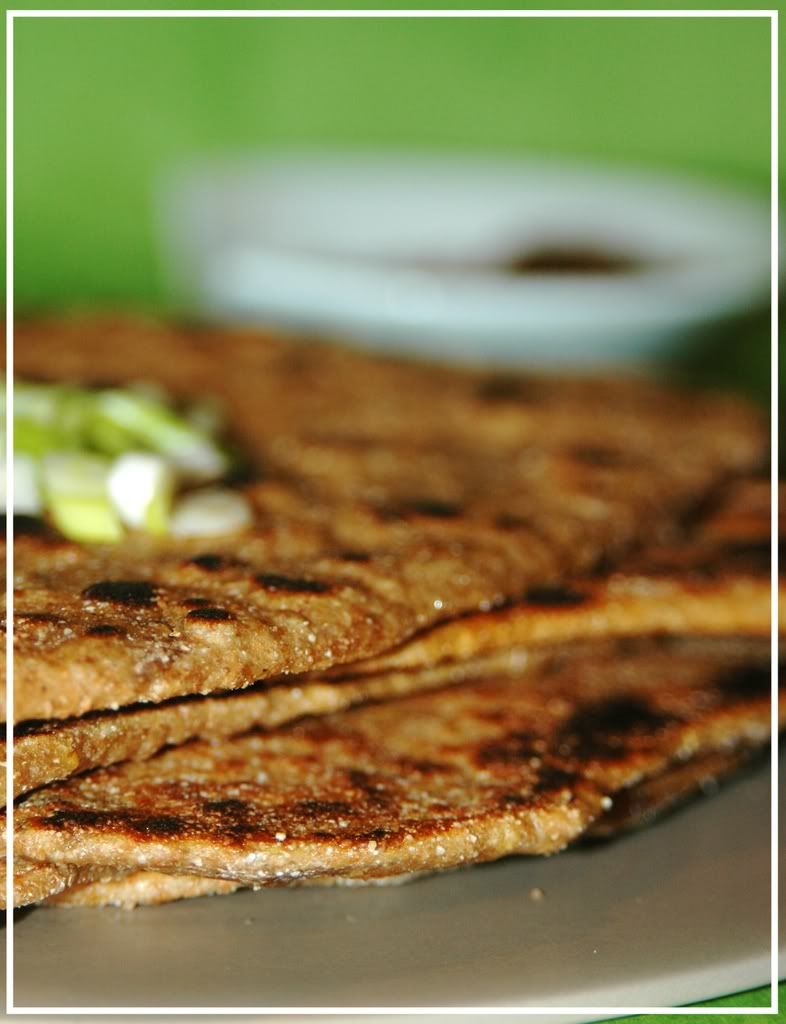
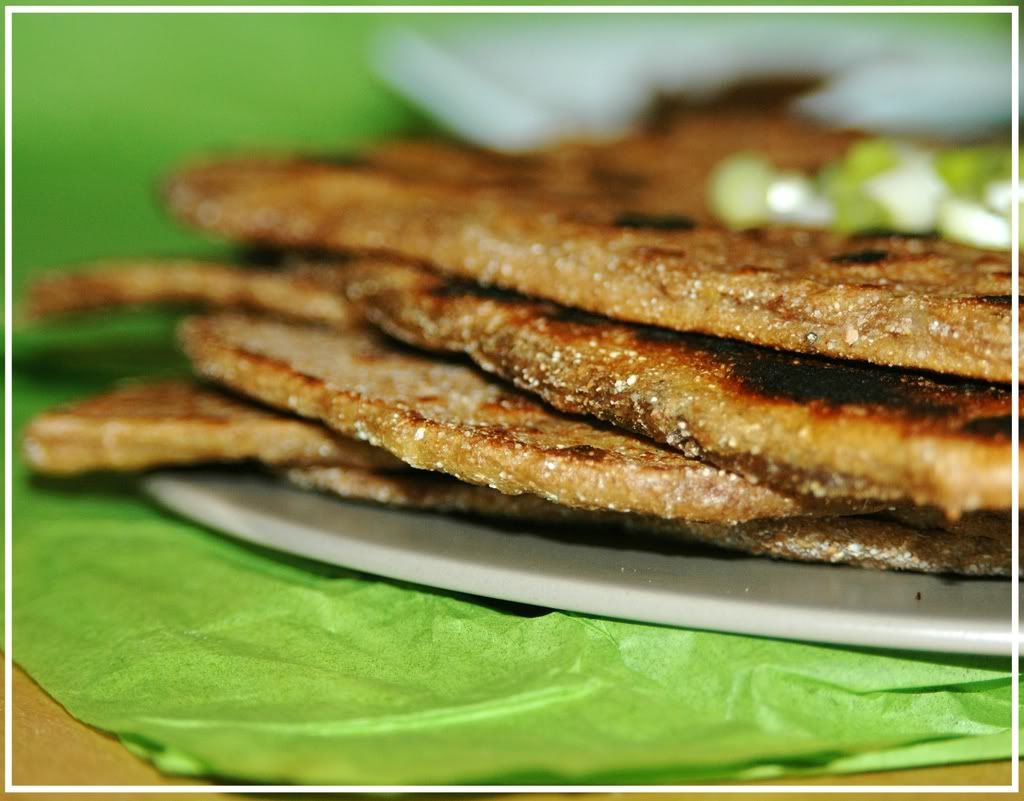
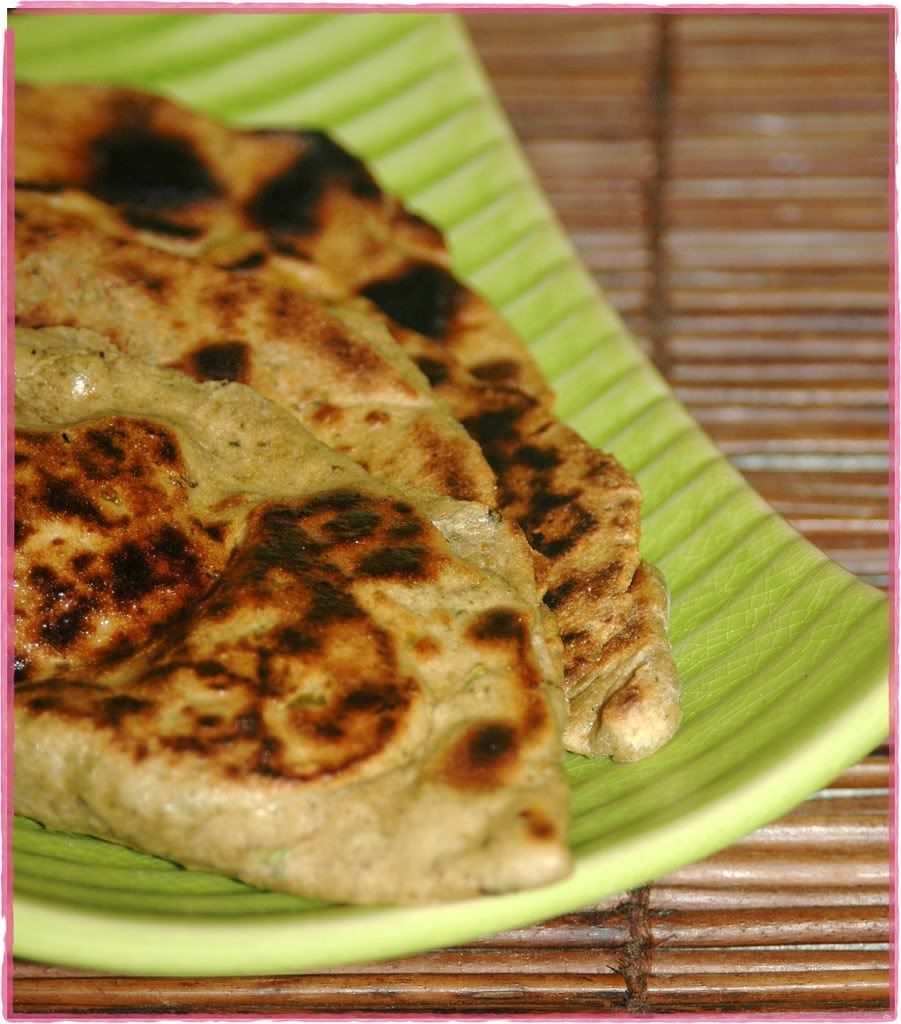
Tonight warranted simple comfort food - something healthy, quick to throw together? Something with desi flavours ... After poking around a bit, I settled on making some parathas. It has been a while since I handled that rolling pin, and I've been missing the cathartic experience of kneading the dough, making those balls, patting them out, rolling them, folding them, rolling them ... *so* relaxing!

Experimenting with stuffings in parathas is always exciting, we often play around with a variety of greens, cheese curds, tomatoes, onions, the works. But a squash variant was a first. I initially contemplated stuffing the parathas with a squash filling, but finally settled for just kneading it into the dough - definitely easier to work with, plus the bread turned out much softer! Also, instead of boiling/cooking the vegetables, I chose to grate the squash, mix it up with some spices and knead it into the dough instead.

I also wanted to play around with the dough a bit - so I threw in some coarse whole wheat pastry flour along with a 1/4 cup of corn flour add some earthiness and texture to the dough - always fun to get that chewy undertone!

“If thou tastest a crust of bread, thou tastest all the stars and all the heavens.”
Robert Browning (1812-1889) English poet


Squash Parathas
Moist, chewy goodness!

Servings: 8-10 parathas

2 cups fine whole wheat flour
1/2 cup coarse whole wheat pastry flour
1/4 cup corn flour
2 T olive oil
1/2 cup buttermilk
warm water as needed for kneading the dough
2 yellow squashes - grated (medium)
salt to taste
1 T ancho chilli powder
1 T sumac powder

Mix the flours in a bowl along with the buttermilk, salt, spices and grated squash.
Start kneading it, adding warm water as needed.
Knead it.
Knead it some more.
And when you think you're done, add the olive oil.
And knead for a few more minutes or till your arm is ready to fall off :)

Cover the bowl with a wet towel and let it sit for atleast 20 minutes.

When your arm has recovered and you're ready to roll out some rotis ...

Take a large ball of dough (about enough to fill your palm), pat it down and roll it out using flour as needed.
Fold the circular roti into a quarter and roll it out again in case you want some funky triangular parathas.

[NOTE]: Every once in a while, I get a hole in my head and forget to complete my thoughts :) Guess that's why I forgot to finish talking about how to make these parathas! Thanks for all the comments remind me to finish my damn sentences :)

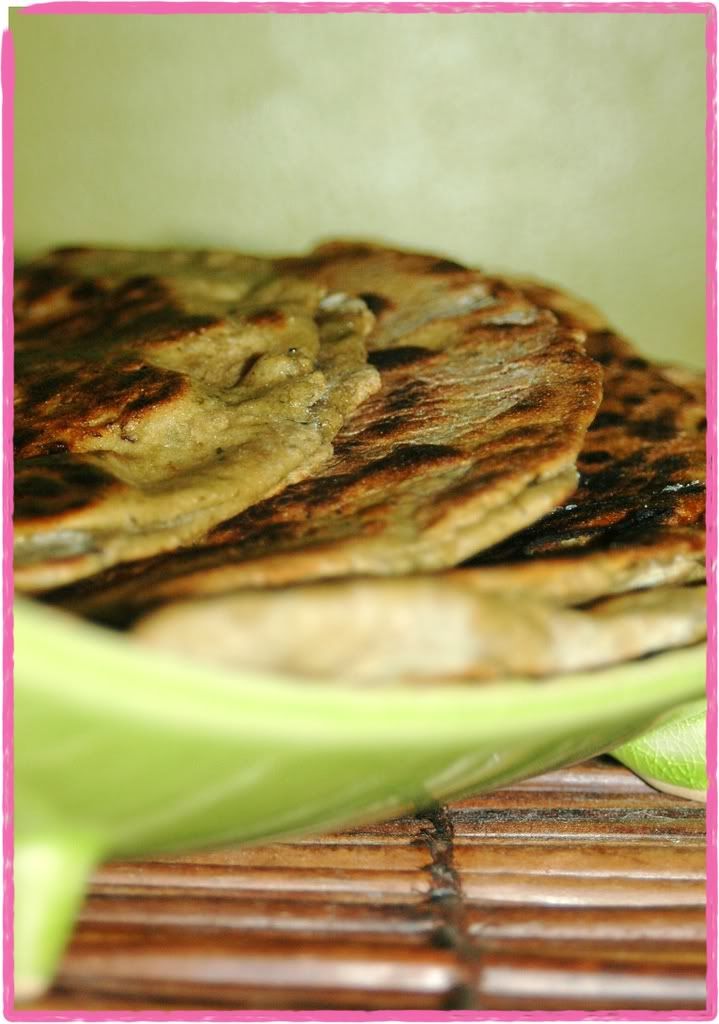
Once you've rolled the paratha out, put it onto a greased pan and cook. Once the bottom is mostly cooked, rub the surface with either a bit of butter or some oil (I tend to use grapeseed or sesame oil) and flip over. Grease the other side and cook till somewhat crispy and browned/blackened.

[I tend to store the cooked parathas covered till they're ready to be noshed on.]

Serve with homemade yoghurt and pickles - my choice for tonight was a spicy tomato pickle.


Opinion?
Simple, flavourful, chewy, earthy, very very happy! Adding the corn flour was a killer idea!

*burp*

***********

I know, I know, I'm super late in posting the roundup for Think Spice - Think Wasabi. What can I say, I'm a super lame duck :( But the dust from a manic work life is finally settling, so hopefully I can do justice to this in the next day or two.


***********

Whhoooaaaaa!!! Serious thunder and lightning out here! Very exciting :)

Monday, June 23, 2008

Coming back from the dark side ...

Are we blogging again? Huh??


Wow! I was almost convinced this blog was a goner!!! Work, work, work. No time to breathe, let alone blog. Pretty tragic, huh? As much as I love my work, I doubt if even I can survive another bout of being slammed like this! Seriously, something is quite wrong when the pictures just keep piling up ... to the point where I randomly stare at them and begin to wonder "When did I make that?? And how the hell do I make it again?!"

Yeeeeessshhhhh.

But life is creeping back to normalcy again. And it seems like I don't quite have writer's block - *phew*! Such a relief! I was kind of freaked out about not knowing how to quite start writing again. Absolutely abhor this feeling of being left behind - like the rest of the food blog world has moved on, you know? And I'm sitting here with my (proverbial) pen in hand, slowly emerging from work insanity, struggling to phrase a sentence or three.

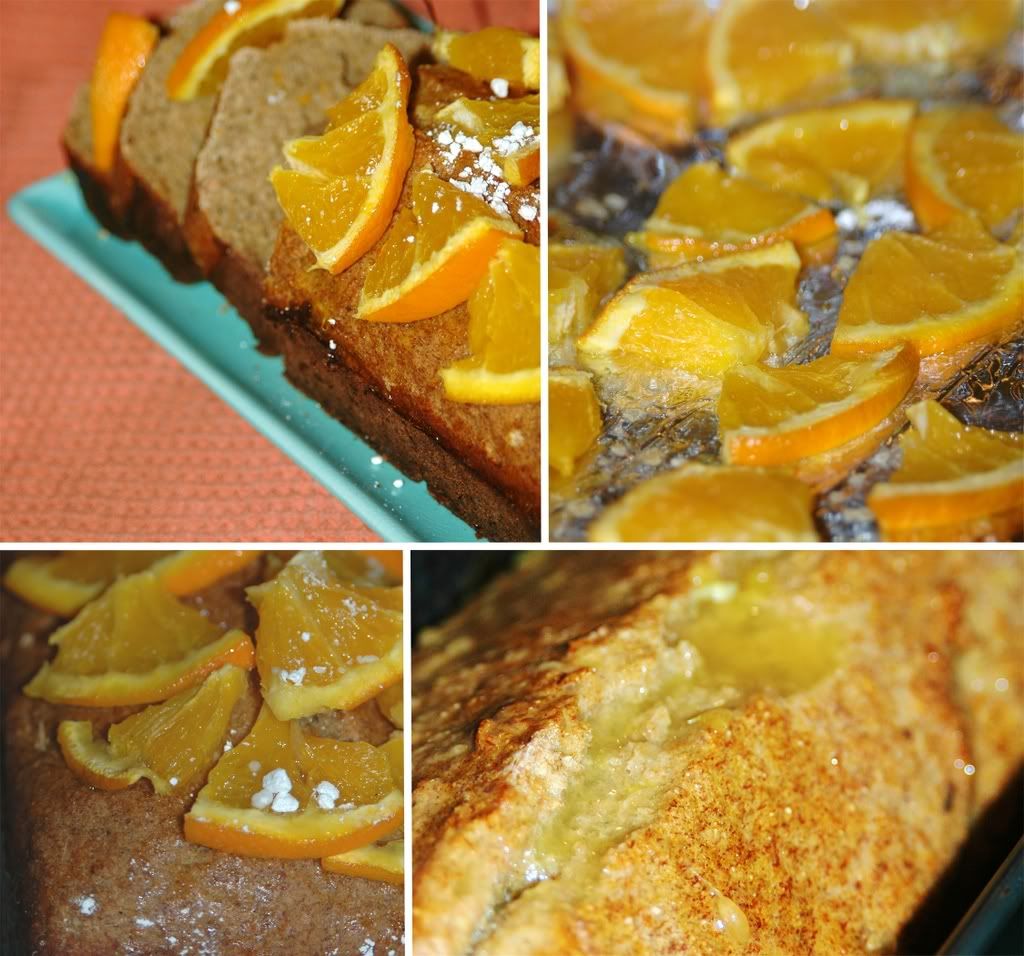
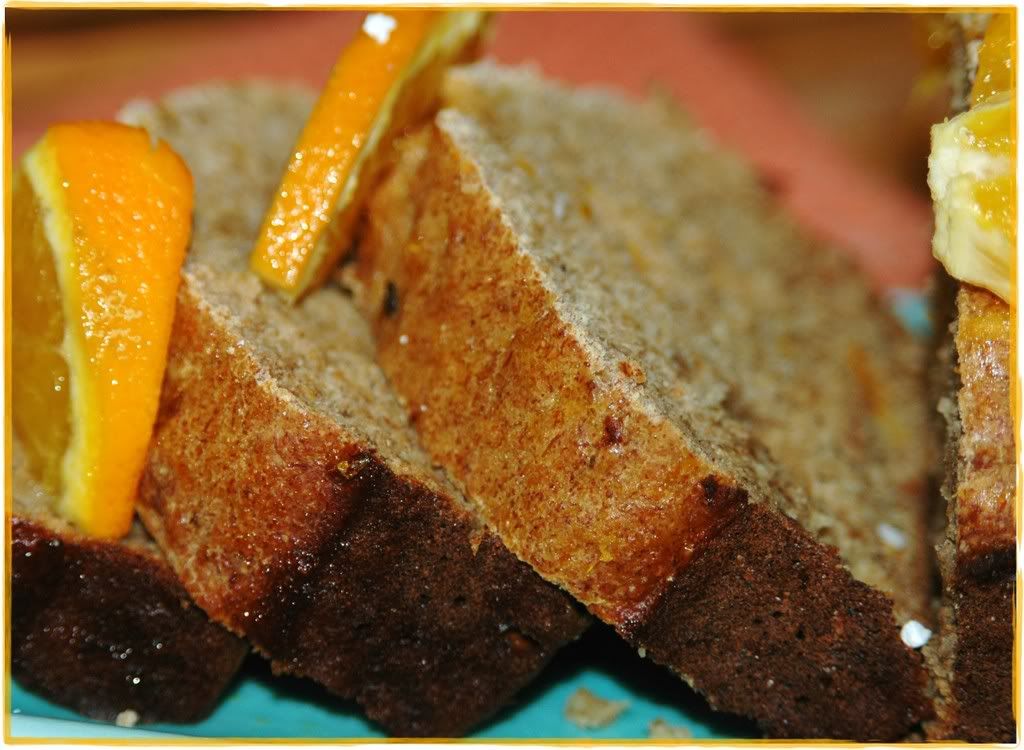
Well, over three sentences have been phrased. Yay! So, we can safely move onto a reasonably fit recipe to celebrate a safe return from the dark side :) - a simple, light and delicious banana-orange loaf. I just mentioned this recipe to Srivalli and she went "Oh man! Another dessert! Wow!" Well, she's right! Apparently, I hanker for breads and desserts a lot more than I realize! Yet, I don't seem to write about these as often as I'd like to ... wait! Guess that's probably because I'm not quite posting as often as I'd like to :)

********

Ok, back to this celebratory loaf - I based this on a pretty straight-forward recipe from Rosemary Wilkinson's The Ultimate Desserts Cookbook. Like always, I spent several minutes drooling over the pictures before embarking on baking it :)


Banana Orange Loaf
Light, simple, oozing banana and citrus flavours!

Serving size: 1 loaf

3/4 cup whole wheat flour
3/4 cup unbleached flour
1 t baking powder
1 t ground mixed spices (allspice, cinnamon, nutmeg)
2 large overripe bananas
1 egg
2 T sunflower oil
2 T clear honey
finely grated rind and juice of one small orange
4 orange slices - quartered
2 t icing sugar

Preheat the oven to 350 F. Brush a loaf tin with sunflower oil and line the base with non-stick baking/wax paper.
Sift the flours with baking powder and the spices into a bowl.

Peel the bananas and mash them in a medium bowl. Beat in the egg, oil, honey, orange rind and orange juice. Fold this mixture into the dry ingredients.

Spoon this mixture into the baking tin and smooth the top. Bake for 40 minutes or till firm and golden brown on top, and an inserted toothpick comes out clean. Turn out and cool the cake on a wire rack.

Now comes the fun part :)

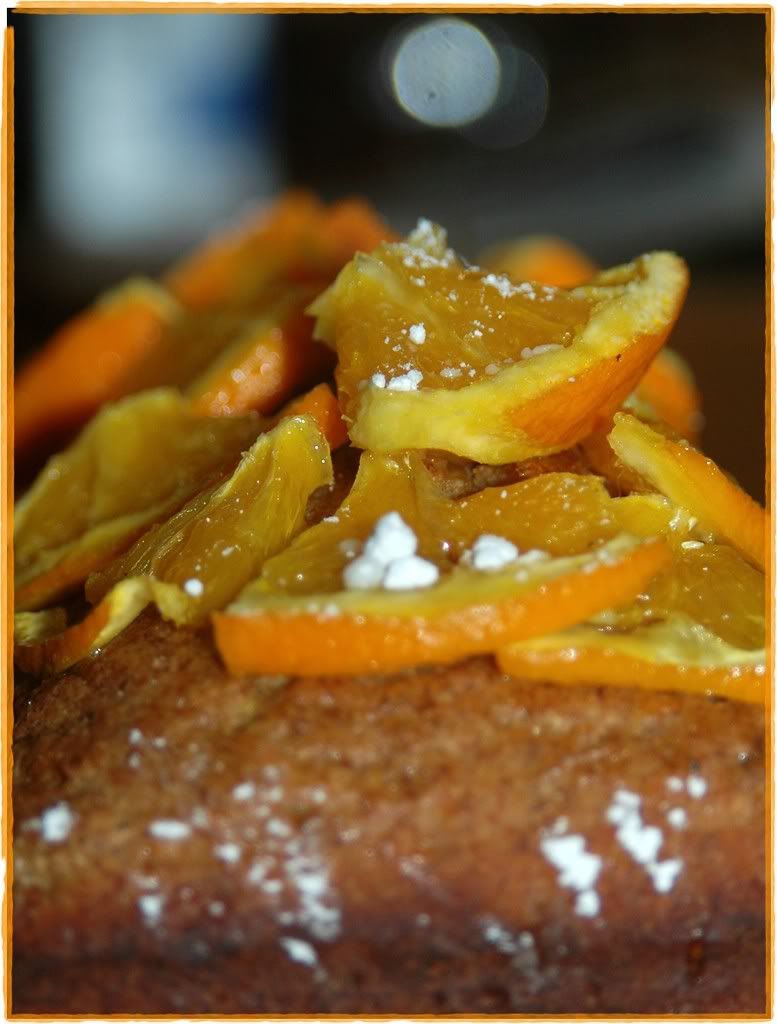
Sprinkle the orange slices with icing sugar and grill until golden and you get a funky baked citrus smell. Actually, I should amend the recipe here - grill double the number of slices mentioned in this recipe - only half the orange bits will end up on the cake. The other half? ... I guarantee those will go straight into your mouth :)

Decorate the cake with the orange slices (or whatever is left of them) :)

*********


Opinion?

Yum! Perfect back-to-blogging celebration. This recipe is light on fat - all of 2 T of oil for the entire loaf! You could even skip the egg and use just egg whites - though I would throw in a spoon of applesauce to go with it.
The banana+orange flavours are delightful, I even doused my slice with a couple of spoons of orange juice before digging in. Also, the overripe bananas kicked ass - nothing like super moist banana flavour to warm the soul :)

**********

More such recipes:

And now I'm off to catch up on the zillion blog posts that I've missed over the last couple of weeks! And yes, I need to start responding to all those emails too!

***********

IMPORTANT REMINDER:

:)

Don't forget to send in your Think Spice, Think Wasabi entries!

That's definitely my next post - a very offbeat nasal passage-scorching wasabi dish :)

And feel free to use this really neat logo that Sunita came up with. Sorry dear S, I meant to post about it earlier, but all this work mania threw me off kilter.


Thursday, April 3, 2008

'Boreking' some bread :)

"Mediterranean Street Food" - how can one not fall in love with this book? *sigh* As I turn the pages, I'm totally mired in nostalgia as I'm taken back to the souks of Fez, the bustling streets of Cairo, Monastiraki Square in Athens ... *sigh*. And then I start dreaming of wandering around Istanbul, sitting on a beach in Sicily and visiting the multitude of mediterranean destinations that I haven't been to yet! Damn this travel bug.

Anissa Helou is a master of weaving stories around street food - and who can resist that? Her book is a treasure trove of travel encounters, local foods, interactions with berbers and irresistable recipes of local foods that she samples as she hops from tea cart to sandwich stand to candy stall. Sure sounds like a good life, doesn't it?

I flipped the pages of this book, sighing as I read the blurbs, I could almost smell the foods that she was talking about!

*growl*

That was my belly! Guess it was time to find something to cook instead of dreaming of all the fabulous street food I could be noshing on.


Saj Borek.

That's where my eyes landed. Hmm ... this sounded like a cross between a calzone and a stuffed paratha. Saj Boreks are a specialty of Anatolia - the Asiatic area of what is modern Turkey (called Asia Minor in ancient times).

The traditional dough for saj borek uses a variety of flours - bread flour, all-purpose and whole wheat. The pastries work with a plethora of fillings - ground meat, potatoes, spinach and feta.
I didn't feel like a plain cheese filling or something as heavy as potatoes, so I went with a broccoli filling instead. That might just be one of the best things I've done all week!

:)


Saj Borek with Broccoli and Cheese
Yummy savoury street food

Servings: 8-10

For the dough:

3 cups whole wheat flour
1 t salt
1 t chilli powder
1/2 cup buttermilk
warm water for kneading

For the filling:

1 cup crumbled feta cheese
3 T flat-leaf parsley
2 medium heads of broccoli - chopped
1 T harissa

To finish:

1-2 T butter - melted

Sift the flour into a large mixing bowl, add the salt, chilli powder and buttermilk.
Start kneading the dough, adding warm water as needed.
Knead for 5-10 minutes till a smooth, firm dough is formed.
Cover with a damp paper towel or cloth and let the dough sit for about 30 minutes.

In the meantime, run the broccoli and parsley through a food processor to make a coarse crumble.
Add the crumbled feta cheese along with the harissa (you could use hot sauce or red pepper flakes if you don't have harissa).

Flour the work surface and a rolling pin.
Take a ball of dough and roll it out as thinly as possible, flouring it all the time till a 12" diameter circle is formed.
Sprinkle a handful of the broccoli-cheese mixture over the lower half of the dough.
Fold the plain side of the dough over the filling to make a half circle.

Heat a nonstick griddle over medium heat.
Place the filled dough on the hot griddle and cook for a couple of minutes on one side.
Flip the pastry over and cook the other side for another 1-2 minutes.
Both side should end up crispy and somewhat golden.

Transfer the pastry to a plate, brush with melted butter and serve.

***

Borek + Raita = bliss.


Opinion?

O.M.G.! I love Anissa Helou. I love her recipes. I love her books. I *just* ordered one more. More than anything, I love boreks. Is that plural version even right? Do I even care? All I know is that I want many a borek in my life :)

And this broccoli filling rocks! As much as I want to try out other fillings, I could just eat this forever and be satisfied!


Seriously, how can something so simple taste so fabulous?

Thursday, March 27, 2008

Mmm ... pancakes!

Us siblings could be called children of a Disney generation - we grew up hooked onto sunday morning Disney cartoons and spent many a summer day perched on a wall or a tree branch reading their comics. And Mickey Mouse made me quite happy - I mean, who couldn't love those fabulously huge ears, that crazy Disney voice that sounded tailor-made for MM, a mouse with a dog (some insist Goofy is a cow!) for a friend, another dog for a pet, such insanity! As much as I've grown past this, and often view Disney productions with a much more skeptical eye, there are some indelible memories associated with this essential piece of our growing years.

So, what does any of this have to do with pancakes? Or even with food? Really. Well, that was the first time we even heard of pancakes - when we saw Mickey eating a ginormous stack of pancakes doused with a mug of maple syrup! Whoa! A mouse can eat a whole stack of those oothappam-lookalikes? Really? And I was filled with this crazy urge to eat those things, I mean - if they made Mickey that happy, they've got to be good, right? Soon after, my sis got hooked onto cooking and started experimenting with various foods (and with us!)

My first meal request was ...

K: Can I have pancakes?
Sis: For dinner?
K: Yessssss!
Sis: You're all crazy, girl!

But she made them anyway!

K: I want a stack of 20 pancakes for dinner.
Sis: You're all crazy, girl. You're just getting 4.
K: *grumble* *grumble* Guess that's better than zero.

Well ... I have no idea how the hell MM ate that stack, I remember struggling to finish those four small pancakes! And they were delicious :)


Anyway, years have gone by, pancakes are not the hot favourite breakfast (or dinner) item very often, mostly because I don't have much of a sweet tooth when it comes to breakfast. But every once in a while, I do get a hankering for these, especially if the recipe has a multi-grain twist to it! This recipe is adapted from Didi Emmons' Vegetarian Planet - such a happy book!

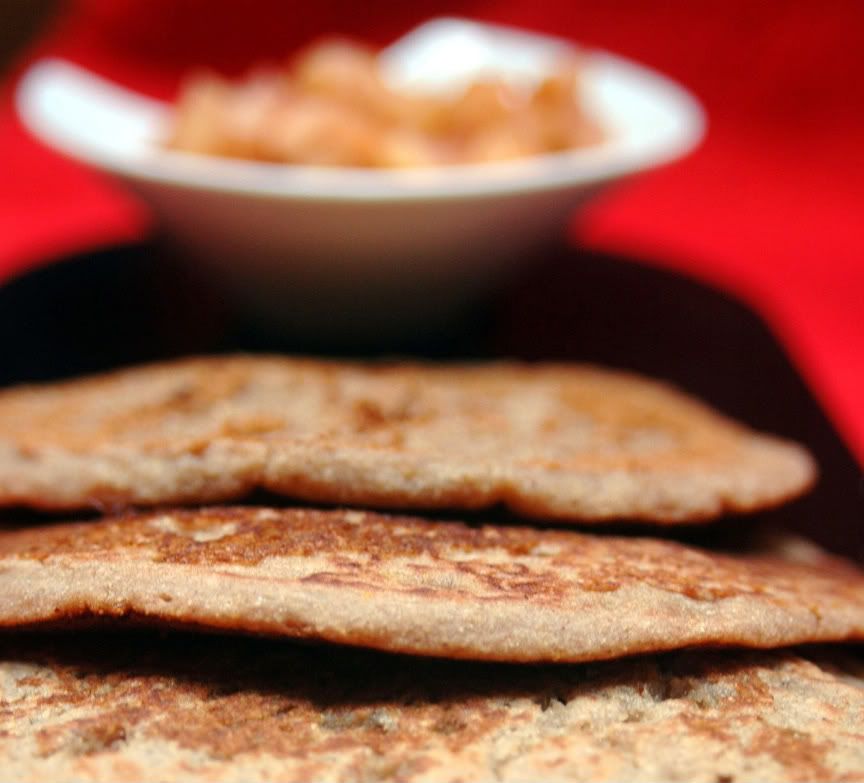
These pancakes worked really well with a simple apple compote - honey crisps with a touch of spices and a light port marinade.

Oat-Corn Pancakes
Goodness sans eggs and sugar!

Servings: About 7 pancakes

1 T unsalted butter
1/2 cup rolled oats
1/2 cup yellow cornmeal
1/2 t salt
1/4 t baking soda
1 cup buttermilk

Melt the butter over medium heat till it browns and starts to clarify, and set it aside.
In a food processor, grind the oats and transfer to a bowl.
Mix the cornmeal, salt and baking soda with the oats.
Add the buttermilk and stir well.
Now stir in the butter, continue mixing for a couple of minutes to ensure there are no lumps in the batter.

Heat a griddle to medium hot and grease it lightly.
With a small ladle, pour the batter onto the griddle to form 4-5" pancakes.
Cook till bubbles appear on top of the pancakes, then flip them and cook for 1-2 minutes more.
Keep the cooked pancakes warm in a slow oven while the rest are being made.

***


Apple Compote
Sweet and spicy fruit love!

Servings: 2 cups of compote (generous to go with 7-8 pancakes)

2 honey crisp apples - cored and cubed

1/2 cup water
2 T port or muscat
1/2 T brown sugar
1/8 t ground cinnamon
1/8 t ground nutmeg
1/8 t ground cloves
1/4 vanilla bean pod (split)
a pinch of salt

In a large saucepan, combine all the ingredients except for the apples.
Boil gently till the sugar is dissolved and the mixture thickens (about 5 minutes).
Add the apples and return to a boil, stirring constantly.
Cook till the apples start getting tender and the mixture has thickened around the apple bits (takes about 12-14 minutes).
Take off the heat and remove the vanilla bean pods.
Cool to room temperature before serving.

Note: If you want a super mushy, almost-spreadable compote, continue to cook the apples for another 8-10 minutes.


Opinion?

We ate these pancakes like oothappams - a dollop of compote wrapped in a shred of pancake. Weeeeeeeeeee!!! *so* much of grain and fruit goodness! This goes off to Mansi for the current edition of Weekend Breakfast Blogging - Nandita's brainchild. Thanks, Mansi and Nandita for hosting/starting this event!

And yes, I'm absolutely sending this over to Srivalli - how could I not be part of her fabulous insanity - a Dosa Mela!!! And Bee, what would I do without you - my favourite event reminder :) Thanks, monkee!

Saturday, March 15, 2008

Mélange - Appetizers

Over the last couple of weeks, we made a variety of appetizers that turned out to be insanely simple and totally delightful. Delicious enough that every time I looked at the pictures, I went "Ahhh!" and then balked at the idea of writing a post about each of these :)


So, the idea of this Mélange series was born. We often end up making an assortment of nibbles/dips/desserts, usually for a party, but these usually don't get written about. This consolidated post seems like a good idea for bunching together some of these long overdue posts.

So, without much further ado, I'll start babbling about several nibbles that were insanely easy to assemble and totally kicked ass!

***

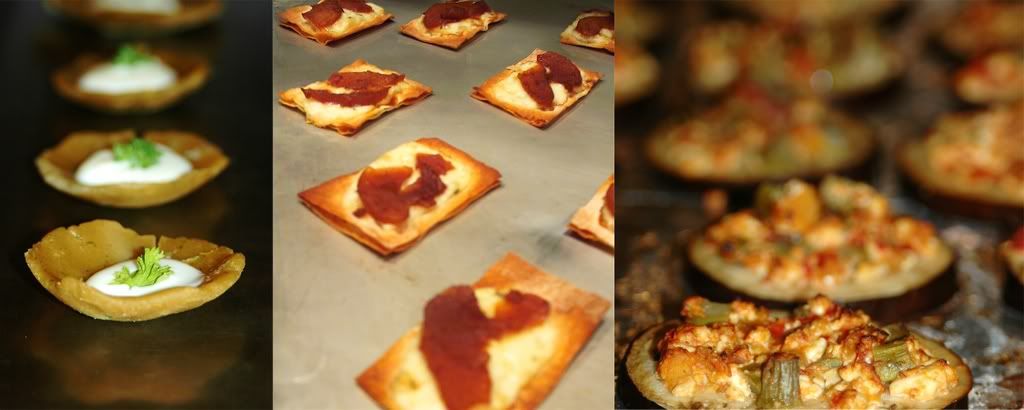
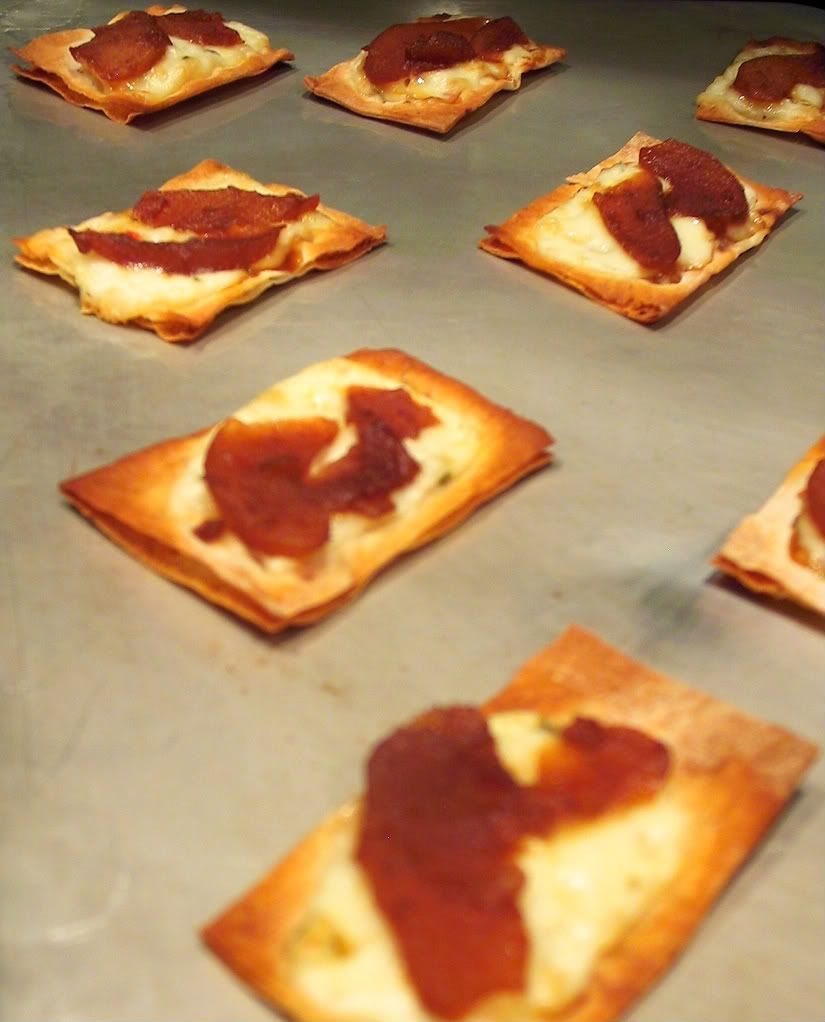
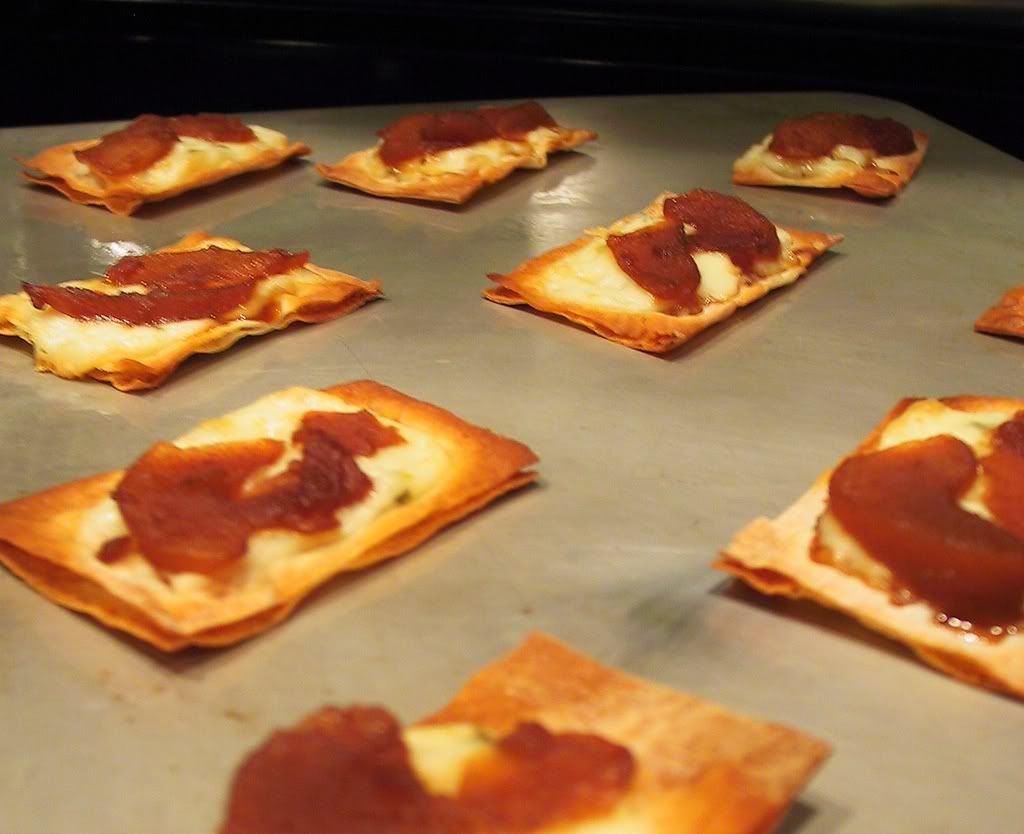
Lavash topped with Brie and Pear Chutney

Lavash is a soft thin yeast bread of Armenian origin - really simple flavours derived from a combination of flour, water and salt. It makes for fabulous wraps and rolls, and even with dips. And last week, we discovered that it makes for a crispy baked base with a variety of toppings.


Servings: 12 pieces

1 sheet of lavash bread
Several thin slices of brie
Pear preserve (recipe follows)

Fire up the oven to 350 F.
Cut up the lavash sheet into 12 pieces - these can often be torn by hand into small pieces.
Top each piece of bread with a slice of brie and a dollop of pear preserve.
Bake for 3-4 minutes till the brie is melted and the edges of the bread are crispy.

Pear Preserve

Servings: fills a pint-sized canning jar

2 pears - peeled, cored and sliced
1/2 cup brown sugar
1 cup water
1/2 lemon - sliced
1 stick of cinnamon
3 cloves
1 green cardamom

Heat the water in a saucepan and melt the sugar in it.
Add the pears and lemon slices along with the spices.
Simmer till the pears just start to get tender and the syrup thickens around the pear slices.
Pour the pears and the syrup into a canning jar, let it cool before sealing the jar.


Opinion?

The first time we made this snack, we used our friend Daria's pear chutney and some pepper jack cheese over lavash bread. The pear chutney was fabulous, but the jack cheese wasn't quite right. The next time around, we went with some brie and my version of the pear preserve. The combination worked much better, but I still like Daria's version of the pear chutney better - especially because it had sat around enough for the flavours to totally blend - insanely delicious!

***

This goes to Raaga at Chef At Work for AFAM-March (brainchild of Maheshwari from Beyond the Usual) - the current theme is Pears. Thanks, Raaga - for organizing this edition.

***

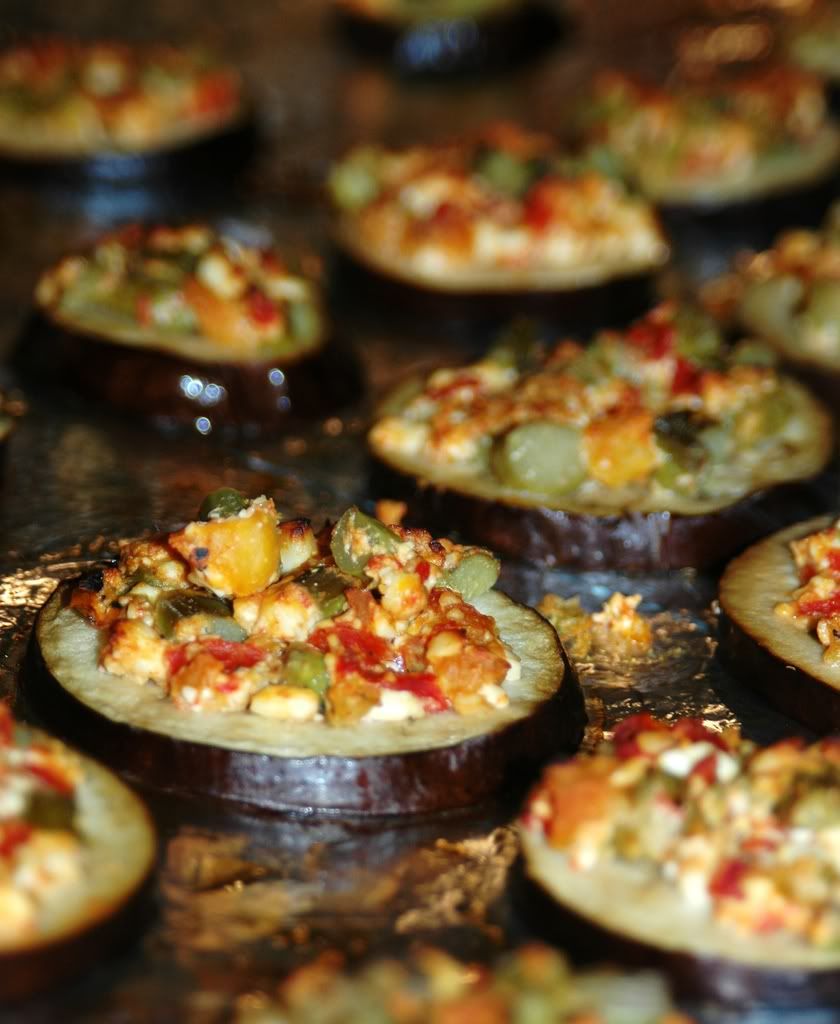
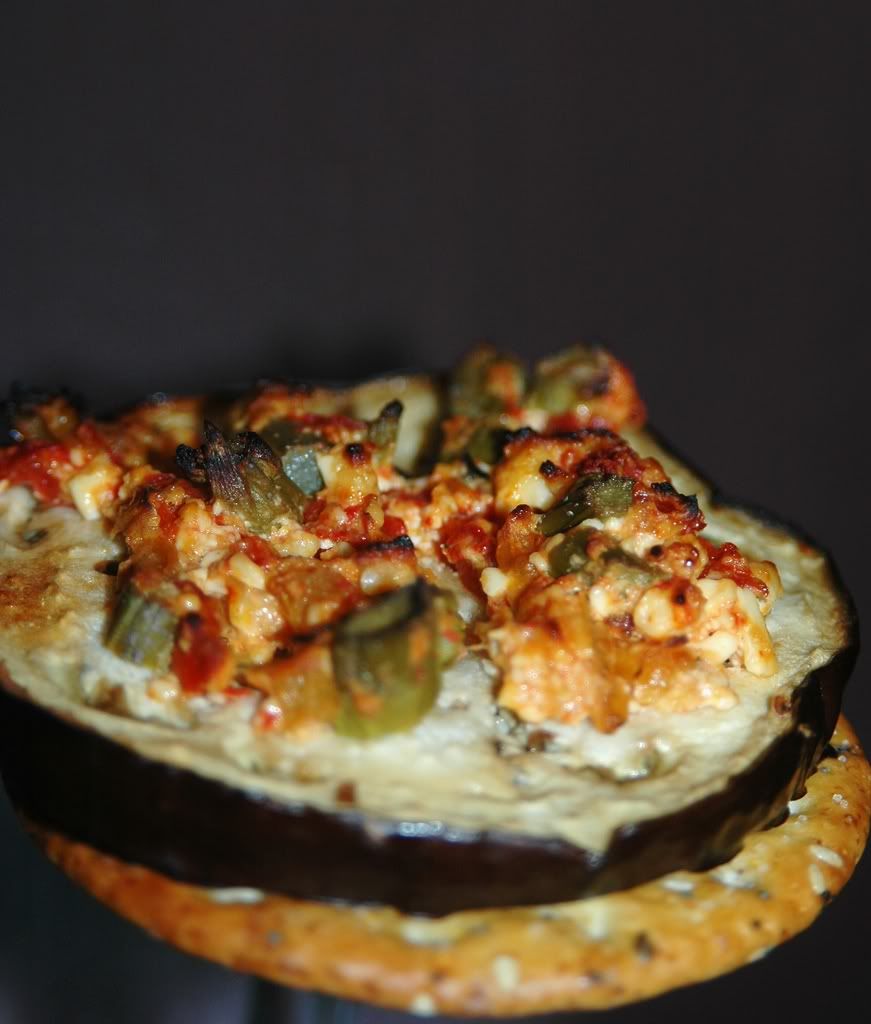
Eggplant Bruschetta with marinated vegetables

This recipe was born when we wanted to make some bruschetta-style nibbles, but had no bread to work with! But we did have a giant eggplant - obviously we often mistake one of these for a giant loaf of bread, right? :) Weeellll, not really, but we could go for a lo-cal bruschetta if we found a way to use these!


Servings: 15-20 pieces

1 large eggplant
8 oz Reduced fat feta cheese - crumbled
10 stalks of pickled asparagus
1 marinated red bell pepper
1 marinated yellow bell pepper
freshly ground pepper
2 T apple cider vinegar
1 T olive oil

Fire up the oven to 400 F.

Slice the eggplant into 1/3" thick slices and place then on a greased baking tray.
Brush the eggplant slices with a mixture of the olive oil and vinegar.
Cut the asparagus into 1/2" pieces and mix it with the crumbled feta cheese in a bowl.
Chop the bell peppers into small pieces and throw them into the mixing bowl.
Season with the pepper (and salt if needed).
Top each of the eggplant slices with a generous dollop of the veggie mixture.
Bake for 6-8 minutes till the eggplant is cooked (but still firm) and the cheese is melted.


Opinion?

Eggplants rock. Seriously. I'm often leery of Mr.Big Eggplant, but this was a perfect use for it. The tartness of the marinated vegetables and the juices of the eggplant blended quite nicely with the cheese flavour. And these slices disappeared in *no* time at all :)


***

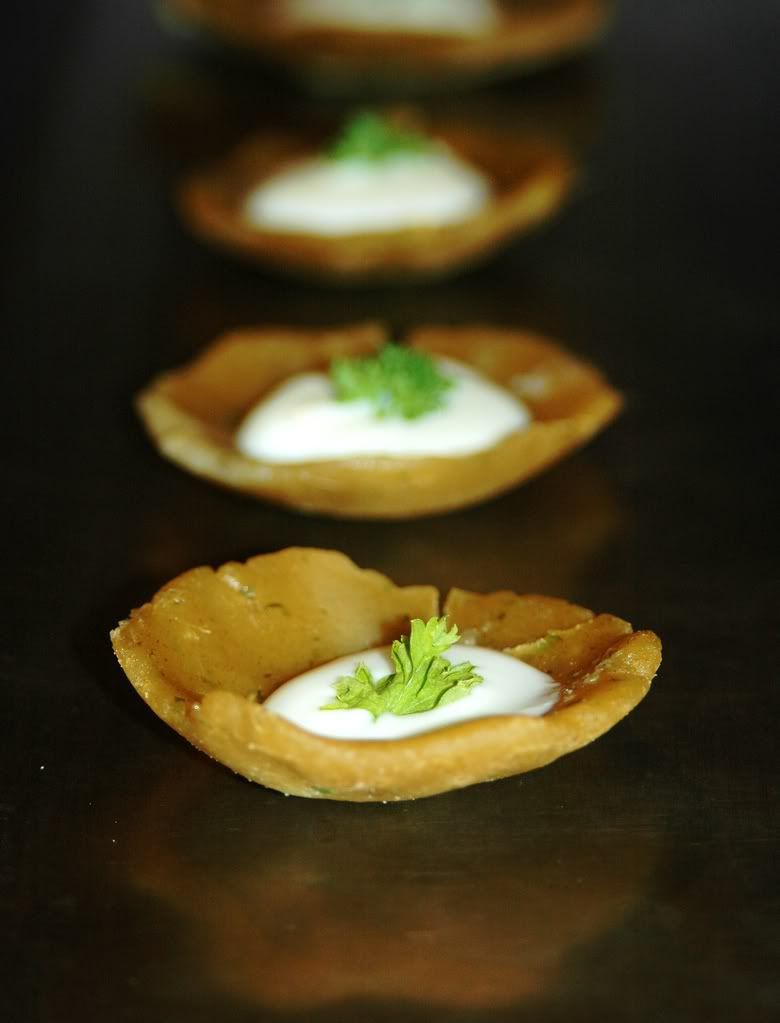
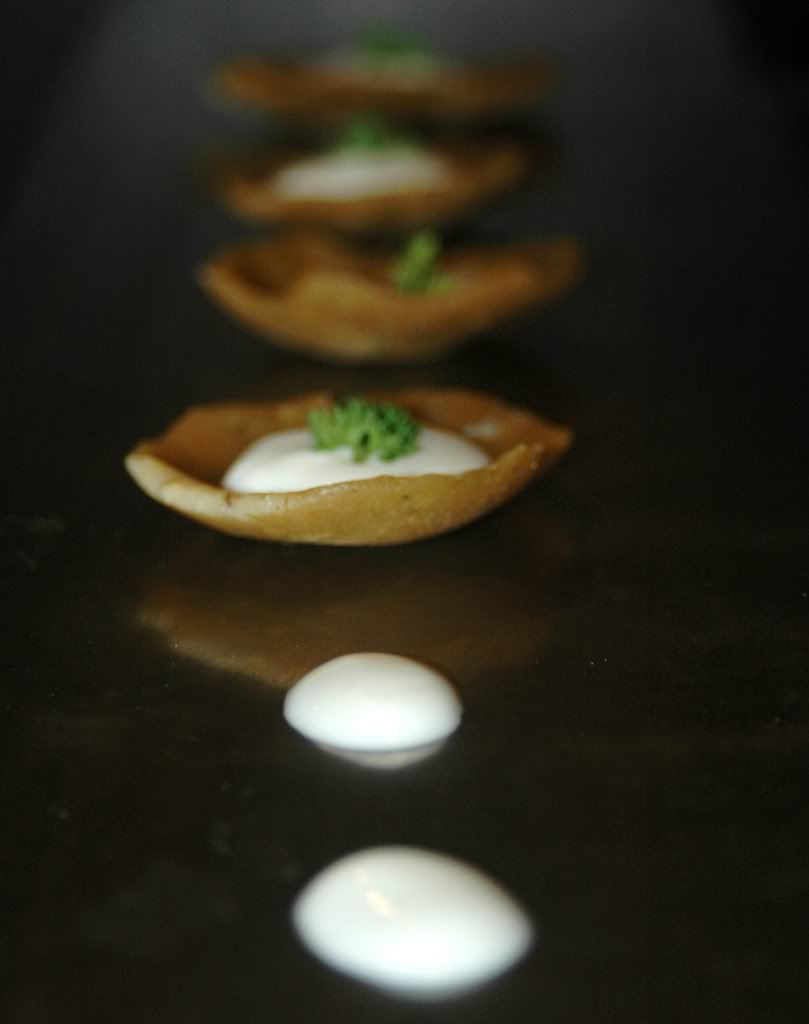
Nombu Adais

We do not celebrate nombu (another of those days where the guys get all the attention while the girls slave their asses off), but that does not stop us from working any recipes associated with nombu. Especially the salty nombu adai kind :) We attempted a variation here by skipping the coconut and garnish, instead adding some curly parsley. And we topped each adai with a few drops of thick european yogurt.


Servings: 16

1 cup rice flour
1 cup water
1/2 t ghee (clarified butter)
3 green chillies
1" ginger
1/2 cup packed curly parsley
1 t hing (asafoetida)
salt for seasoning

Roast the rice flour for 5-6 minutes till it start smelling, but before it starts turning brown.
Add water, 1 T at a time to the flour, mixing thoroughly to avoid any lumps.
Grind the green chillies, ginger and parsley into a coarse paste.
Add this paste along with the hing, salt and ghee to the flour mixture, gently kneading the dough till the seasonings are all mixed in.
Grease a set of idli plates with oil spray.
Take a small handful of the dough and flatten it to fit into one of the idli moulds.
Repeat this till all the plates are filled with adais.
Steam for 6-8 minutes till the adais are cooked.
Serve topped with some yogurt and a sprig of parsley.


Opinion?

These rocked! They were way better than we expected them to turn out. And we're becoming more obsessed with parsley by the day! Guess we added more green chillies than we realized, these adais had some serious zing to them. And given that we haven't really done much with rice lately, we were a bit worried that these adais might feel heavy on the palate. Nope! Surprisingly, they seemed light and flavourful - a happy healthy snack.

Thursday, March 13, 2008

Bread, Soup and happiness

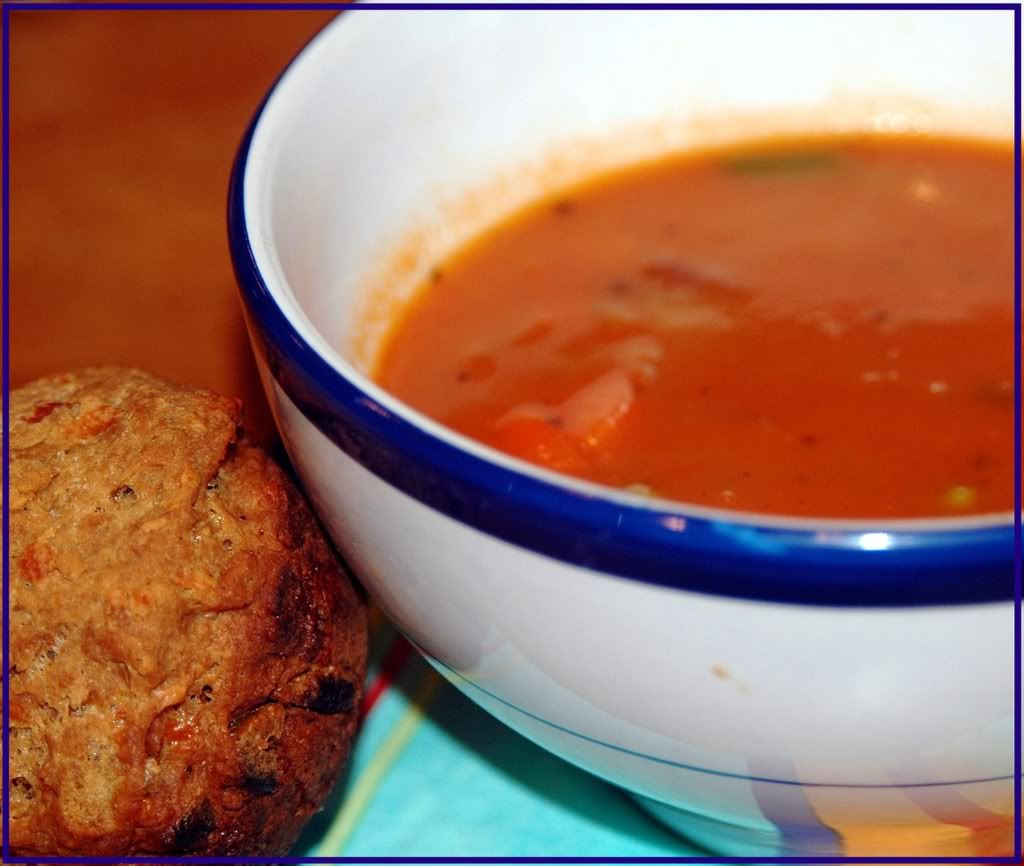
Sometimes, that's about all that's needed to put a smile on the face! A bowl of hot soup, some crusty bread to mop it up and soon life is all goodness.


I was wandering around Columbus Foodie's insanely fun blog - brimming with a wide variety of recipes that I could pick from for T&C VII. Just as it seemed like I was going to drown in eternal indecision, I saw this recipe for beer batter bread. Whoa! That sounded really delicious. Plus I've been hankering for more baking lately, so this sounded perfect. And the plan was to try this recipe out right away - how insane would it be if I posted a recipe for an event a couple of weeks in advance? Do things like that ever happen?!!

The Abster was coming over for dindin and said she was hankering for a soup. And when I mentioned bread, I could pretty much hear her jumping around on the other end of the phone line! But wait ... she *hates* onions! Well, the recipe could be reworked to use garlic instead, can't go wrong with that! And then she said she wanted swirly soup. Hmm ... I was kind of hoping to kill 2 food events with one meal here :) If we made a spicy soup instead, I could totally ship it off for March's edition of No Croutons Required!

Yay for food agendas :)

We poked around several cookbooks and the Pupp found a really simple and elegant spicy soup - a plethora of veggies, some marjoram, kicked up with some cayenne ... sounded pretty good!

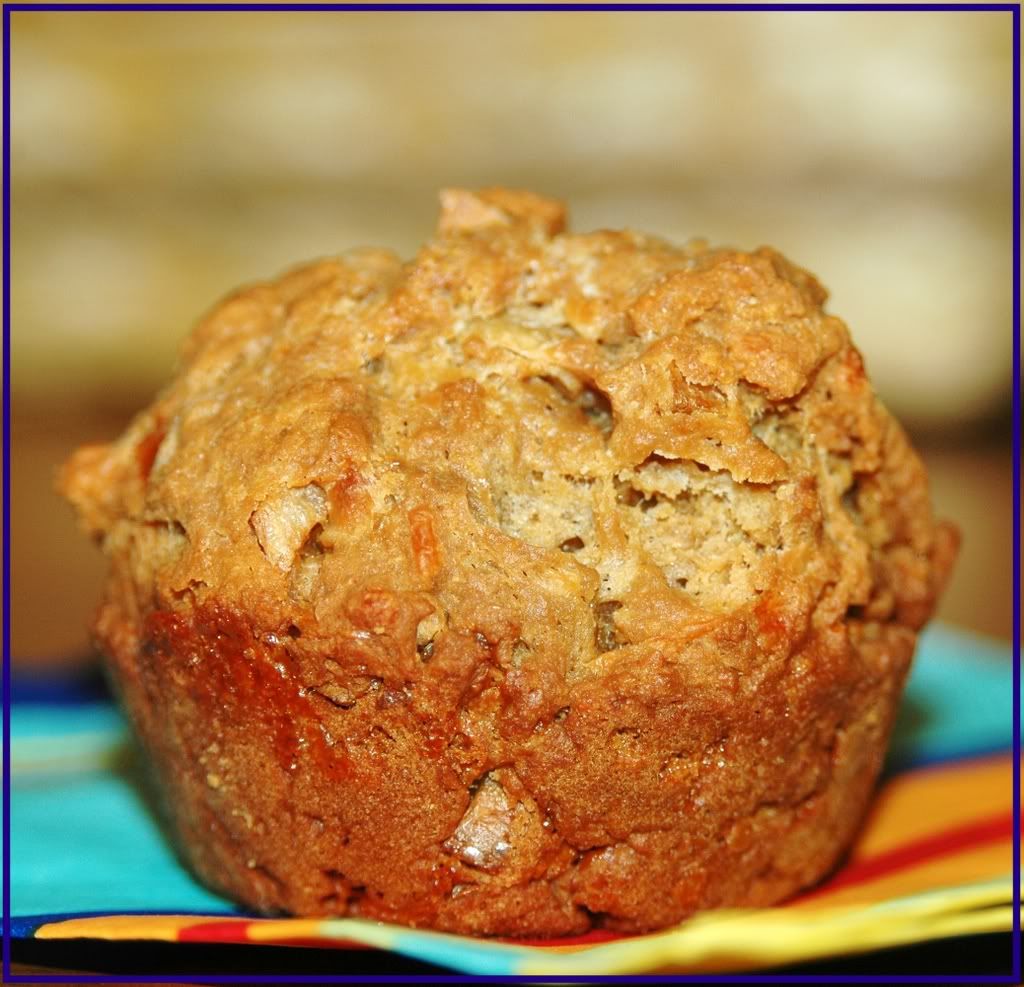
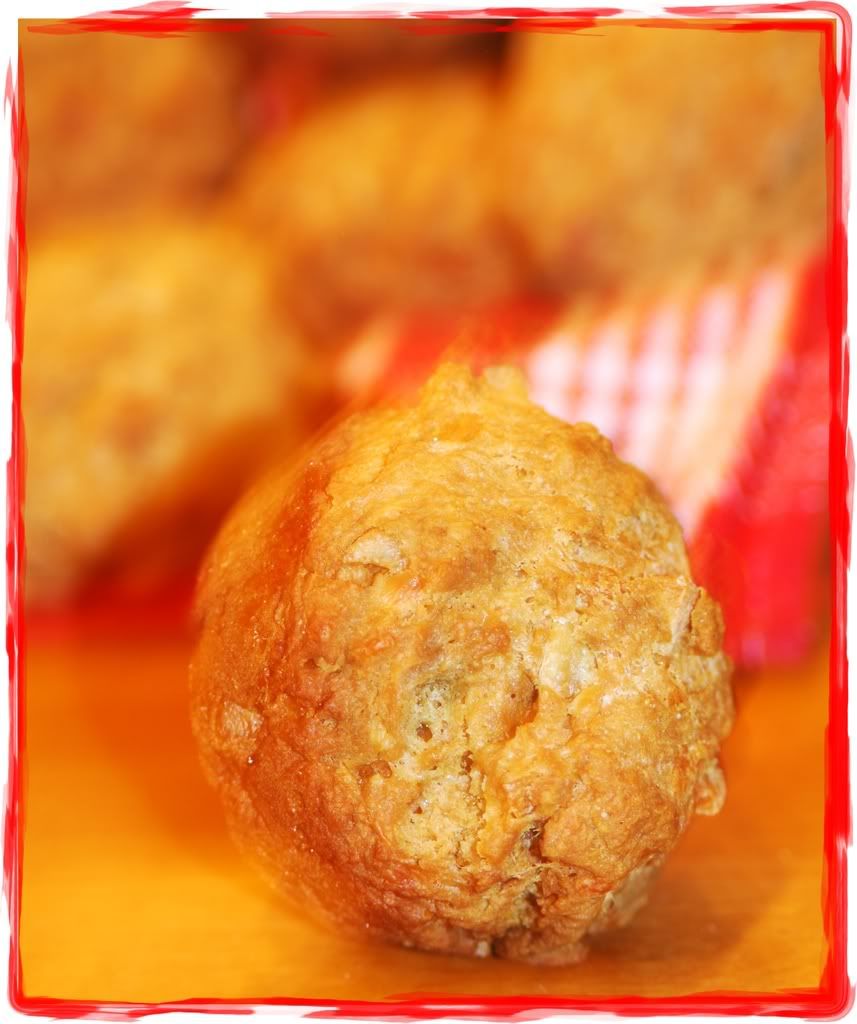
We also ended up reworking the bread recipe to use whole wheat flour. And we made some muffins and scones instead of a big loaf - worked out pretty well.


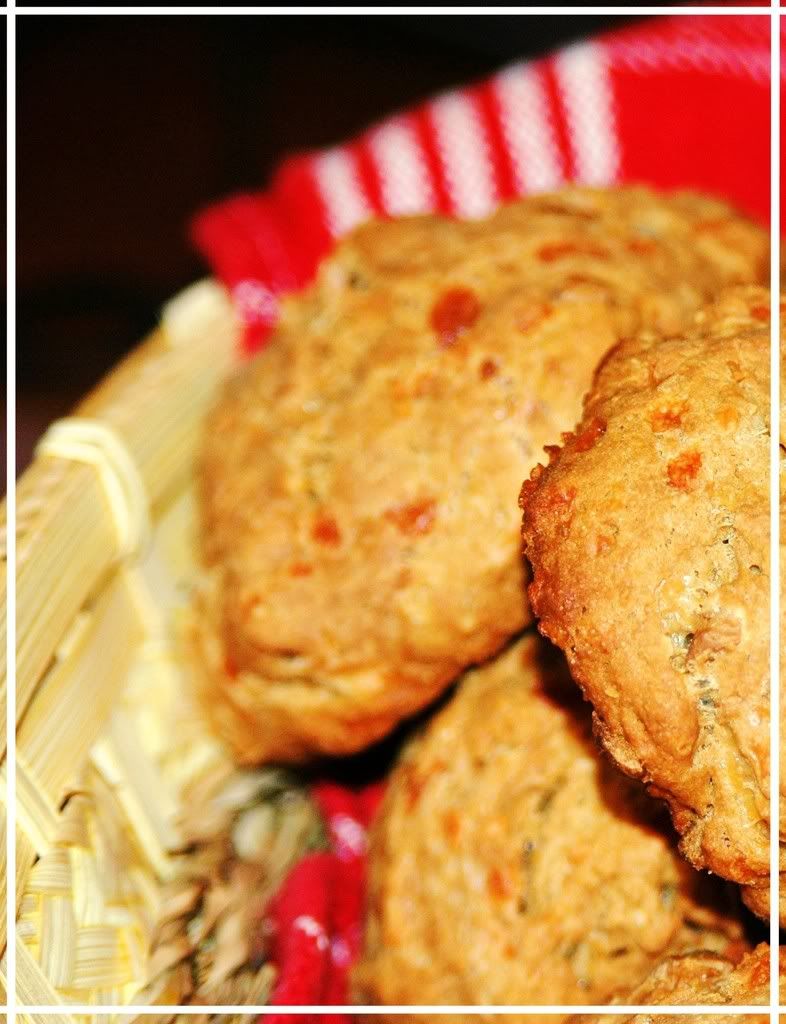
Beer Batter Muffins and Scones
Mmm ... garlic! Mmm ... cheese!

Servings: 12-14 muffins/scones

2 heads of garlic - peeled and chopped into bits (not minced, unless you don't want to feel the yummy sticky garlic chunks in your mouth!)

3 cups white whole wheat flour
1 T olive oil
3 T sugar
2 t baking powder
1 t salt
1 cup grated light cheese
1 12 ounce beer (we used amber ale)
3 T butter - melted

Preheat oven to 375 F.

Heat the oil in a large skillet and saute the garlic until lightly browned.

Sift the flour, sugar, salt and baking powder into a bowl.
Make a well in the center of the flour mixture and add in the cheese, beer and garlic.
Stir/knead until the mixture is just moist and well-mixed.

Grease palms with cooking spray before taking handfuls of the mixture and plopping them onto a greased baking tray.
Another option is to drop dollops of it in a muffin pan.
(We did both!)

Drizzle 1.5 T of butter over the muffins/scones and set in the oven.
Bake for 20 minutes.
Remove the muffins/scones, drizzle the remaining 1.5 T of butter over them.
Set back in the oven for about 12-14 minutes till they are lightly browned.
A toothpick or knife inserted into the muffin should come out clean.

Cool the muffins and scones on a wire rack.

Opinion?

Weeeeeeee! Enough garlic to chase all those vampires away! The scones were chewy and tasty. We did think that maybe they needed a little zing - think we'll add some minced jalapeno next time around. And they tasted better today than yesterday - seemed moister than ever! And the beer definitely gave the bread a yeasty flavour - very appetizing.

Thanks Becke for this recipe, we're definitely going to try it out again!

***


The Drunk Muffin
Photo Courtesy: Abbie

***

While the bread was baking, we started the soup. We were a little dubious about how hearty this soup would be - it didn't seem to ask for a lot of ingredients, but my fears were totally unfounded. Simple is good, especially in soups.


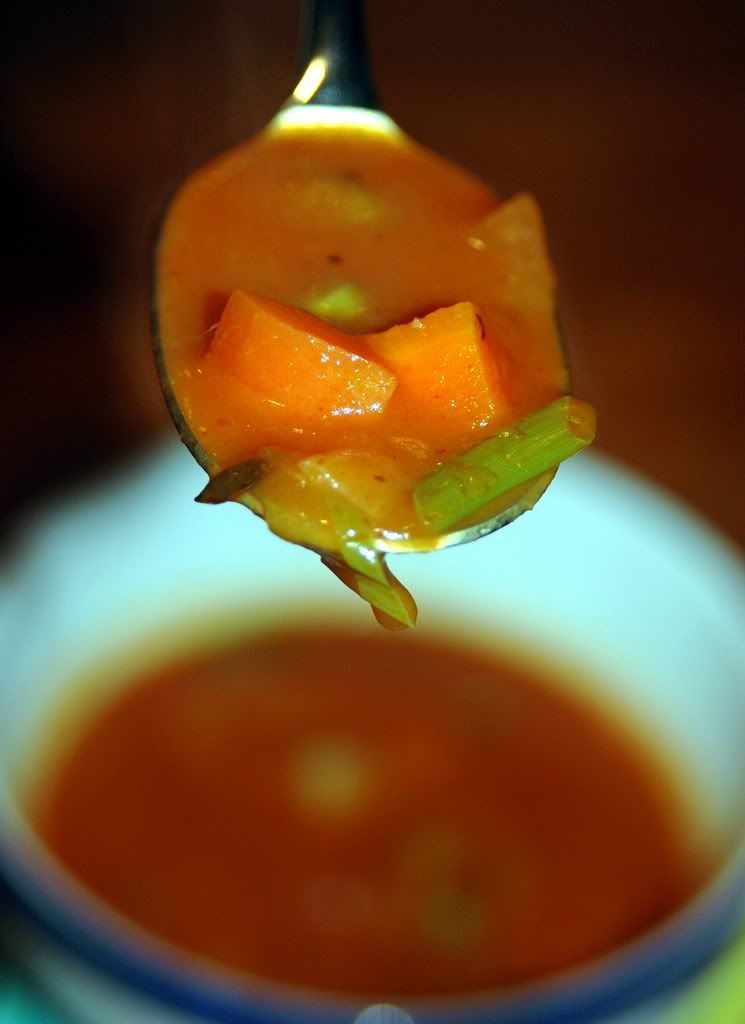
Spicy Chunky Vegetable Soup
*so* fresh and happy!

Servings: 4

1 red onion - chopped
4-5 cloves garlic - finely chopped
1 small carrot - diced
1 large potato - diced
4 oz green peas (we used frozen petite peas)
2 cups of drained tomatoes
1 L reduced sodium vegetable broth
2 scallions - sliced diagonally into thin pieces
1 T butter
1.5 t dried marjoram
2 t cayenne
salt to taste

Saute the onion in butter till browned.
Add the vegetable broth and bring to a boil.
Reduce to a simmer and add the tomatoes, garlic and marjoram. Cook for about 15 minutes.
Stir in the carrots, peas and potatoes along with the cayenne and salt.
Cover partially and cook on medium for 10+ minutes till the potatoes are cooked.

Opinion?

The recipe had likened this soup to minestrone, but described a much lighter flavour. We didn't quite grok that when we first read it, but one spoonful and we knew exactly what that was about. The consistency was just right, the drained tomatoes were *perfect*, the soup tasted *so* damn fresh! Like if I was running through a garden and noshing on all the veggies! Well ... no, not quite like that. But you know what I mean - it just felt ... so right. And spicy too.


Eat (bread), drink (soup), make merry!

***

Off this goes to Ms. Tinned Tomatoes for No Croutons Required.

Many thanks to Nicole for another fun edition of T&C.

***

And I'll leave you with a snapshot of the craziest cat around hereplace :)


Thursday, December 27, 2007

Machli ka Salan and much more!

Last week, we were hankering for a desi cookout - well, that's pretty normal except this time we decided to try out a fish recipe.

Being relatively new to eating fish, I often end up going for simple flavors that easily showcase the fish - marinades followed by grilling or broiling. But this time, we wanted obvious desi flavors, so we attempted this salan recipe from Art of Indian Cuisine by Rocky Mohan. BTW, I'm digging this book more by the recipe - it distinctly lacks cooking times, but makes up for it by showcasing really flavorful and often different dishes.


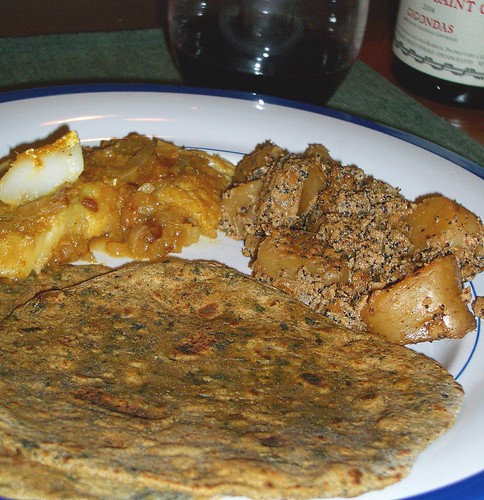
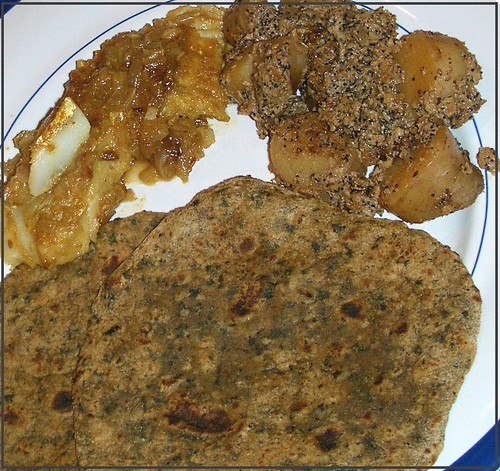
Once we picked our fish recipe, the next step was finding the right sides - after a little deliberation, we decided to skip rice and went with Aloo Kurma and collard green rotis - another greens fix :)

Madison Market has become a pretty good destination for reliable fish - the folks behind the counter totally know what they're talking about and are pretty amiable about picking the right size of fillets - especially since I'm not a fan of thick slabs of fish that don't cook through easily. The recipe just called for white fish, we we went with true cod. And we ended up skipping the mint that the recipe asked for and just used dry spices along with ginger and garlic for the marinade.


Machli ka Salan
Fish Fillet Treats

Servings: 3

1 lb true cod fillets

Marinade:

1 T red chilli powder
4-5 garlic cloves
1" ginger

1 t turmeric powder

1 T coriander powder (freshly roasted and ground works best)


1 T butter

1 large white onion - finely chopped

salt to taste

Rub the fish fillets with the marinade and set aside for 45-50 minutes.
Heat the clarified butter in a large frying pan and add the chopped onions.

Sauté until light brown in colour.

Add the marinated fish fillets.
Reduce the heat and add 1/2 a cup of warm water and salt.
Simmer, stirring carefully, taking care the fish pieces do not break.

Cook until the fish is tender and the gravy is thick.

What did we think?

Perfect. Seriously. One of the best fish dishes we've ever made.


Alu Kurma

Yay! Potatoes!

Serves: 3-4


1 lb fingerling potatoes - sliced into chunks
1 cup of thick yogurt

Masala:

Dry roast and grind to a paste with a little water

2 T almond - blanched, peeled and sliced
1 T grated coconut

1 T poppy seeds

1 T coriander seeds

1 T red chilli powder

1 T olive oil

1/3 cup finely chopped onions

1 t grated ginger
3 cloves garlic - smashed

Salt to taste


Whisk the yogurt with the roasted spice paste and set aside.


Heat the oil in a wok, saute the onions+ginger+garlic till golden brown.
Add the potatoes and saute for 3-4 minutes.

Add 2-3 T of water, stir and cook covered for 4-6 minutes.

Add the yogurt mixture and salt and stir.
Cook for 5 minutes and add 3/4 cup of warm water.
Bring to a boil, reduce heat and cook the potatoes are tender and the gravy is thick.

At this point, we ended up tossing the potatoes+gravy into a baking pan and baking it covered for about 15 minutes at 300 F.


What did we think?

Daria thought it tasted perfect, but we think the poppy seeds was a bit much - we'll probably scale back on that next time, but otherwise, the potatoes were perfectly cooked and absorbed the masala flavours really well.


Collard Greens Rotis

Go Grrreeeennnnnn :)

Servings: many many rotis

3 cups of whole wheat flour

6-7 leaves of collard greens - cleaned and shredded into small pieces

1 t salt
1 T cayenne powder

1 t cumin seeds
1/2 cup warm milk
warm water for kneading

1 T sesame oil


Cook the collard greens in about 1 cup of water till softened - this took about 5 minutes.

Knead the dough with the greens, salt, spices and milk, adding water as needed.

Once well mixed, add the oil and knead for another 5-7 minutes.
Cover the dough with a wet towel for about 20 minutes before rolling out rotis.


These were *good*! Think we'll make parathas with them next time around and maybe just stuff them with a spiced collard mix, that sounds a lot more exciting :)

Wine Pairings:
All french - a Chateauneuf du Pape (which was fabulous, thanks Daria!), a Gigondas that was quite yummy and one more that I've forgotten the name of!


The meal was fabulous, but the pictures were subpar. Oh well!

Monday, November 26, 2007

A whole lotta bread - Daring Bakers Challenge (Nov 2007)

Mmmm ... aroma of baking bread ... I finally got to this last night! This last month has been crazy - when the Daring Bakers Challenge details were sent out, I really thought 4 weeks is plenty of time to get going on some yummy bread making. Well, I was wrong! This month has just whizzed by - lots of cooking and baking has happened, but I just wasn't able to find the handful of hours needed to work on my potato bread. Until last evening - when I finally went to work for several hours, frantically kneading and rolling until my arm was ready to fall off :)
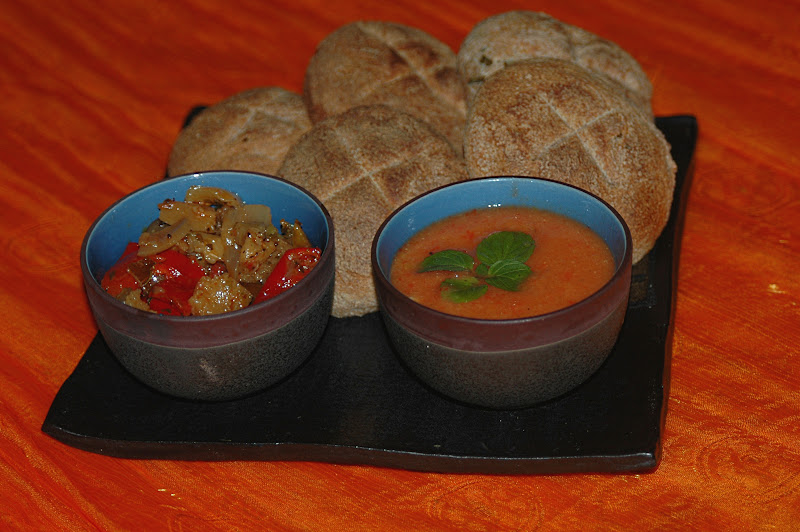


This was my first bakers challenge - I was obviously all freaked out about it, even though baking is one of those zen things for me - kind of restores calm amidst chaos :) I got increasingly excited as I pored through the recipe outlined by Tanna from My Kitchen in Half Cups - this recipe sounded perfect! I settled for baking a bunch of rolls and a small loaf, figured I'd make stuff that Vodka could eat :)

So, Tanna picked this tender potato bread recipe from Home Baking: The Artful Mix of Flour and Traditions from around the World by Jeffrey Alford and Naomi Duguid. I felt a little intimidated, especially with the idea of winging it in terms of how much flour I used to knead into the dough, but the idea of noshing on potato rolls totally kept me going :) Thanks, Tanna, for this awesome recipe - I feel like you picked the perfect Fall bread!


I loved how this recipe blended tradition with creative license - the actual dough recipe was pretty traditional, but we were allowed several variations that could totally redefine the end result:

  • This bread needed to be savory and not sweet.
  • Hand kneading only.
  • No biga, sponge or starter.
  • We could shape this dough anyway you would like.
  • We could make this as a loaf, as rolls, as focaccia. Braid it, twist it whatever.
  • We could season this bread in any way.
  • We could even fill it, like a calzone!

Tender Potato Bread

Ingredients


4 medium yukon gold potatoes - cut into chunks

4 cups (950 ml) water (need to reserve 3 cups (750 ml) cooking water)

1 T plus 1 t salt

2 t active dry yeast

6 ½ cups to 8 ½ cups unbleached all-purpose flour (1 kg to 1350 g)
1 tablespoon unsalted butter, softened
1 cup whole wheat flour (130 g)

Conversion Chart for yeast:
Fresh yeast 1 oz/ 1 tablespoon = active dry yeast 0.4 oz/ 1.25 teaspoon = 0.33 oz / 1 teaspoon
Reference: Crust & Crumb by Peter Reinhart

Directions for making the dough by hand:


Put the potatoes and 4 cups water in a sauce pan and bring to boil.

Add 1 teaspoon salt and cook, half covered, until the potatoes are very tender.


Drain the potatoes, SAVE THE POTATO WATER, and mash the potatoes well. Tanna suggested using a food mill for mashing the potatoes, I ended up using a potato masher - it worked pretty well, but I think I'm getting a food mill this weekend :)

Measure out 3 cups of the reserved potato water (add extra water if needed to make 3 cups). Place the water and mashed potatoes in the bowl you plan to mix the bread in. Let cool to lukewarm – stir well before testing the temperature – it should feel barely warm to your hand. You should be able to submerge you hand in the mix and not be uncomfortable.


Mix & stir yeast into cooled water and mashed potatoes & water and let stand 5 minutes.
Then mix in 2 cups of all-purpose flour and mix. Allow to rest several minutes.

Multiple ways of adding yeast:
* Mix & stir yeast into cooled water and mashed potatoes & water and let stand 5 minutes.
Then mix in 2 cups of all-purpose flour and mix. Allow to rest several minutes. (This is what I went with)
* Add yeast to 2 cups all-purpose flour and whisk. Add yeast and flour to the cooled mashed potatoes & water and mix well. Allow to rest/sit 5 minutes.

Sprinkle on the remaining 1 tablespoon salt and the softened butter; mix well.

Add the 1 cup whole wheat flour, stir briefly.


Add 2 cups of the unbleached all-purpose flour and stir until all the flour has been incorporated.


At this point, I had used 4 cups of the possible 8 ½ cups suggested by the recipe.


Turn the dough out onto a generously floured surface and knead for about 10 minutes, incorporating flour as needed to prevent sticking. The dough was very sticky to begin with, but it kept taking up more flour from the kneading surface and became easier to handle.

I could not have functioned without my dough scraper here - I worked it to keep the floured surface clean and to push random doughlets back into the dough :)


Tanna had warned that was meant to be a soft dough and we needed to be avoid overflouring here. I ended up using about 7 1/2 cups of flour - seemed liked I needed this since I used over 12 oz of potato.

Place the dough in a large clean bowl or your rising container of choice, cover with plastic wrap or lid, and let rise about 2 hours or until doubled in volume.

Turn the dough out onto a well-floured surface and knead gently several minutes. It will be moist and a little sticky.

At this point, I added a couple of handfuls of chopped chives to the dough - figured a mild seasoning was a good idea and fresh chives seemed like a better alternative than dried rosemary.

I divvied up the dough into 2/3 and 1/3 chunks - the larger one for rolls and the smaller one for a loaf.


Oven: Heat to 450 F.

Forming the loaf:


Roll out the dough into a flat oval on a baking stone. Start rolling it from one end till it is rolled like a croissant. Smoothen the loaf before covering it with plastic wrap for about 35 minutes, till almost doubled in size.


To make rolls:


Butter a 13 x 9 inch sheet cake pan or a shallow cake pan. Cut the dough into 12 equal pieces. Shape each into a ball under the palm of your floured hand and place on the baking sheet, leaving 1/2 inch between the balls. Cover with plastic wrap and let rise for about 35 minutes, until puffy and almost doubled.
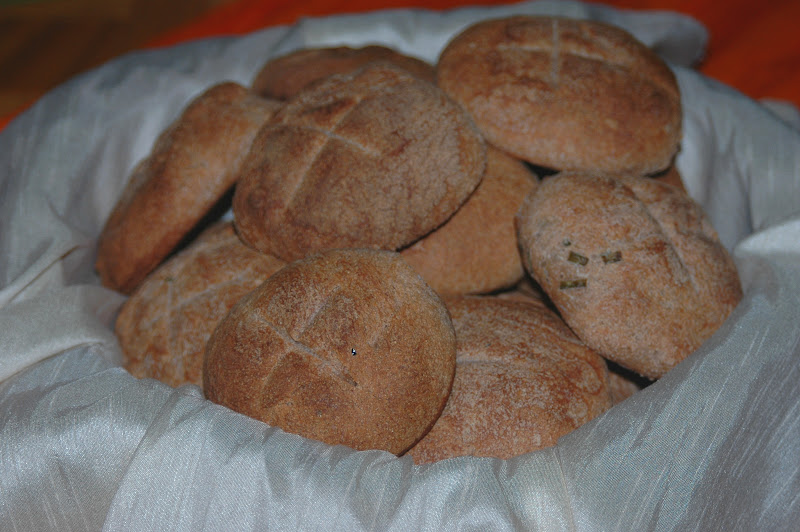


Baking:

For the small loaf:

Remove the plastic wrap and make slashes with a knife on the top of the loaf before sticking it into the oven.


For the rolls:

Dust rolls with a little all-purpose flour or lightly brush the tops with a little melted butter or olive oil (the butter will give a golden/browned crust). Place the rolls next to the loaf in the oven.


Bake rolls until golden, about 30 minutes.

Bake the small loaf for about 40 minutes.


Transfer the rolls to a rack when done to cool. When the loaf or loaves have baked for the specified time, remove from the pans and place back on the stone, tiles or baking sheet for another 5 to 10 minutes. The corners should be firm when pinched and the bread should sound hollow when tapped on the bottom.


Let breads cool on a rack for at least 30 minutes before slicing. Rolls can be served warm or at room temperature.
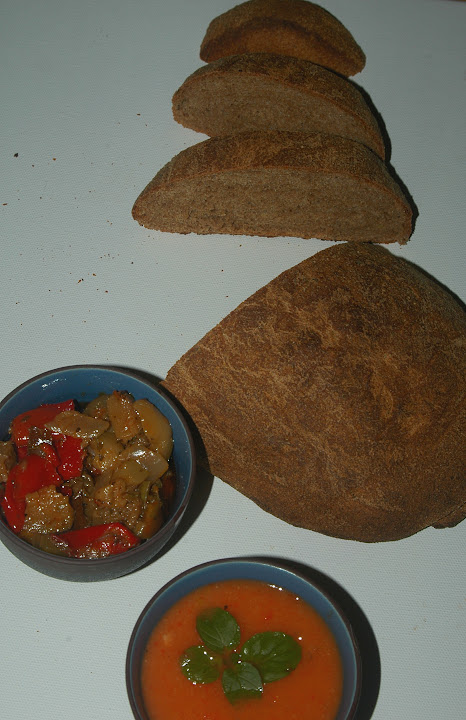

End Result:

Wow! This was easily one of the yummiest bread recipes I've ever used. Personally, I preferred the rolls to the loaf which felt a little denser - thin slices topped with tapenade worked better for the loaf, while the rolls were just moist, tender, chewy and totally picking up flavors from the dips. Oh, the dips! That was a whole lot of fun - I wanted something beyond the usual olive oil+vinegar or herbed butter this time, so I did what I usually do - stare at all the ingredients around me till I stumble upon something I can use :) If that doesn't work, I usually start poking around all my cookbooks!

Well, this time, there was one forlorn pear-apple waiting to be eaten. Seemed like a light sweet-tart dip would be a fabulous complement for the starchy bread.

Pear and Pepper Chutney
Sweet, Tart and Fiery!

1 pear apple - chopped into chunks
1-2 pieces of marinated bell peppers
1 T red wine vinegar
1 T cider vinegar
2 cloves garlic
1 t brown sugar
a few drops of habanero sauce
a sprig of mint

Heat the vinegars along with the sugar in a pan.
Once the sugar has dissolved, add the pear-apple, garlic and peppers and boil for about 4-5 minutes.
Once cooled, puree the mix and add the habanero sauce (as suits your palate :))
Garnish with fresh mint.

*drool*
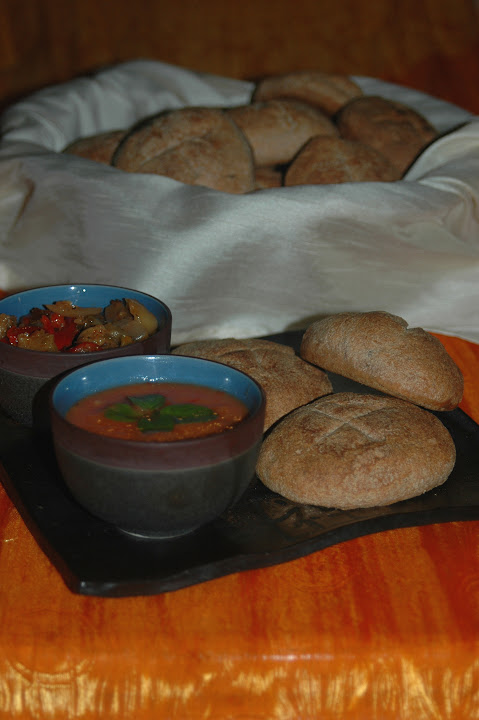

This was my first baking challenge and it was a total blast! I can't wait for the next one now :)

Tanna, thanks again for this recipe, for your guidelines and for organizing this. It was a real adventure and I can't wait to try this recipe again - and I'm going for the focaccia next time!

The Daring Bakers blogroll has a zillion other awesome versions of the potato bread - pretty amazing what folks think of even with a set recipe :)


I think this post should go to Andrea for her Grow your Own event - growing those chives and mint was a good thing, the crop was abundant!