Au Naturel.
Endless possibilities ...
Which just means I'm stumped.
And it gives me infinite reasons to procrastinate :)
15 minutes till the deadline. Guess this will have to be it.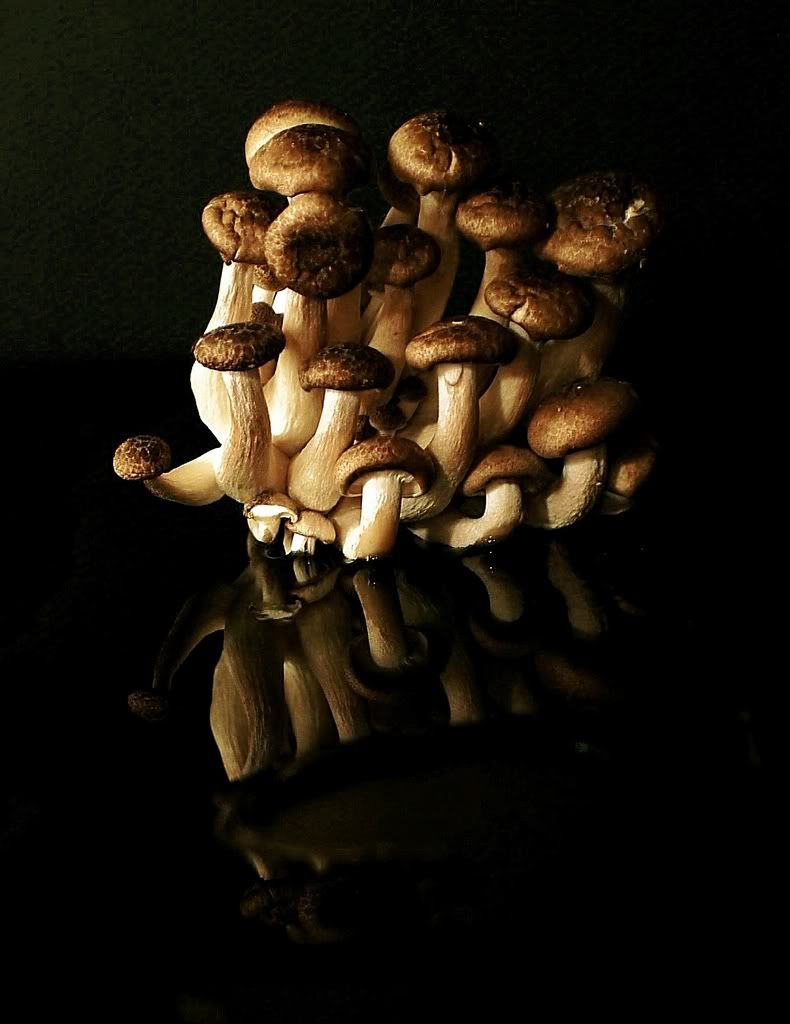
Details:
Pic: Hon-Shimeji mushrooms
Camera: Leica Digilux 3
Kit Lens
No tripod, but lots of gyrating was involved
10 minutes ... Damn, Bee is going to kill me! :)
Wednesday, April 30, 2008
Click a 'shroom or 3?


Tuesday, April 29, 2008
Mushroom Lemongrass Soup (Tom Yum Het Mangsawirat)
No, I did not know the full name of that soup. Like most other people, all I call it is Vegetarian Tom Yum. I just looked up the name so I could increase my coolness factor tenfold :)
I've often felt like writers' block is nonexistent when it comes to talking about food. Except for today. I read Mele Cotte's post about her Cooking to Combat Cancer event a few days ago and finally figured out a recipe I wanted to try out in honour of it. But attempting to write about it has been insanely difficult. As I've sat here typing/editing/erasing sentences over and over, I've can't stop thinking of people I've encountered who have battled the disease - some survived, others didn't, in all cases the disease seemed to take a toll on everybody involved. And, in all cases, the indomitable strength displayed by everybody involved is just phenomenal. The will to live, to battle it out, the will to stand by friends or family - it makes for amazing stories of humanity.
****
Mushrooms - apparently, they're a powerfood when it comes to foods that fight cancer.
- All wild mushrooms ostensibly contain the complete natural range of trace ingredients (72+).
- Several mushrooms contain polysaccharides, especially Lentinan - that help build immunity. They also contain lectin, which attacks cancerous cells and prevents them from multiplying.
- Mushrooms that contain thioproline can stimulate the production of interferon in the body.
- Extracts from mushrooms have been successfully tested in recent years as an adjunct to chemotherapy.
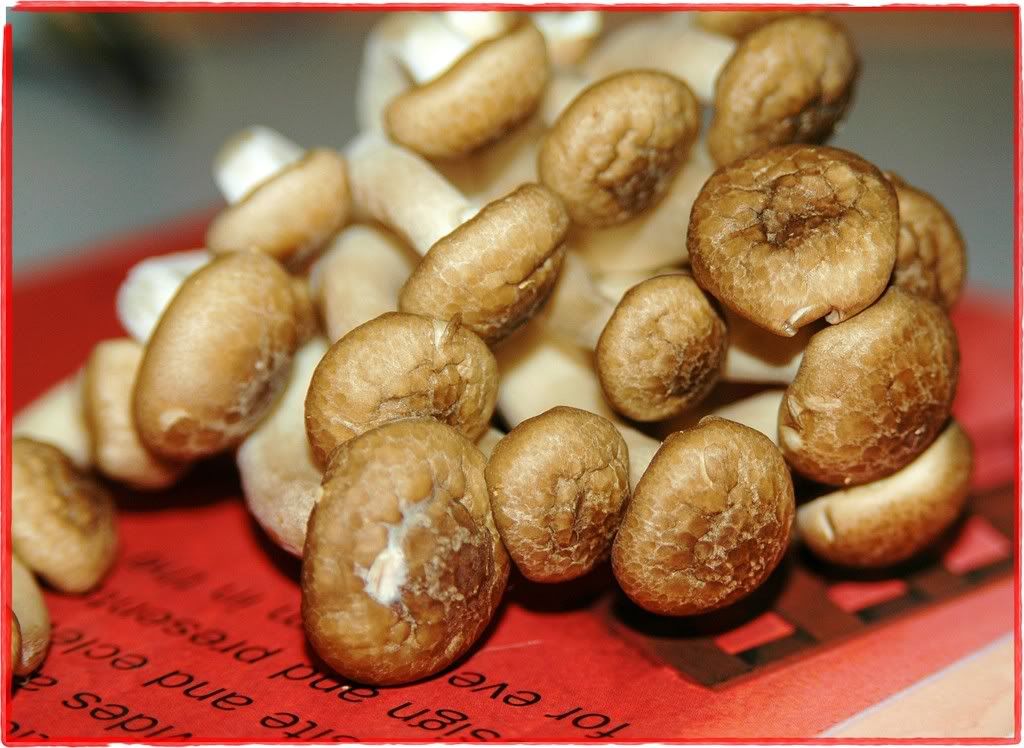
Feeling empowered by all this new found knowledge, I marched off to a couple of stores determined to find atleast one mushroom variety that I wasn't familiar with! Well, that's a pretty easy task - there are probably a zillion that I've never eaten before :) The booty for the day ended up being a pretty fun stash:
Enoki - These insanely cute looking mushrooms have a delicate fruity flavour and are usually served raw.
Clamshell - Apparently, these have a taste evocative of shellfish (I wouldn't know anything about that!). They're best when blanched or cooked.
Brown Beech - Also known as hon-shimeji mushrooms, these are highly esteemed in Japan. These are often grown on wood, especially beech trees hence the common name beech mushroom.
Crimini - Probably the most familiar of all - apparently, these are portabellos that are harvested real young! They tend to retain their firmness with cooking and work great in sauces and soups.
End-of-Botany-Lesson :)
****
So, in spite of the disappointing adventure with drunken noodles last week, the craving for thai flavours has not mellowed in any way. Tom Yum flavours are always so light and comforting, and with the mushroom booty on hand, how could one resist trying out this soup?
TYHM is the vegetarian version of Thailand's most popular soup - spicy and sour, it is usually served scalding hot in a pot with a fire underneath - very exciting! :) Well, we didn't quite go for that ultra traditional effect, though the spice in the soup more than made up for the flames! :)
The original recipe was for a clear soup with just mushrooms and tomatoes. I went for a couple of variations - some shallots, a slew of grated carrot and a few spoons of coconut milk. Also, we ground the thai chillies so the spice blended in a little more - which it totally did, the last batch of bird's eye chillies from Uwajimaya pack a whopper!
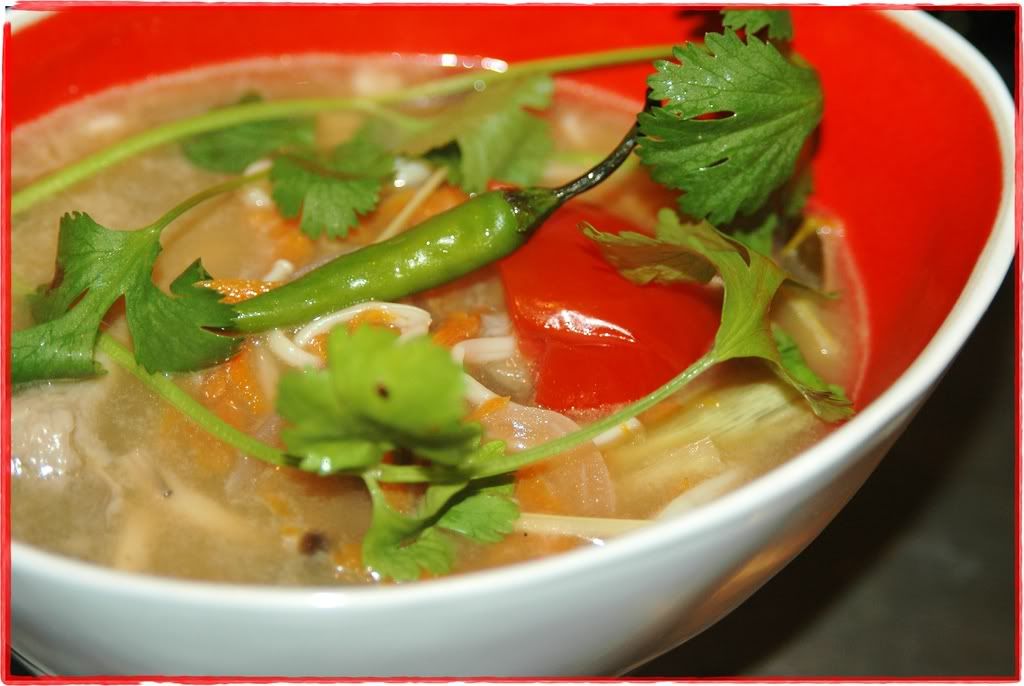
Tom Yum Het Mangsawirat
Oodles of mushroom goodness!
Oodles of mushroom goodness!
Servings: 4 cups/2 bowls
2 small shallots - sliced long and thin
3 cups water
1 lemongrass stalk - cut into 4" pieces and smashed
4-6 whole torn lime leaves
3 slices galangal (about 1 t)
8-10 crimini mushrooms - sliced
4 small thai chillies (Prik Kee Nuu Suan)
2 cups of mixed mushrooms (enoki, brown beech, clamshell)
1 medium carrot - grated
1 tomato - cut into eighths, lengthwise
3 T coconut milk
2 T white soy sauce
1 t sugar
3 T lime juice
1-2 stems cilantro
1 t sesame oil
Heat the oil in a saucepan and saute the shallots till lightly browned.
Add the water along with the crimini mushrooms and boil covered on medium-high (6-8 minutes).
Once the mushrooms are completely cooked and soft, remove them from the water.
[We only want the "mushroom stock" flavour from the crimini - I have a couple of ideas on what to do with the cooked crimini, I'll try to post about it in the next week.]
Crush the lemongrass in a mortar and add it to the water. You could alternatively just shred/separate the lemongrass if you don't want to deal with fishing out small pieces from your soup later :)
Add the torn lime leaves along with the galangal.
Turn up the heat and bring to a boil, for about 5 minutes - to release the flavours of the herbs. The water should be murky brown/green when done.
Add the mushrooms and ground chilli paste. Boil for 2 minutes till the mushrooms are just starting to get soft.
Add the tomatoes along with the coconut milk and cook for another minute.
Take the soup off the heat and stir in the soy sauce and sugar. Add the lime juice just before serving - you want to hold off on this till the end since lime juice loses its tartness when boiled.
Check the flavours before serving - tom yum is traditionally served *hot* and is insanely spicy and sour!
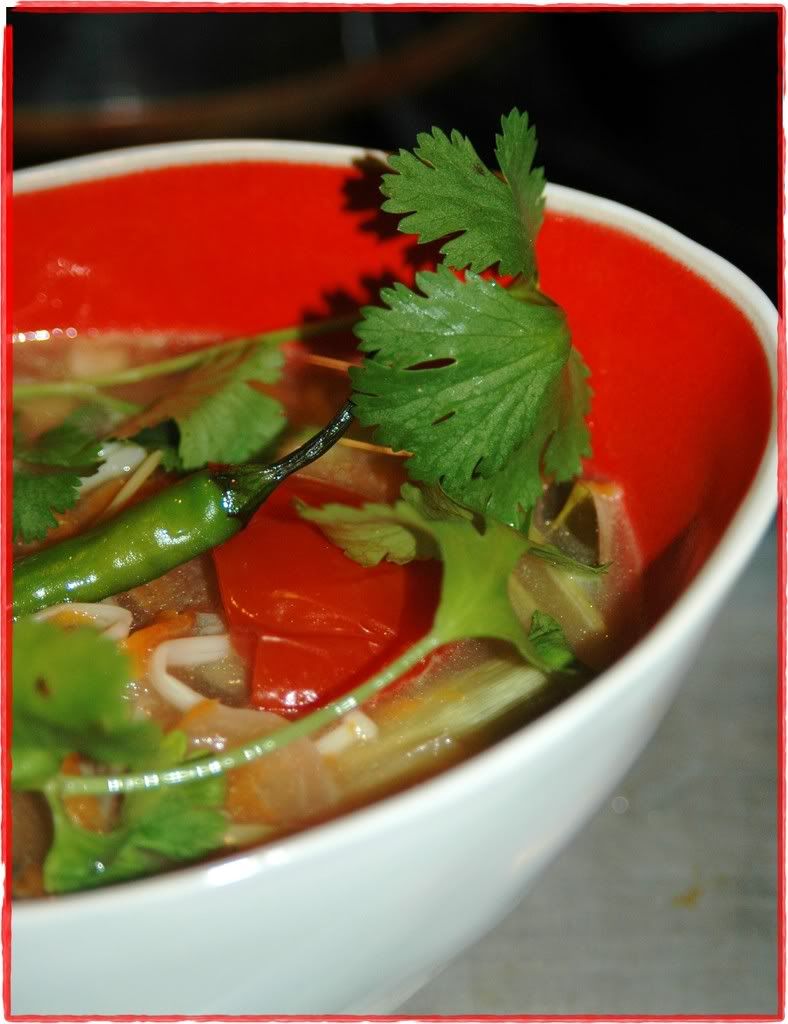
Transfer into bowls and garnish with sprigs of cilantro.
****
Opinion?
Yum! This was exactly what I wanted tonight. Simple, flavourful, elegant, insanely spicy. If someone threw me into a giant bowl of tom yum, I could just swim around and drink it forever!
I'm sending this to Chris for her awesome event - Cooking to Combat Cancer - Stay strong and healthy, Chris!
This is a shout-out to all those incredibly brave survivors and fighters out there - we raise a toast to your strength and hold many good thoughts for you as we revel in this simple and healthy meal.
Monday, April 28, 2008
Eat a cheesecake pop, will you?
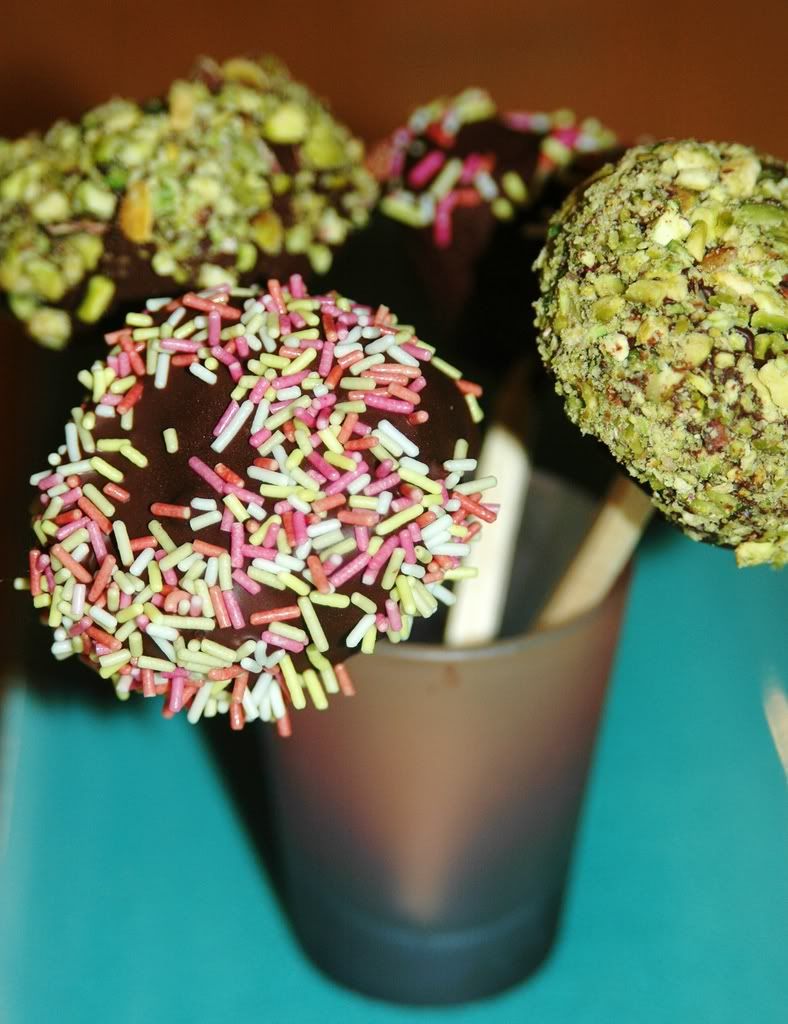
When I first read about cheesecake pops being the DB challenge for April, it took me a while to figure out what these crazy things were. I had to read and re-read the recipe before understanding how these pops got done. They're made of cheesecake, but there's more to them. They look like lollipops, but that isn't what they are. They need to be frozen, but they are not icecream. They're a crazy olio of dessert techniques leading up to these really fun looking finger foods! Crazy, eh? There's a DB challenge for you :)
This month's challenge was organized by Elle (Feeding My Enthusiasm) and Deborah (Taste and Tell)- they picked these funky cheesecake pops from Sticky, Chewy, Messy, Gooey by Jill O'Connor. Seriously, this is the perfect title for a book that has a recipe for cheesecake pops! They're gooey all right, was quite a bit messy assembling them, sticky - a bit ... chewy - somewhat :) I've never baked anything from this book before, now I'm totally intrigued about what other quirky recipes it contains!
These cheesecake pops make for the perfect party food. And given that tomorrow is Vodka's b'day, I decided to tailor these for him. A few pops got the prescribed chocolate dunk, but a few others were set aside for Vodka - they got a yummy crust of sliced almonds in a vodka-honey sauce. That's the tradition - for the 9th year running - the pooch gets a Vodka-based dessert on his birthday :)
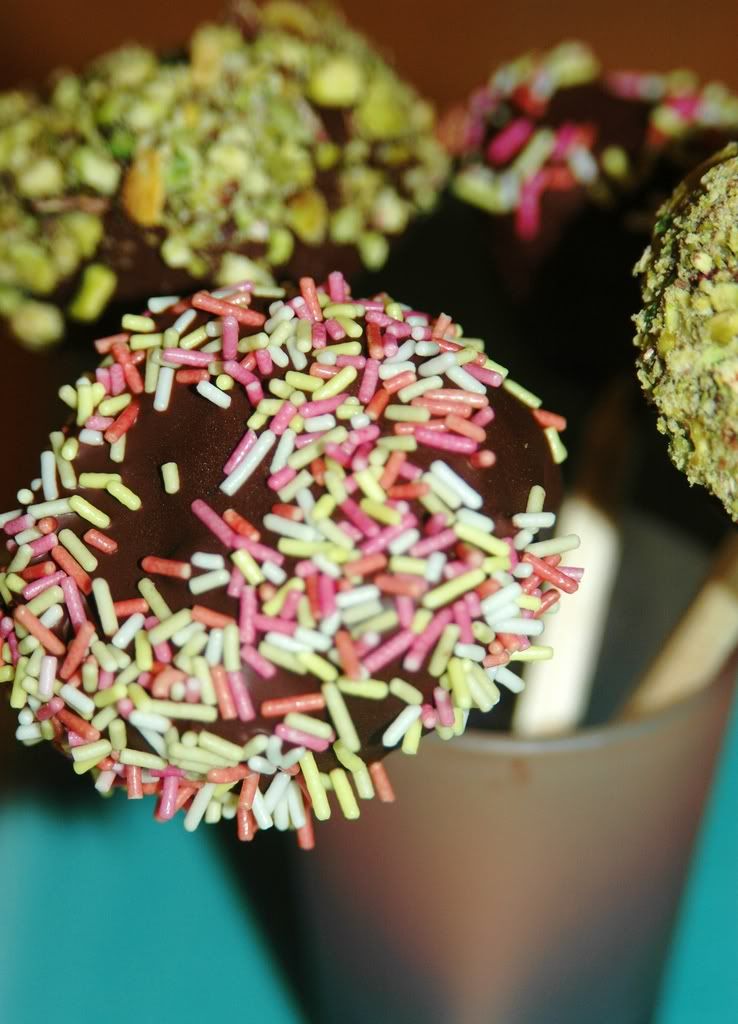
This was actually a really simple and straightforward recipe - a basic cheesecake baked using a water bath. There is plenty of flexibility in the dipping flavours and colours which was fun! I ended up going for the traditional cheesecake balls instead of any fancy geometric shapes, but the fun started with the dipping and decorations. The first few got dunked in semisweet chocolate and topped with sprinkles - very festive! And then Vodka's preferences took over - which made for a big hit!
****
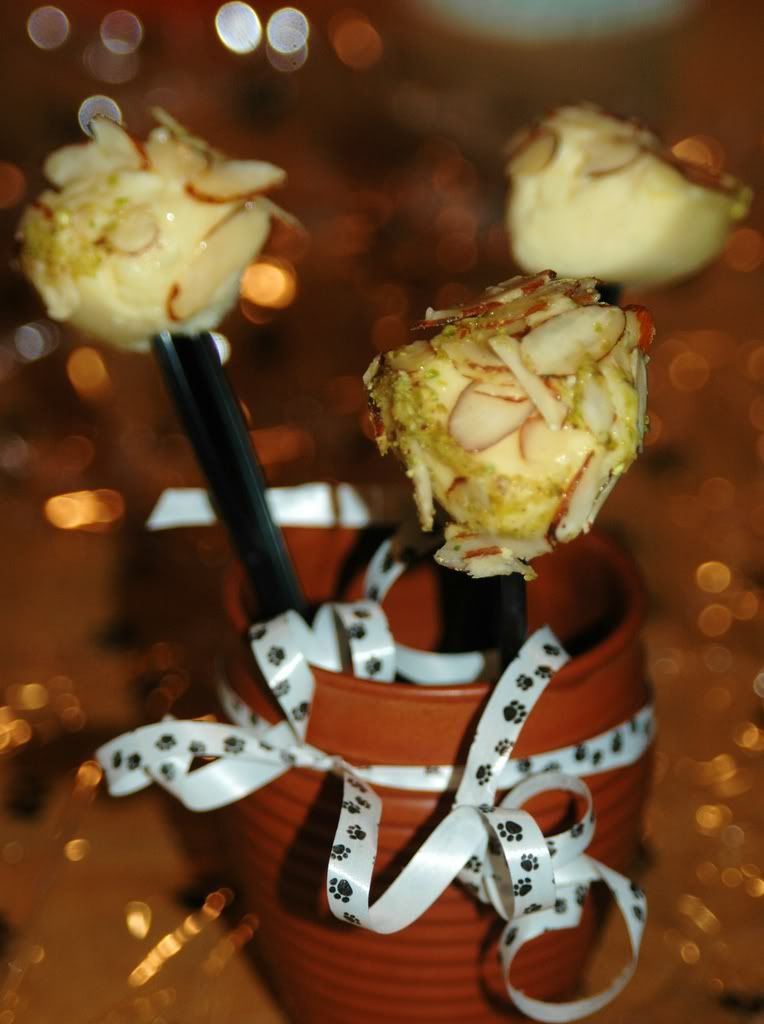
Cheesecake Pops
(based on Jill O'Connor's recipe from Sticky, Chewy, Messy, Gooey)
(based on Jill O'Connor's recipe from Sticky, Chewy, Messy, Gooey)
Makes 30 – 40 Pops
5 8-oz. packages cream cheese at room temperature
2 cups sugar
¼ cup all-purpose flour
¼ teaspoon salt
5 large eggs
2 egg yolks
2 teaspoons pure vanilla extract
¼ cup heavy cream
Boiling water as needed
Thirty to forty 8-inch lollipop sticks
1 pound chocolate, finely chopped – you can use all one kind or half and half of dark, milk, or white (Alternately, you can use 1 pound of flavored coatings, also known as summer coating, confectionary coating or wafer chocolate – candy supply stores carry colors, as well as the three kinds of chocolate.)
2 tablespoons vegetable shortening
(Note: White chocolate is harder to use this way, but not impossible)
Assorted decorations such as chopped nuts, colored jimmies, crushed peppermints, mini chocolate chips, sanding sugars, dragees) - Optional
Position oven rack in the middle of the oven and preheat to 325 degrees F. Set some water to boil.
In a large bowl, beat together the cream cheese, sugar, flour, and salt until smooth. If using a mixer, mix on low speed. Add the whole eggs and the egg yolks, one at a time, beating well (but still at low speed) after each addition. Beat in the vanilla and cream.
Grease a 10-inch cake pan (not a springform pan), and pour the batter into the cake pan. Place the pan in a larger roasting pan. Fill the roasting pan with the boiling water until it reaches halfway up the sides of the cake pan. Bake until the cheesecake is firm and slightly golden on top, 35 to 45 minutes.
Remove the cheesecake from the water bath and cool to room temperature. Cover the cheesecake with plastic wrap and refrigerate until very cold, at least 3 hours or up to overnight.
When the cheesecake is cold and very firm, scoop the cheesecake into 2-ounce balls and place on a parchment paper-lined baking sheet. Carefully insert a lollipop stick into each cheesecake ball. Freeze the cheesecake pops, uncovered, until very hard, at least 1 – 2 hours.
When the cheesecake pops are frozen and ready for dipping, prepare the chocolate. In the top of a double boiler, set over simmering water, or in a heatproof bowl set over a pot of simmering water, heat half the chocolate and half the shortening, stirring often, until chocolate is melted and chocolate and shortening are combined. Stir until completely smooth. Do not heat the chocolate too much or your chocolate will lose it’s shine after it has dried. Save the rest of the chocolate and shortening for later dipping, or use another type of chocolate for variety.
Alternately, you can microwave the same amount of chocolate coating pieces on high at 30 second intervals, stirring until smooth.
Quickly dip a frozen cheesecake pop in the melted chocolate, swirling quickly to coat it completely. Shake off any excess into the melted chocolate. If you like, you can now roll the pops quickly in optional decorations. You can also drizzle them with a contrasting color of melted chocolate (dark chocolate drizzled over milk chocolate or white chocolate over dark chocolate, etc.) Place the pop on a clean parchment paper-lined baking sheet to set. Repeat with remaining pops, melting more chocolate and shortening (or confectionary chocolate pieces) as needed.
****
Allowed Variations
Yes you can make some changes to this cheesecake as long as you promise to use the basic cheesecake recipe (although you can add a flavor to it if you like) and do keep it white (sorry, no chocolate or coffee or mocha), and keep the pops to the 2 ounce size.
The dipping flavors and colors are completely up to you.
If you want to use decorations, go for it. Same with drizzles and ribbons on the sticks. Or leave them plain after dipping them. You can even dip them in graham cracker crumbs and then the chocolate – to get more of the cheesecake feel to them.
You can cut the cheesecake into geometric shapes instead of making balls…triangles or squares or diamonds…just keep them about 2 ounces each. We can't wait to see what combinations our Daring Baker come up with…just make sure to use the basic cheesecake recipe, to make the pops 2 ounces or close to that in size, and to dip each pop in chocolate or confectionary coating and have it on a lollipop stick.
Opinion?
This isn't my typical kind of dessert, I'm not even a big cheesecake fan, but these things turned out pretty good! I was afraid the cheesecake was going to be super dense, but it was actually pretty light - probably courtesy of a couple of changes I made to the recipe - I used neufchatel cheese instead of regular cream cheese, I skipped the egg yolk and heavy cream in favour of a couple of tablespoons of silken tofu - these made for a much lighter cheesecake! Dipping the pops in chocolate was a cinch, rolling them in sprinkles and nuts was ... a piece of cake! :)

The best part of it all was that Vodka absolutely loved his treats and then sat around licking his chops for a while after! :)

Thanks, Elle & Deborah for this really really fun challenge. I had a blast and Vodka is thrilled to bits - nothing like making a pooch happy on his birthday!
And now it is time for me to stay up all night checking out all the other awesome DB posts!
Wednesday, April 23, 2008
Sweet'n'Tangy Kumquat Daal
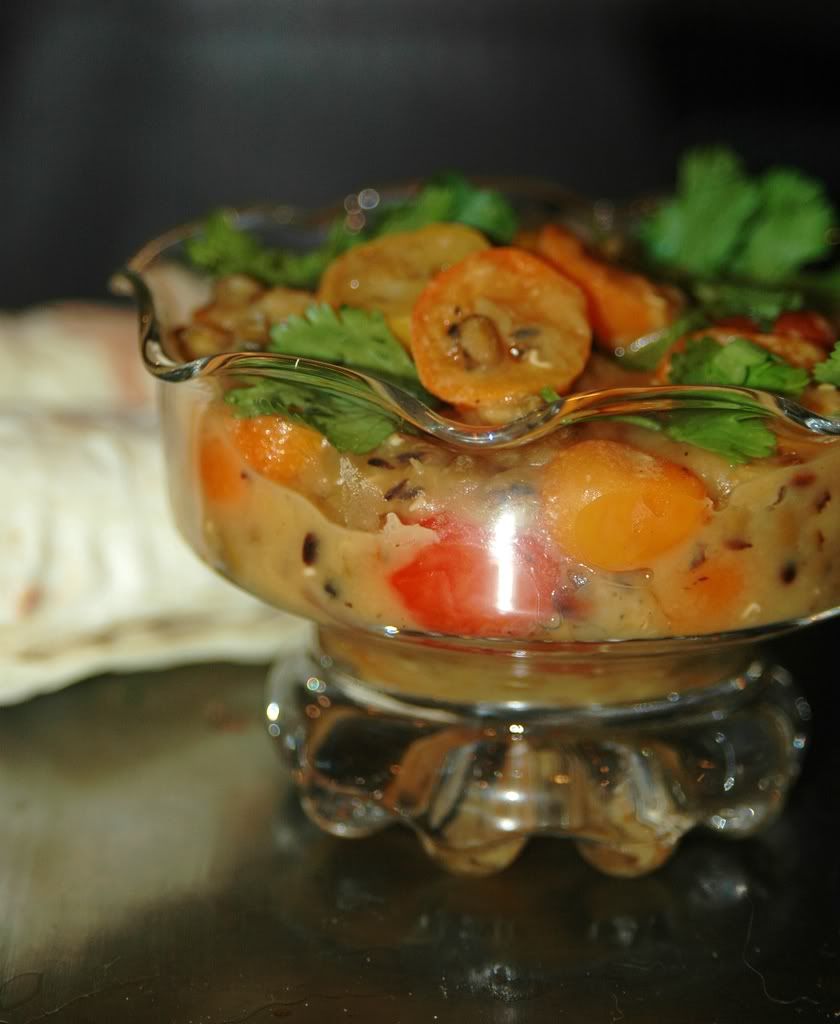
We chanced upon some kumquats at Uwajimaya a few days ago. And I couldn't hold my curiosity any longer. So, we bought a bunch of them even as we kept wondering what we'd do with them! I'd eaten them raw a couple of times and liked them as long as they were perfectly ripe and juicy (except for the damn seeds which are bitter and sometimes a weird blue in colour!)
And I realized earlier today that these crazy cute fruits are the theme for April's round of AFAM. Hmm ... we'd come full circle. Now, we had to come up with a recipe for these crazy cute citrus fruits! I poked around on the web - the most interesting recipes I came up with were Elise's salsa, Sig's cocktail and a few relish ideas on CookingLight, all of which sounded delicious :) But I was hoping for an idea for a main dish for dinner. Hmm ...
Anyway, I love this whole AFAM idea. By the time we end up working with a fruit, we've read so much about it, I feel like I have a new best friend :) Before today, we'd seen kumquats, tasted them, we knew they belonged to the citrus family ... that's about it. And now, I'm a minor font of information!
- Kumquats are not part of the citrus family, but are related to it and belong to the genus Fortunella. The slow growing trees produce 80-100 fruits a year.
- Kumquats readily hybridize with citrus fruits to produce limequats and orangequats - hmm ... these could be the makings of a comic series!
- Kumquats make for a great martini garnish and can be macerated in vodka or any clear spirit.
- Candied kumquats are pretty popular in China.
Back to our recipe search ... after much dithering, we finally decided to experiment with a daal recipe! Simple lentil flavours can never be wrong, right? :) And we're huge fans of raw mango daal - the tartness is so overwhelmingly delicious. Maybe we would enjoy the flavour of kumquats too!
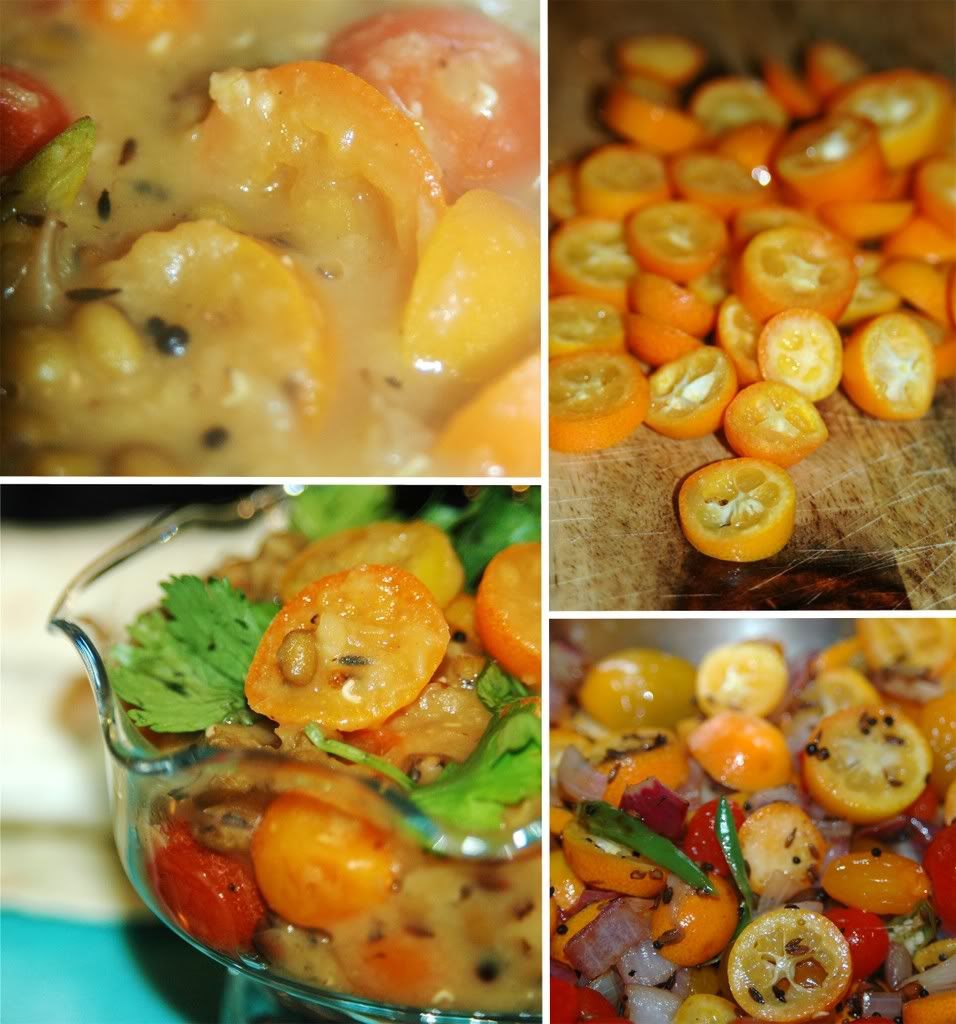
Sweet'n'Tangy Kumquat Daal
Little bits of juicy goodness
Little bits of juicy goodness
Servings: 4-6
1/3 red onion - diced
20+ cherry tomatoes
4 thai green chillies
20 kumquats - sliced and deseeded
1 cup whole moong daal
1 cup masoor daal
1 T sesame oil
1 t cumin seeds
1 t mustard seeds
1 t urad daal
1 t turmeric powder
salt to taste
Chopped cilantro for garnish
Rinse the moong and masoor daal and cook with 4 cups of water either in a pressure cooker or on the stove.
Heat the oil in a wok, add the mustard, cumin and urad daal and let them splutter.
Add the green chillies and onions and saute till the onions start to brown (4-5 minutes).
Throw in the kumquats and tomatoes along with the turmeric and saute for another 4-5 minutes.
Add 1/2 cup of water and simmer for 2-3 minutes.
Add the cooked lentils, season with salt and simmer for 1-2 minutes for the flavours to blend.
Garnish with chopped cilantro.
Opinion?
Wooo Hoo Hoo! Love it! Those crazy little kumquats rock! The daal just oozed with this sweet+tangy citrus flavour. And the sauteed kumquats softened up and tasted *so* juicy and chewy. Yay! Happy :)
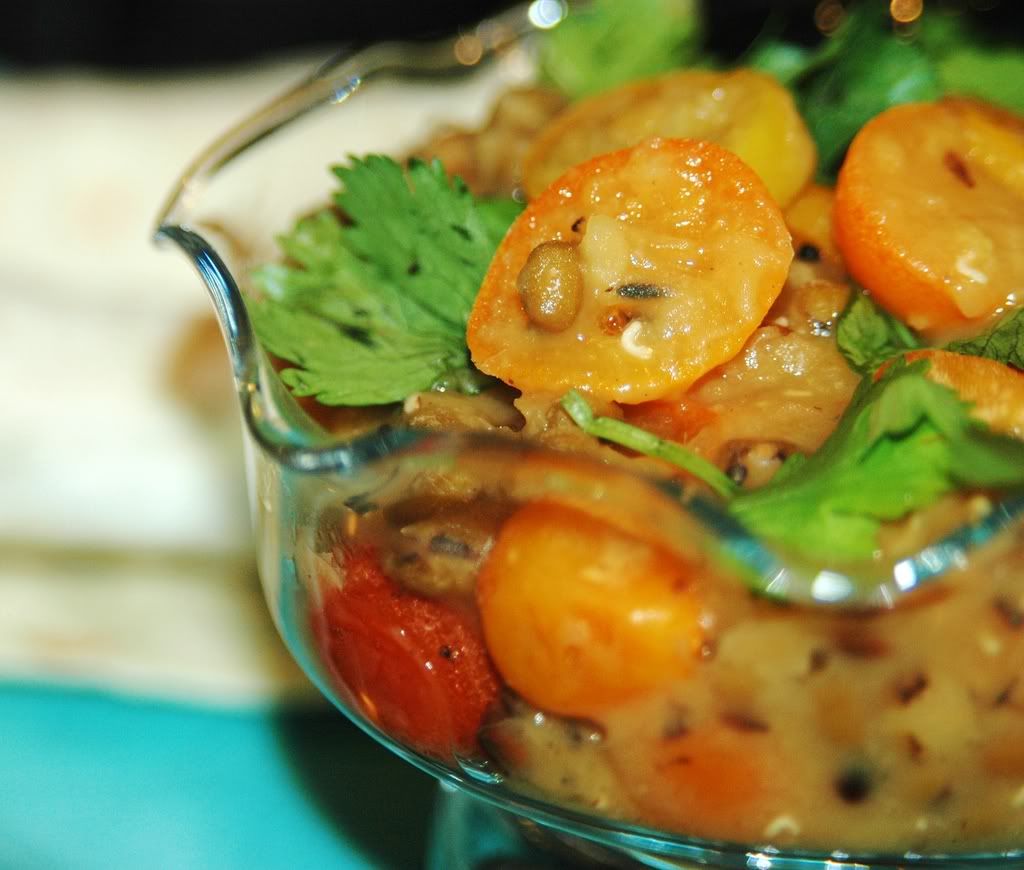
Off this goes to Coffee and Vanilla who is hosting this month's edition of AFAM (Maheshwari's brainchild). Thanks to both of them for organizing this fruit fest!
And we're so hooked onto these fruits, we already have a couple of other ideas for working with them! Expect to see a post about this in the next week or two!
Tuesday, April 22, 2008
Trying to get wasted on drunken noodles ...
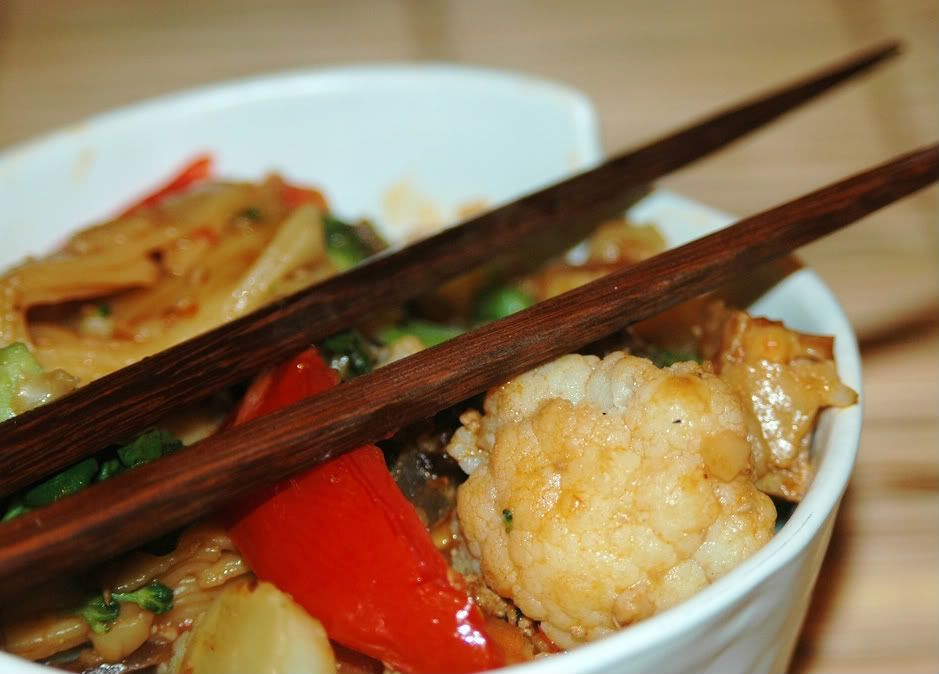
Pad Kee Mao.
Three magic words that can make me skip around in circles. Easily my favourite Thai food, I'm pretty much the informal PKM taster of the city. In fact, there are so many joints that dish up a killer PKM that I've hardly felt the need for attempting a recreation at home.
Until today. We had this hankering for chef-fin' it out. We wanted to be the masters of our own Pad Kee Mao destiny. For some reason, hitting Typhoon or Thin Pan just did not seem enough. So, we embarked on this PKM journey. It was our first time working with those crazy wide rice noodles. When we first saw this dense package in the refrigerated section of Uwajimaya, we weren't quite sure if that was what we wanted - where were the ribbons or pieces of noodles? This just looked like a giant brick! Well, guess we'd have to figure it out. We loaded up on thai basil, a slew of vegetables and sauces and got to work! :)
The insanely delicious drunken noodles is a multi-step dish - with a fascinating assortment of sauces and spice - tamari, soy sauce, oyster sauce, white soy sauce (or fish sauce), red chillies, thai bird chillies, the list goes on!
So, we have to talk about our pitfalls upfront here. For some bizarre reason, we decided to try some additional seasoning here and went for a spoon of chili bean paste. *bad* idea. Don't even try it. I mean, this might work well with other szechuan dishes, but it is not a thai flavour by any means. And the bean bits add a weird flavour to drunken noodles. So, don't do it. Don't.
(Which is why I've excluded it from the recipe.)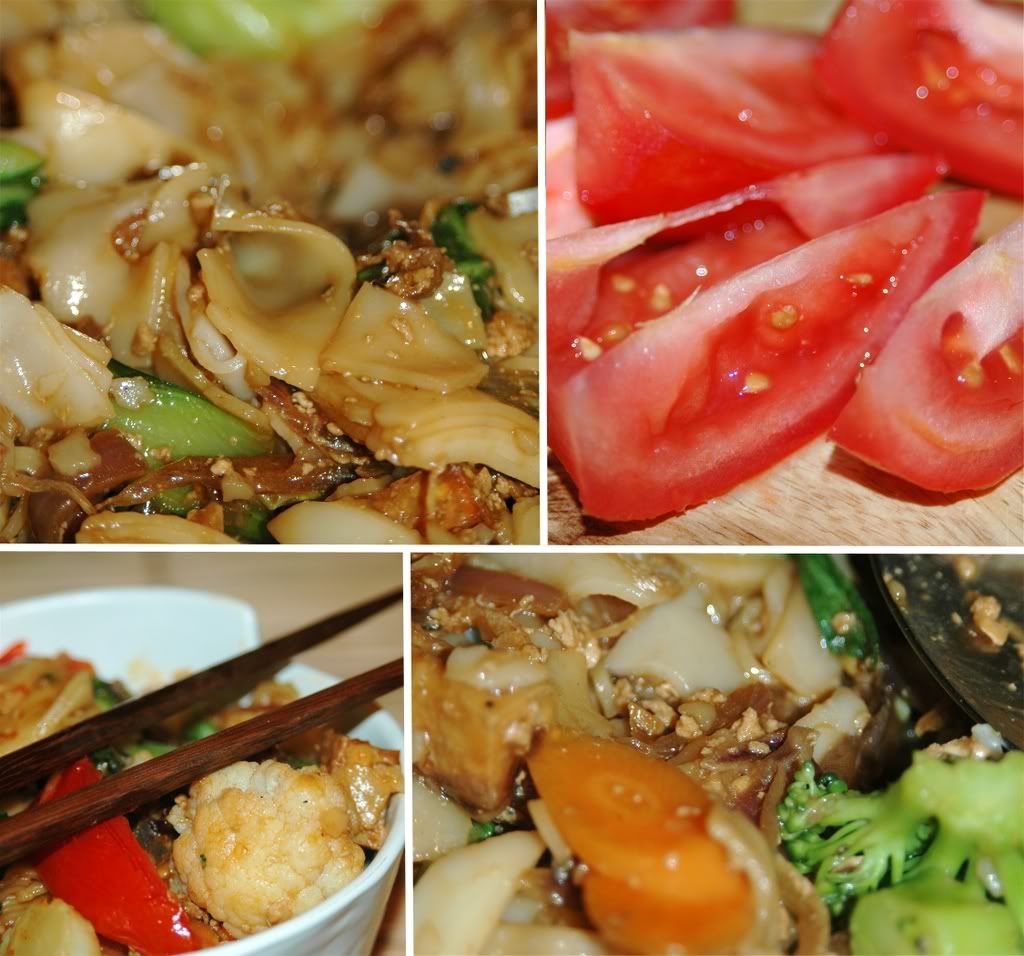
Pad Kee Mao
*hic*
*hic*
Servings: 4
7-8 oz wide rice noodles (sen-yai)
1/2 cup firm tofu - cubed
3 cloves garlic - finely chopped
1 small onion - sliced long
3 T white rice vinegar
3 T white soy sauce (See-yew Khaaw)
4 T palm sugar
3 T lime juice
2 T tamari
4-5 T vegetarian oyster sauce
2 T ground dried red chillies
2 green jalapenos - finely chopped
1 small thai chilli - chopped (Prik Kee Nuu Suan)
7-8 broccoli florets
7-8 cauliflower florets
2 small carrots - sliced
1 tomato - cut into eighths
1 baby bok choy - chopped
1 cup fresh thai basil leaves
2 T peanut oil
1/2 cup egg whites
Soak sen-yai noodles in water for 15 mins. Place soaking sen-yai noodles on the stove and bring to very slow boil, removing the sen-yai noodles while they are still firm (after about 10 minutes). Drain with cold water and set aside.
Spray the tofu chunks with oil spray and stick them under a broiler till browned.
Blanch the broccoli, cauliflower and carrots in a pot of boiling water for 3-4 minutes till al dente.
Heat the oil in a wok and saute the garlic till it starts to brown.
Throw in the onions along with the jalapenos and saute briefly.
Add the scrambled egg whites and saute a bit longer.
Now throw in the rice vinegar, dried chillies, lime juice, sugar and white soy sauce
Turn the heat to high and let the sauce thicken.
Once the sauce reduces, add the thai basil leaves along with bok choy, oyster sauce and tamari.
Saute for a couple more minutes before adding the blanched vegetables.
Add the cooked noodles and tofu and saute for 4-5 minutes on medium heat. Keep tossing the ingredients to mix the sauce completely with the noodles and vegetables.
Top with the tomatoes and cilantro before serving. Maybe even garnish with sliced green onions or chopped garlic or jalapenos.
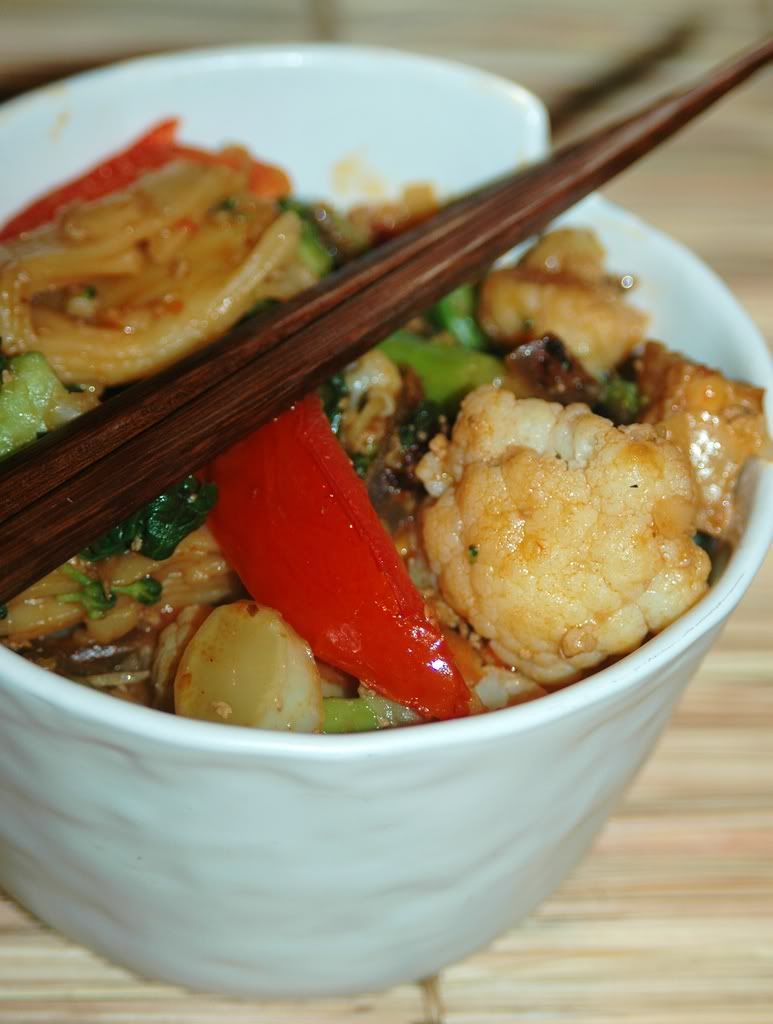
Opinion?
*mediocre*. Firstly, we killed the drunken high by adding that damn chili bean paste. That was a serious mistake. It'll never happen again! But the main issue here was that we're so damn stuffed from the flu that plagued us for the past week that our sense of smell is still on vacation. And that in turn is still greatly hampering our taste buds. *grr*. Even a nice dose of spicy thai chillies couldn't quite fix it! Another thing we did, as odd as it may sound - we used too many vegetables! Next time around, we're only going with broccoli and some carrots, no cauliflower - that's a bit of an overkill in our PKM.
So, we didn't end up being the Iron Chef of PKM. We barely got drunk on our noodles! But we learned our lessons. And the PKM flame burns bright now - we're itching to try it again :)
Sunday, April 20, 2008
Silly Fusilli!
Estelle Costanza: Where have you been? You were supposed to fix the stove! I've been waiting for hours!
Frank Costanza: I fell on some Fusilli!
Estelle Costanza: Fusilli?
Frank Costanza: You know, the corkscrew pasta. It was a Fusilli Jerry. It got stuck in me. Had to go to the proctologist.
Frank Costanza: You know, the corkscrew pasta. It was a Fusilli Jerry. It got stuck in me. Had to go to the proctologist.
~Seinfeld, Episode: The Fusilli Jerry
****
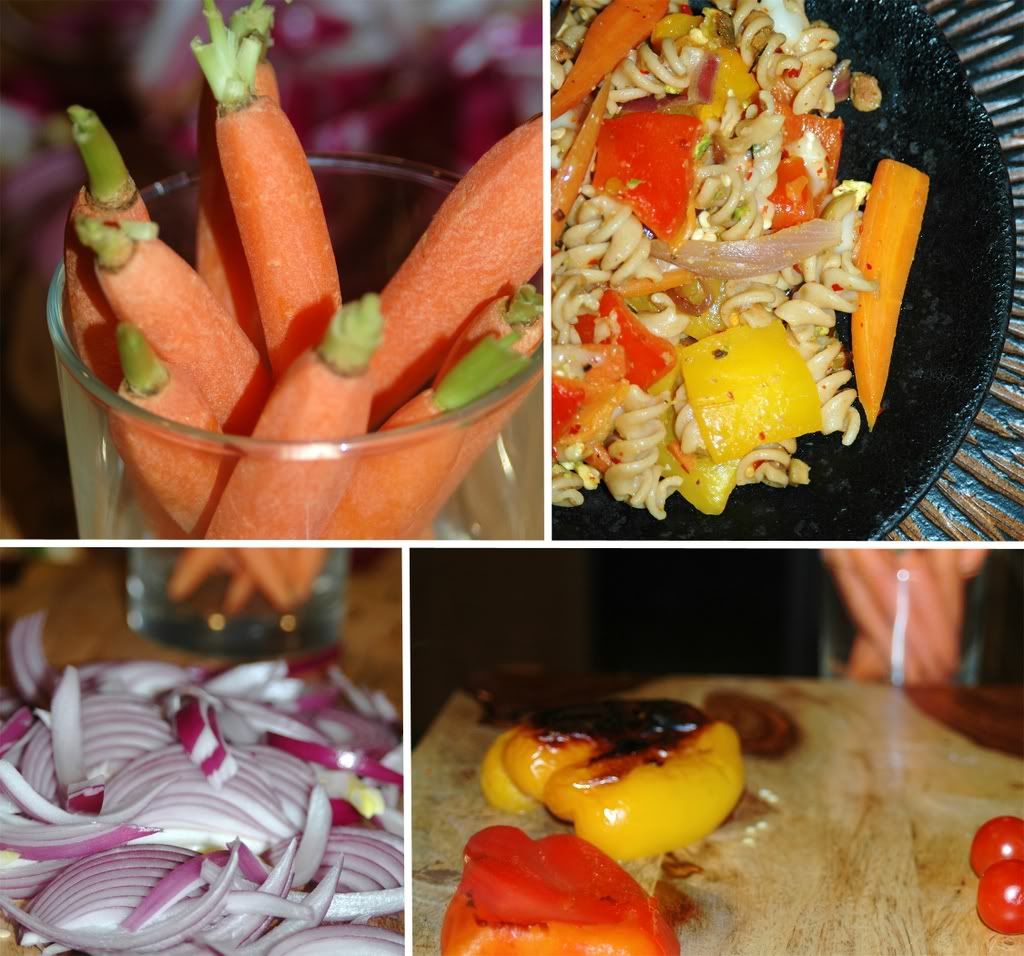
Could I ever cook fusilli with a straight face after watching this? :) Guess not! As long as I can keep cooking and eating fusilli, I'm happy - straight face, screwy face, who cares! :)
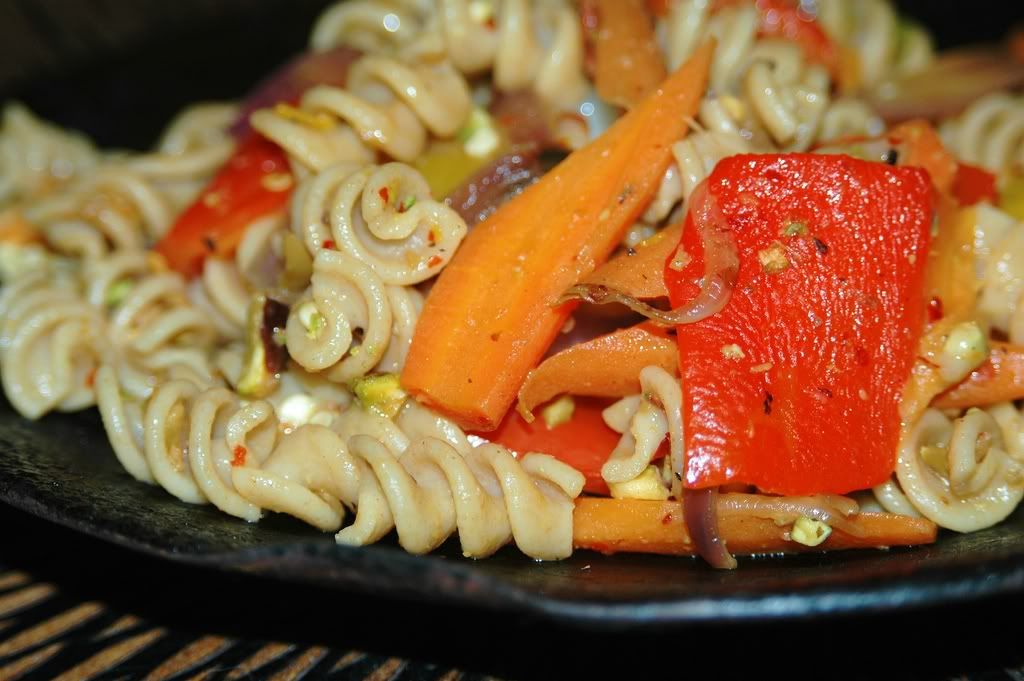
This was one of those meals thrown together when we were craving healthy carbs - we had whole wheat fusilli on hand, a slew of bell peppers waiting to be worked with ... some onions, garlic, a slew of juicy baby carrots ... let's get the meal on!
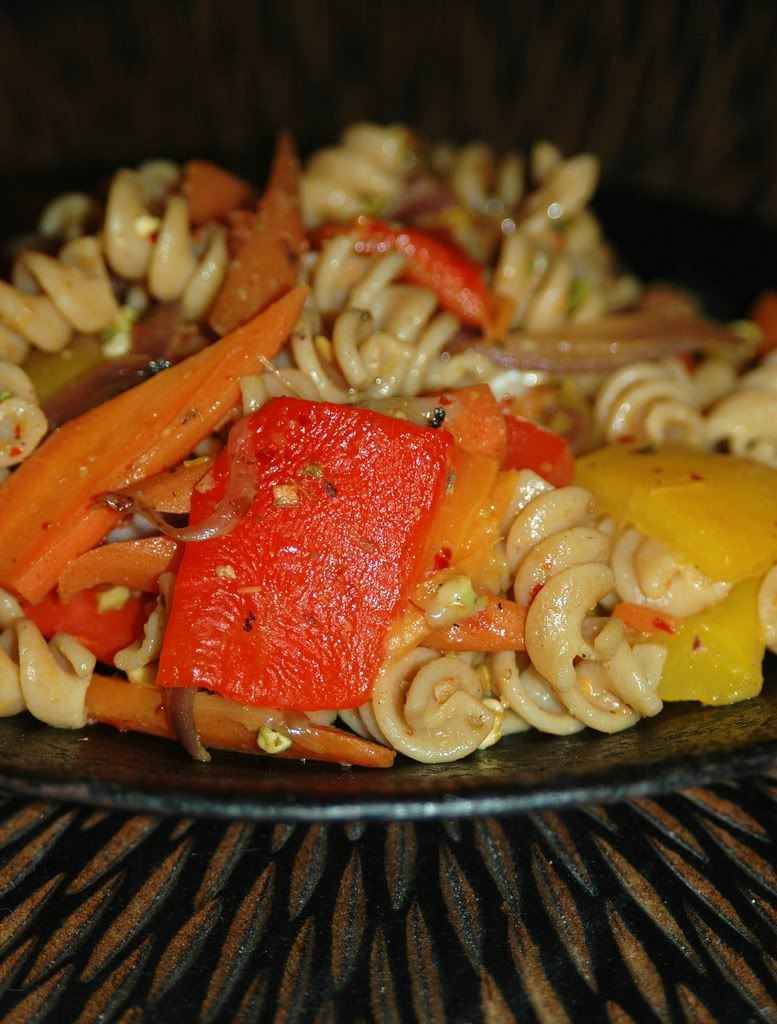
Fusilli with Peppers, Carrots and Onions
Damn, that corkscrew pasta tastes good! :)
Damn, that corkscrew pasta tastes good! :)
Servings: 4
1 lb red and yellow bell peppers
3 T olive oil
1 large red onion - thinly sliced
8-10 baby carrots - cut into long chunks
4 cloves garlic - minced
1 lb whole wheat fusilli
salt, freshly ground black pepper
freshly grated Parmesan cheese
3 T finely chopped fresh parsley
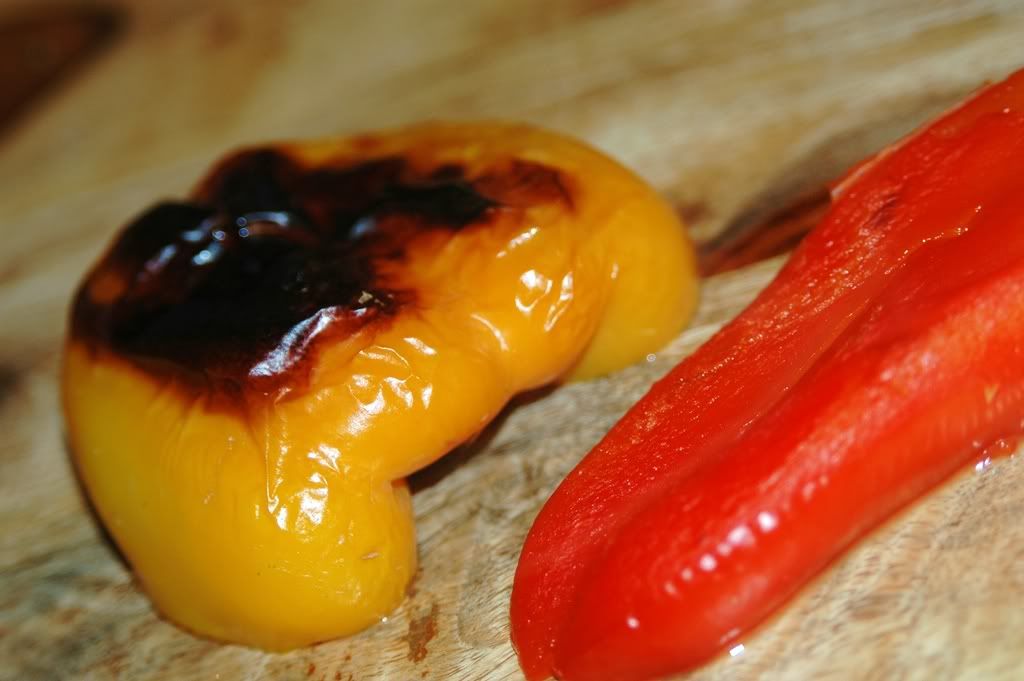
Place the peppers under a hot broiler and turn occasionally until they're blackened on all sides. Turn off the broiler and let the peppers sit for 5-10 minutes.
Peel the peppers, cut them into chunks and remove the stems. Most recipes ask for the seeds to be discarded, but we like the pungent zing of the seeds, so we usually incorporate them in our recipes.
Bring a large pot of water to a boil. Add salt and the pasta to the boiling water and cook until the pasta is just al dente.
Heat the oil in a large frying pan. Add the onions and cook over moderate heat till translucent (about 5-8 minutes).
Stir in the garlic and cook for another couple of minutes.
Now, add the carrot chunks and saute for 3-4 minutes.
Throw in the peppers and mix together gently.
Stir in about 3-4 T of the pasta water and continue to stir.
Season with salt and pepper, and stir in the parsley.
Drain the pasta and tip it into the pan with the vegetables.
Cook over moderate heat for 2-3 minutes, stirring constantly to mix the pasta into the sauce.
Serve topped with Parmesan.
****
Those who forget the pasta are condemned to reheat it.
~Author Unknown
Opinion?
Simple, flavourful, insanely quick! And honestly, being condemned to reheat the pasta sounds like a pretty good option to me :)
A certified candidate for Ruth's Presto Pasta Nights!
Simple, flavourful, insanely quick! And honestly, being condemned to reheat the pasta sounds like a pretty good option to me :)
A certified candidate for Ruth's Presto Pasta Nights!
Monday, April 14, 2008
Whole lotta nut love!
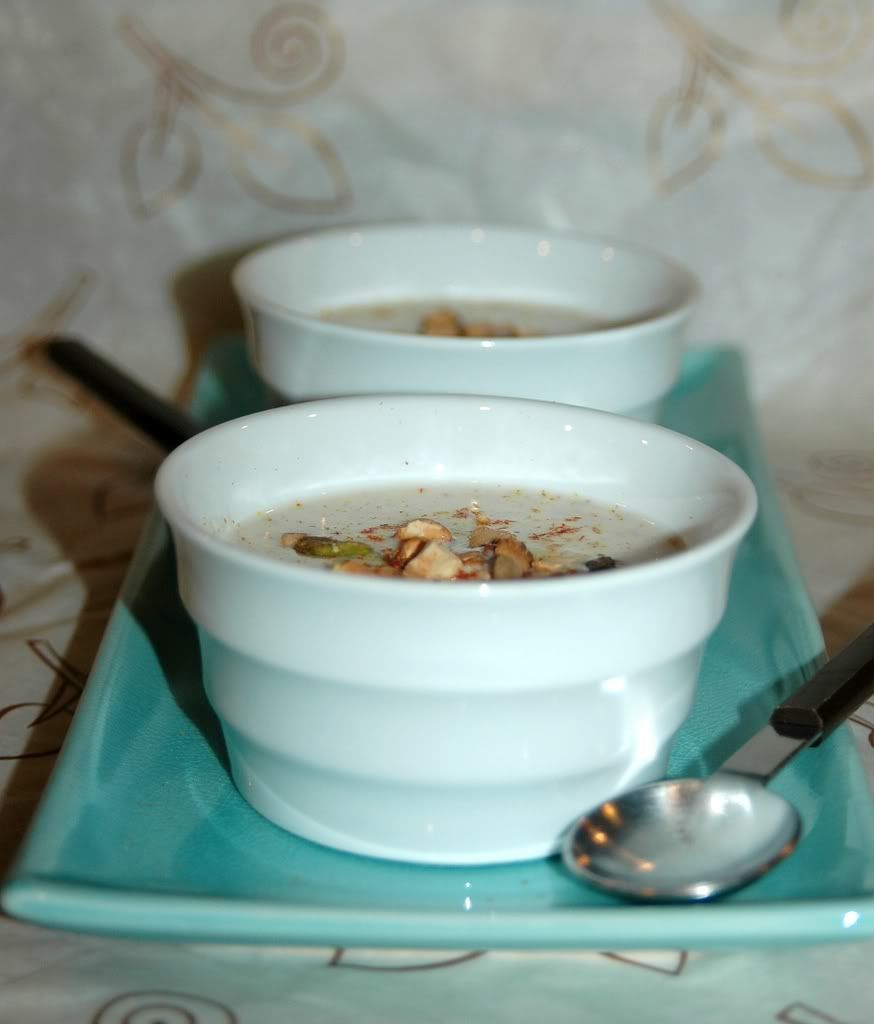
There's no such thing as too much of 'boarding! Really! Even when my ass hurts after two days of sliding, gliding, rolling down the mountain :) But follow that up with an insanely long run ... hmm ... the body starts whining a bit. And wants some serious TLC. And the mind just wants to some long overdue blogging!
And what could be be better than an insanely nutty comfort dessert? The minute we remembered that it was TNY, the reflex was to embark on making something simple, something sweet, something oozing earthy nut flavours!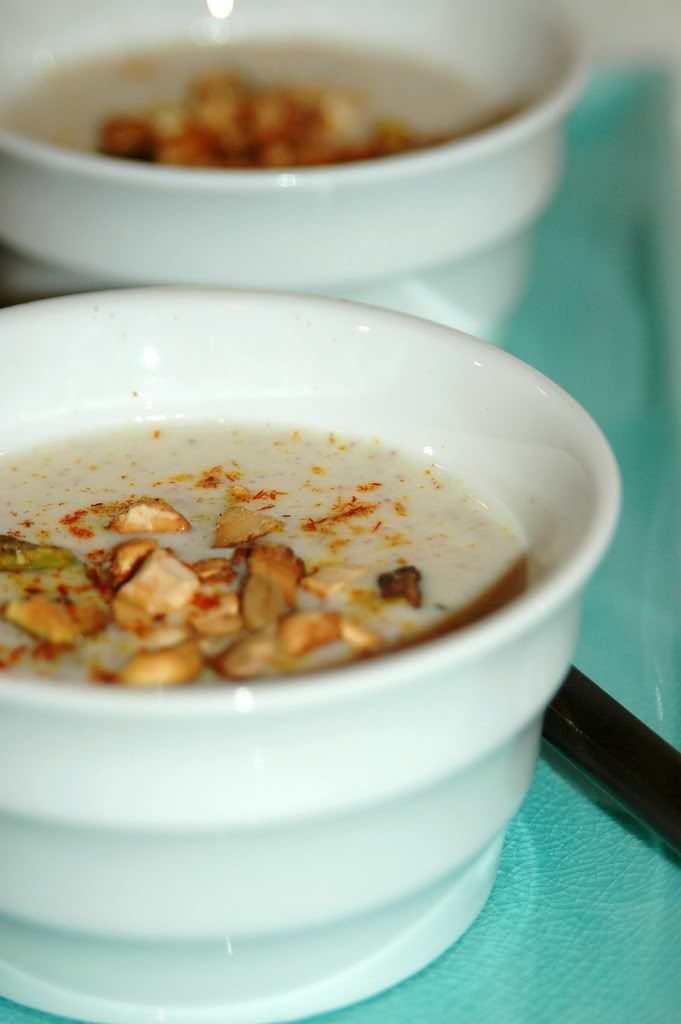
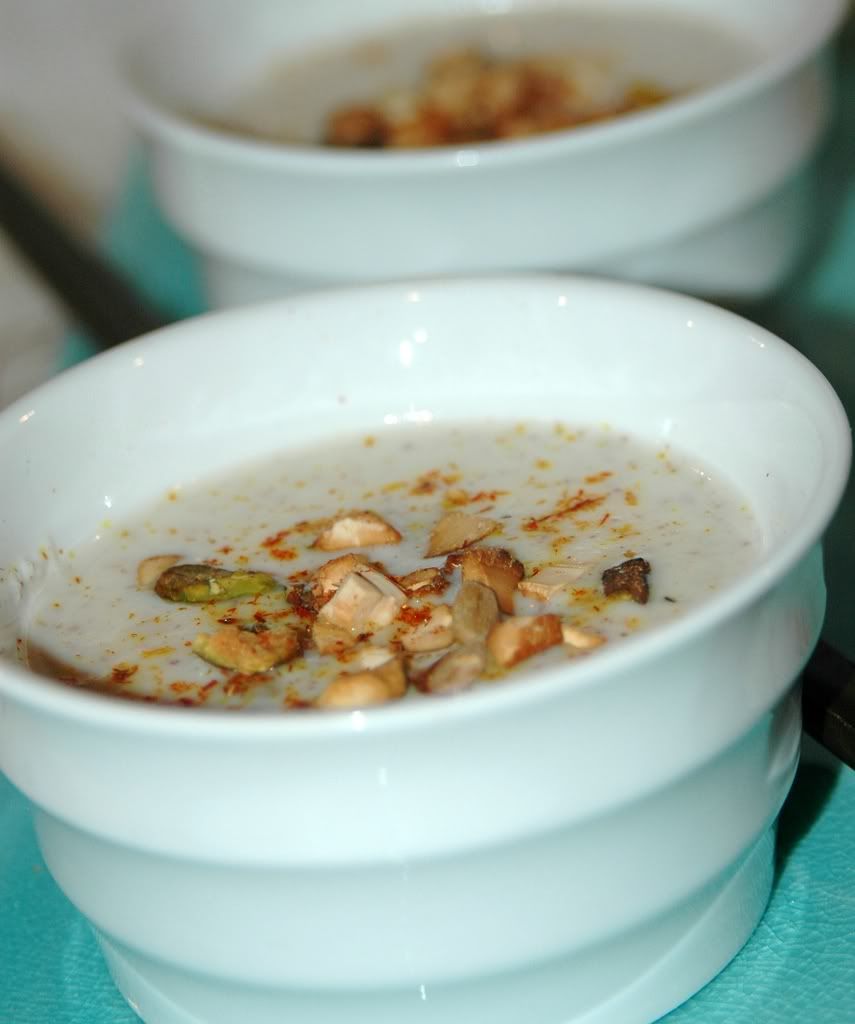
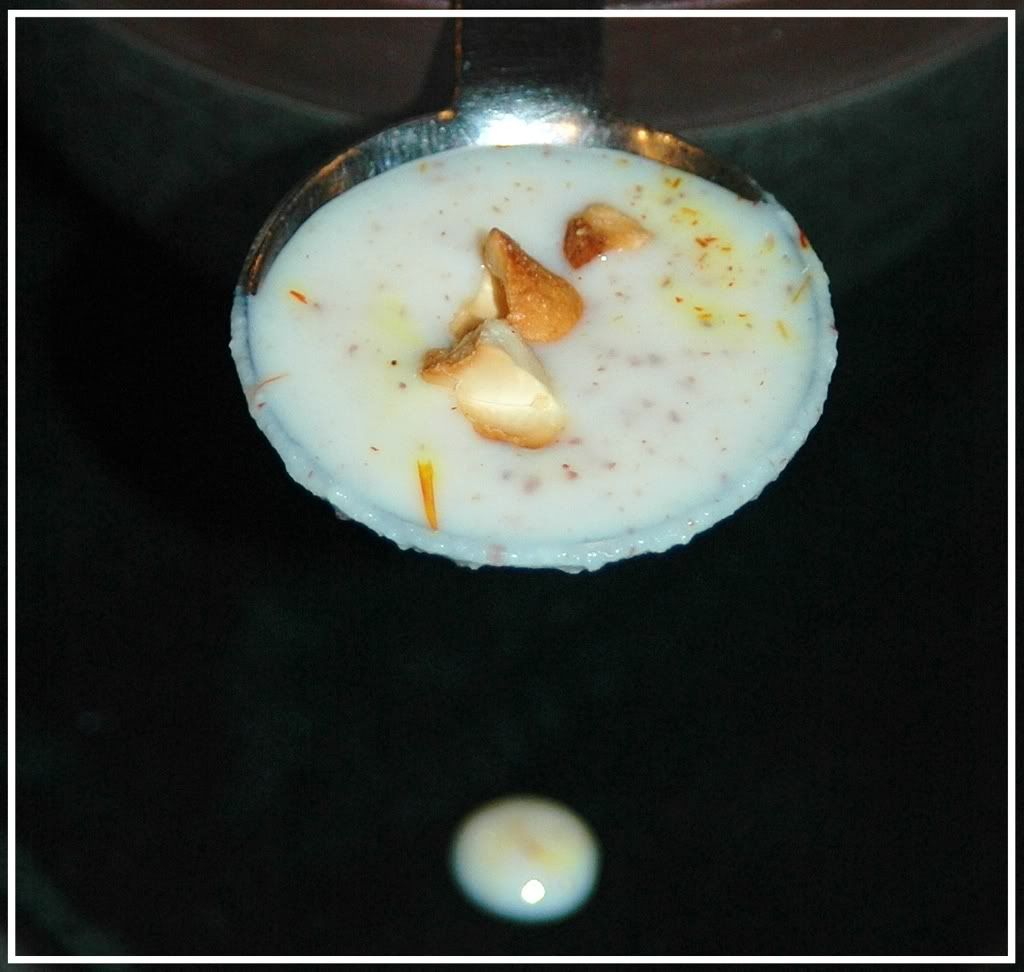
Our version of phirni does not have chunks of almonds, instead we ground up the almonds along with the milk. We also cut back on the rice and let the almonds define the flavour and consistency of the pudding. And, obviously, topping the pudding with a variety of other nuts could only be more goodness! :)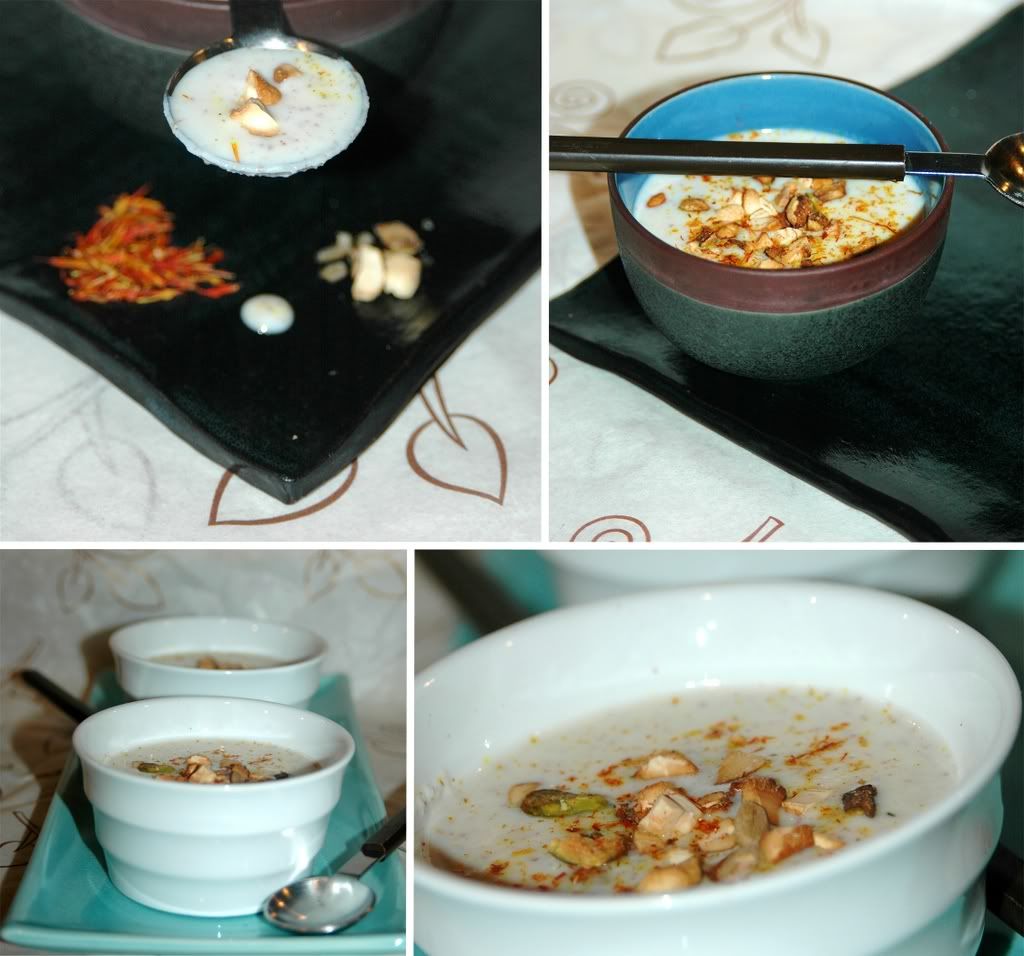
Badam Phirni (Almond Pudding)
Nuts topped with ... nuts!
Nuts topped with ... nuts!
Servings: 4 ramekins
3/4 cup almonds
3 cups nonfat milk
1 T rice
1/2 cup demerara sugar
1 T pistachios - crushed
1 T cashews - broken into bits
1 t charoli seeds
1 t crushed green cardamom
Soak the rice in hot water for 1 hour before grinding it to a fine paste.
Soak the almonds in hot water for about 10-12 minutes.
Peel the almonds and grind them into a fine paste with 1/2 cup of milk.
Heat the rest of the milk in a saucepan along with the ground rice.
Add the almond paste and stir constantly, bringing the mixture to a slow boil.
Let the milk thicken - this takes about 15+ minutes.
Add the sugar and cardamom and continue stirring over low heat.
In the meantime, toast the pistachios, cashews and charoli seeds.
Opinion?
Think we like this version of our badam pudding better than the traditional phirni! The soft creamy badam consistency is *so* good. And if we're in the mood for a thicker version of payasam, this is what we'd settle for! Plus, this is a certified favourite with Vodka, he licked the bowl clean in record time :)
Happy New Year to the multitudes celebrating it - I didn't quite realize how many people celebrate the New Year today - tamils, malayalees, bengalis, punjabis, sinhalese, thais, the list goes on!
Added bonus: Today is N'Ko Alphabet Day! :)
Other nutty dessert recipes:
Brazilian Chocolate Bananas
Orange Almond Chocolate Cake
Date Candy
Nut Barfi
Sugarcane-Banana cake in cashew-pistachio milk
Subscribe to:
Posts (Atom)


