Wednesday, September 17, 2008

Beans'n'shoots make for a great soup!

Finally, it feels like summer out here! The weather over the last couple of weeks has been sheer bliss - warm and sunny, clear skies ... can't help but walk around with a smile :)


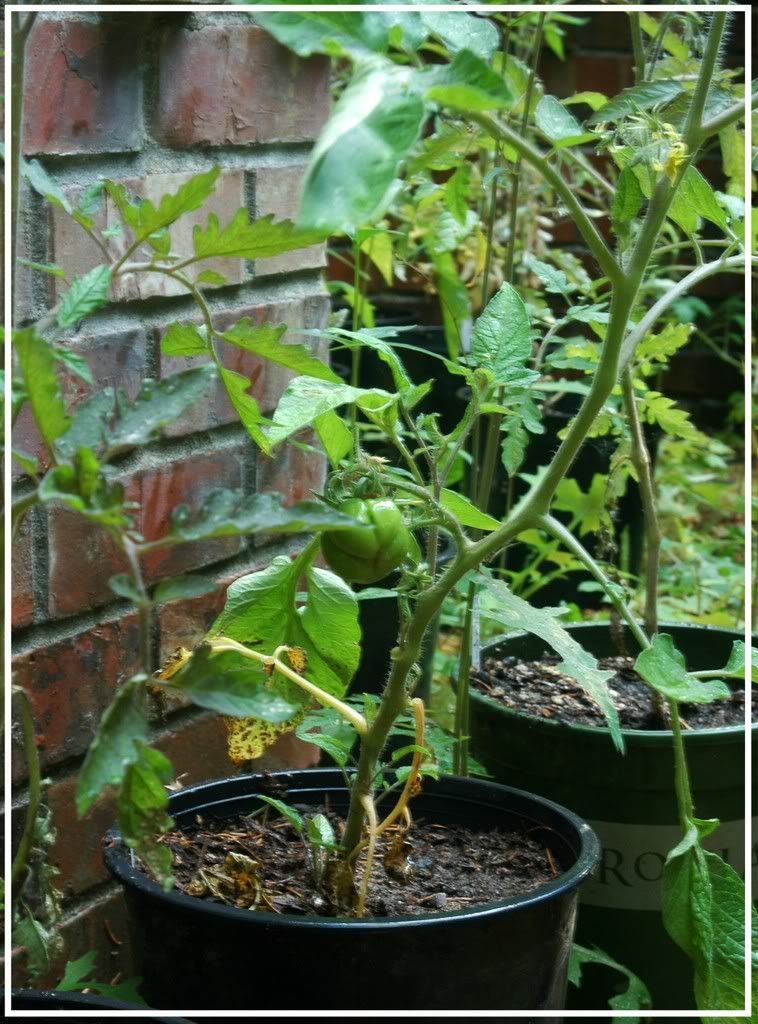
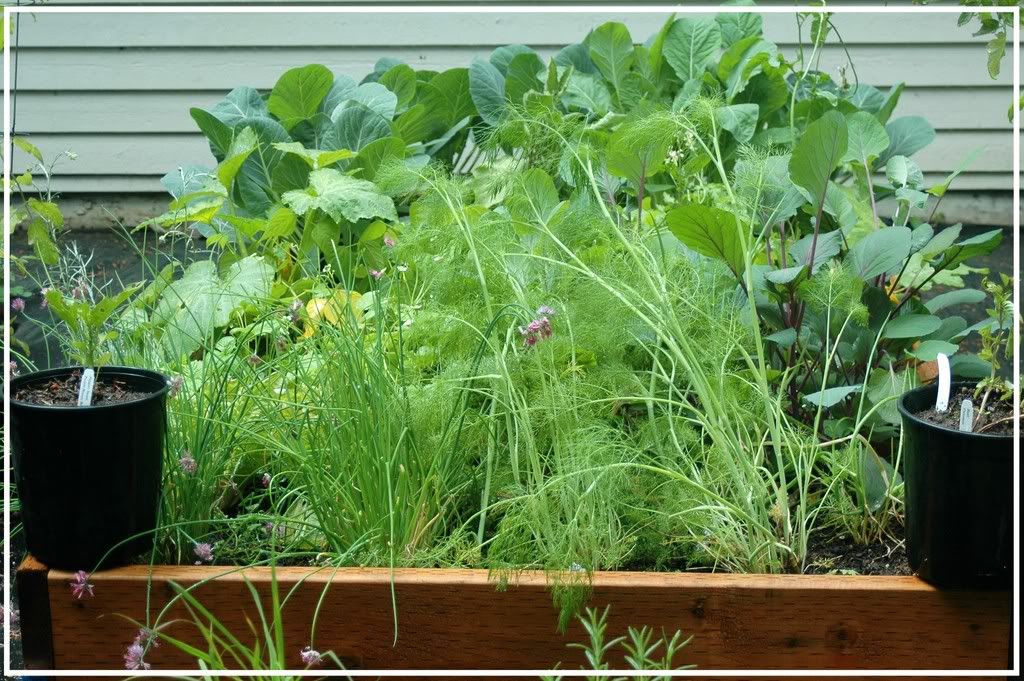
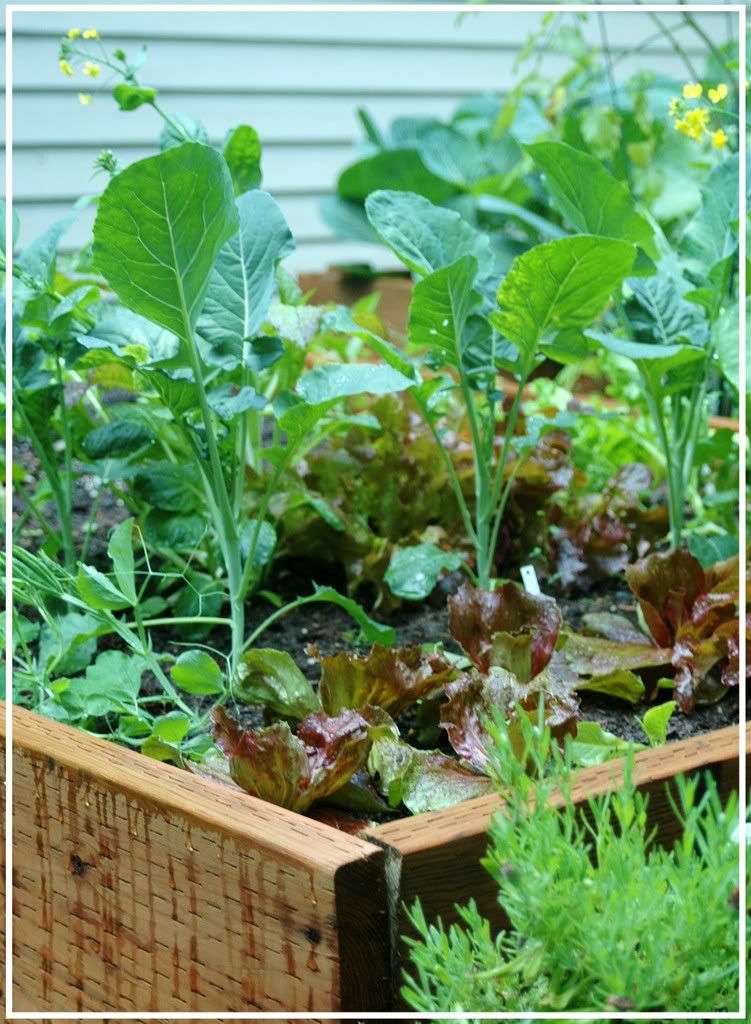
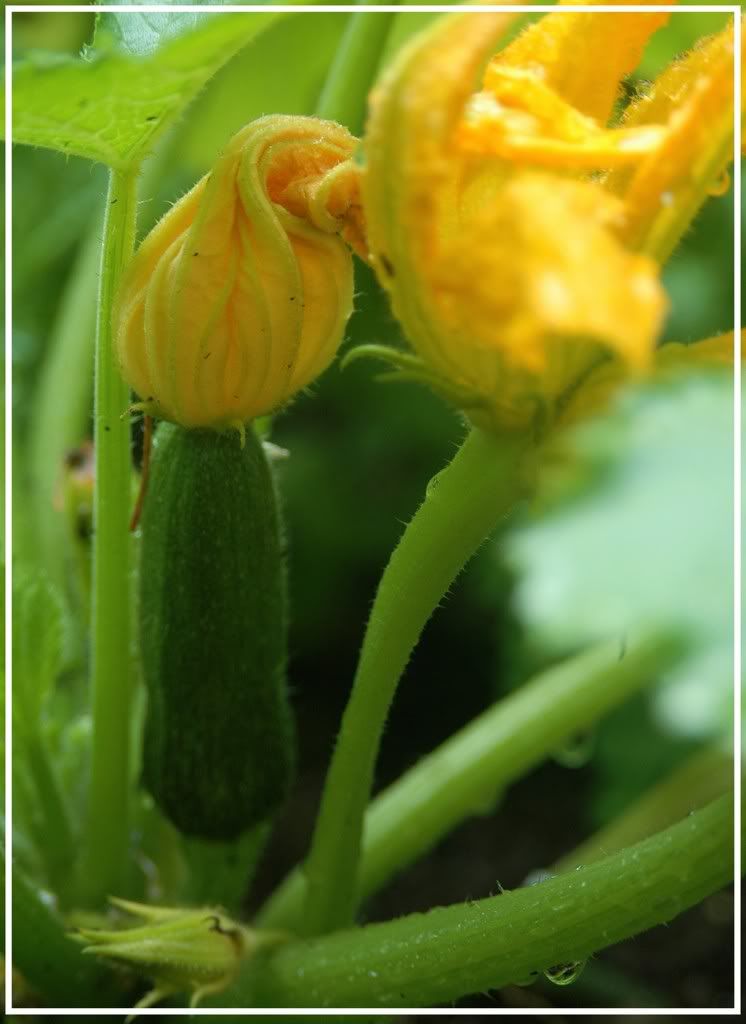
So, what else is awesome right now? The bounty that is coming from my veggie patch! Everyday yields a handful of tomatoes, a slew of greens, some squashes, maybe some chard, a motley assortment of herbs, all goodness! And today, as I was puttering around the patch, fighting those damn slugs, Alice Waters came to mind. Funny how I often think of some of my favourite chefs when I'm down and dirty in the veggie patch :)

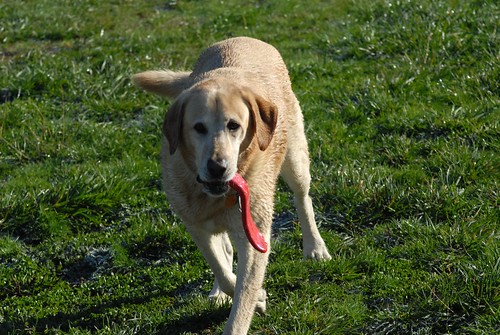
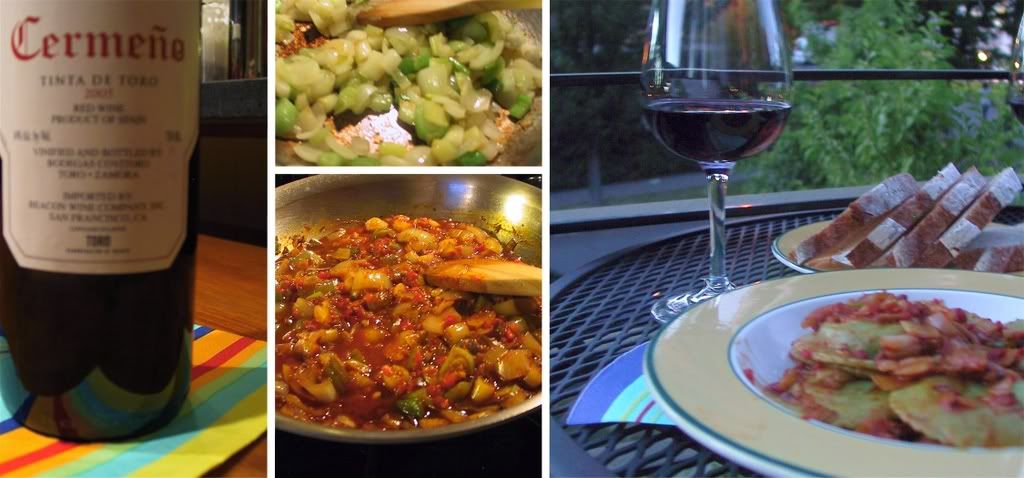
So, with Alice on my mind, I ended up grabbing a slew of pea vines - I've eaten these in salads at several restaurants, but never cooked them up, so today was going to be a first - *so* exciting! Vodka didn't quite share the excitement - I couldn't quite get him to nosh on a few leaves. He cocked his head with the "You're crazy!" look and ran off to get his ball :)


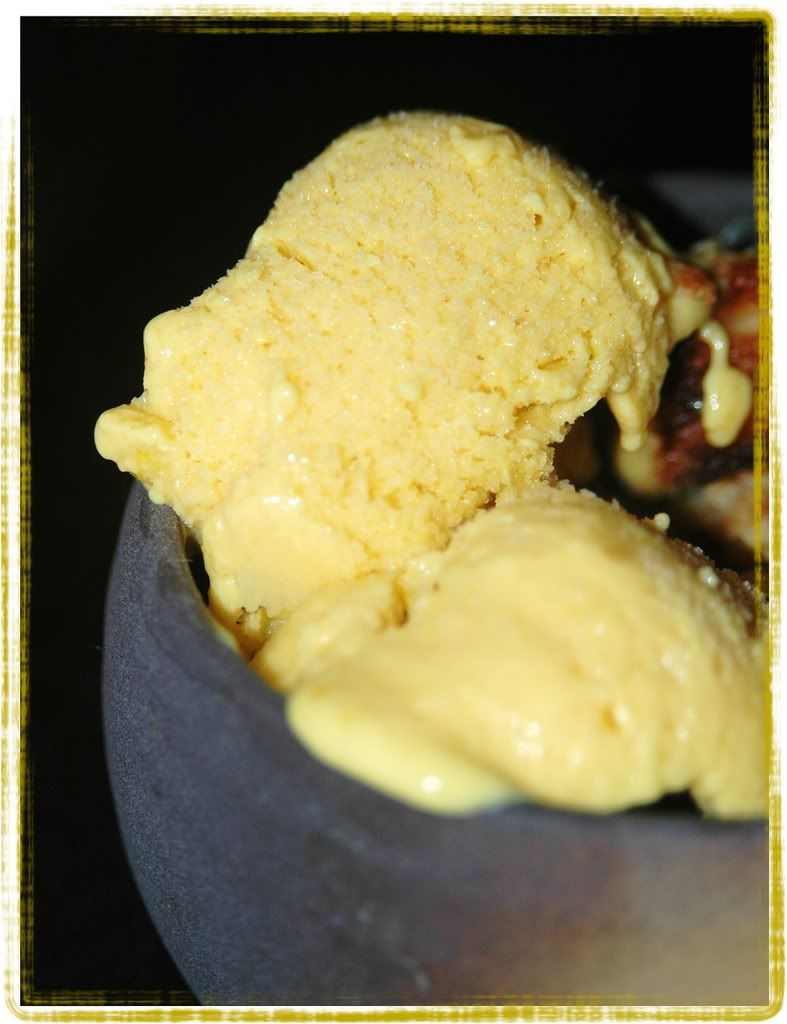
Chez Panisse Vegetables has a killer recipe for a Pea and Pea Shoot Soup - except I didn't have enough peas to make this :) So, I went with fava beans instead (sadly, frozen, but they tasted pretty good!) and decided to let the soup stay thick and smooth instead of straining it.


[I feel like I'm tainted for life - as much as I absolutely *love* fava beans, I can't think of them without remembering Hannibal Lecter's quote from Silence of the Lambs! *grrrrr* ... and no! I refuse to quote it here :) ]


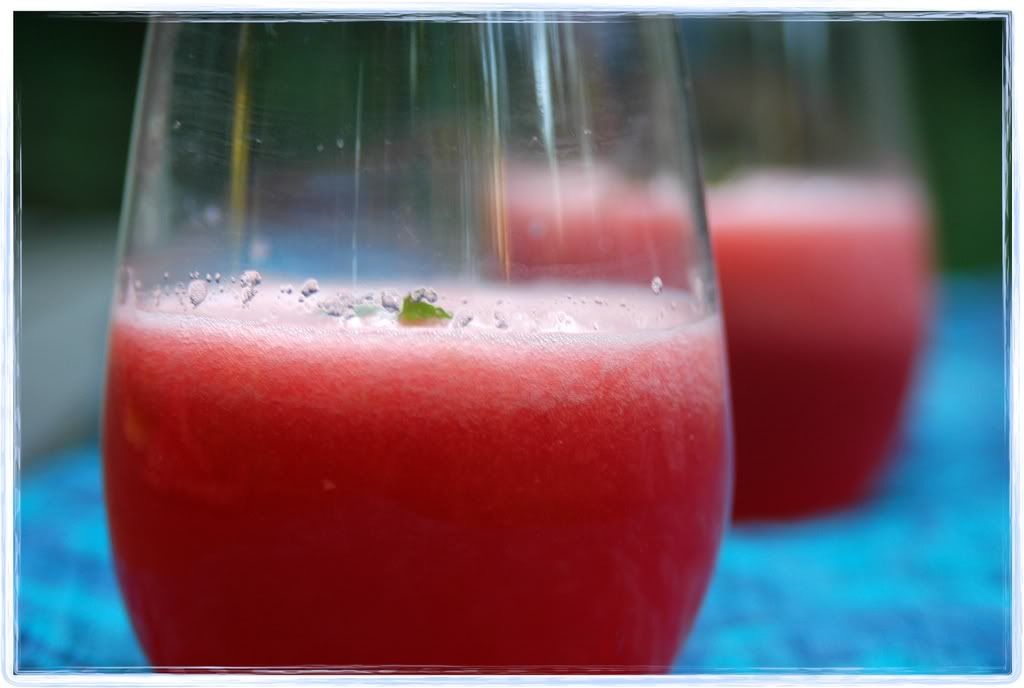
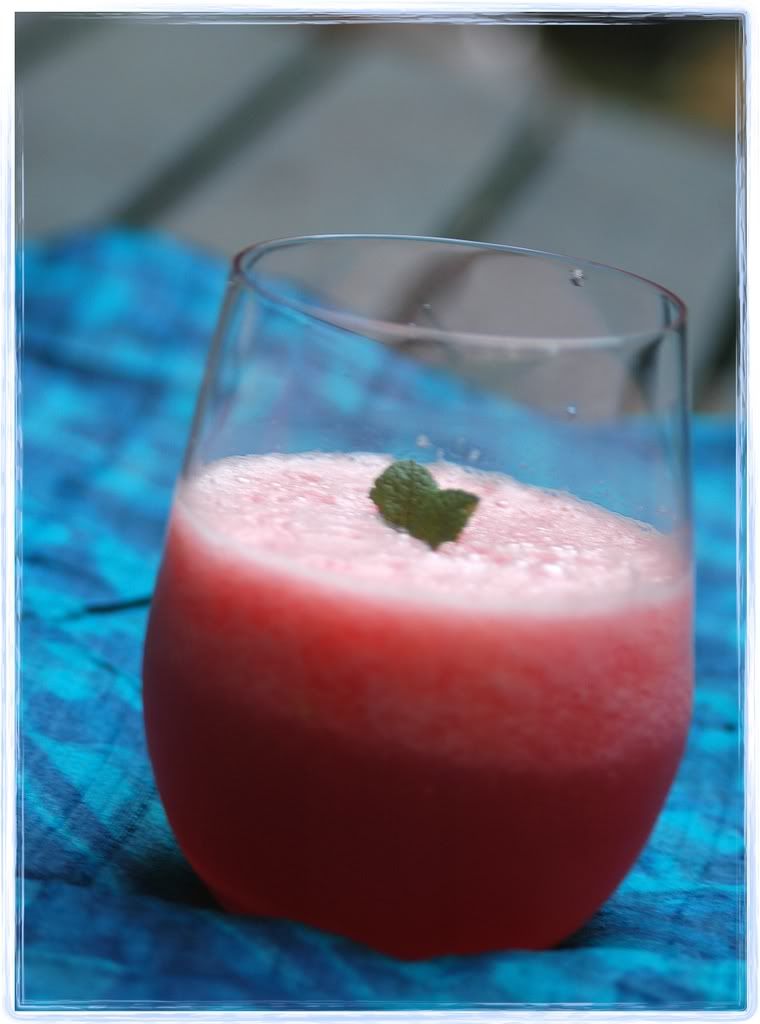
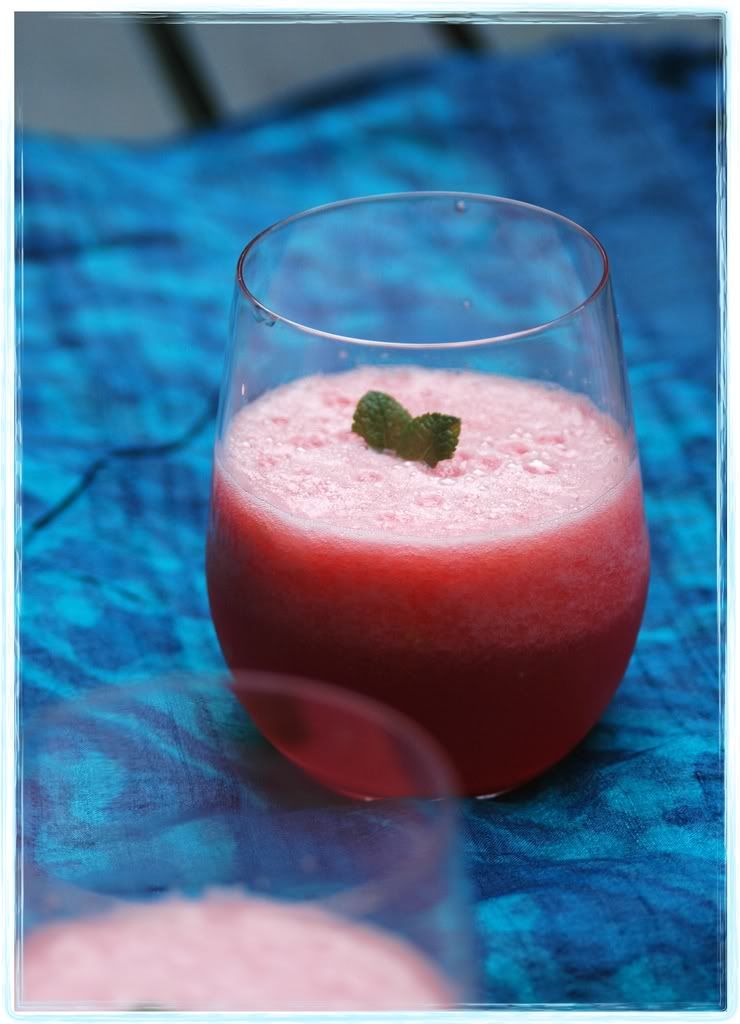
Fava Beans and Pea Shoots Soup
Green is *good*!

Servings: 2

1/2 large red onion

3 cups shelled fava beans

2 handfuls pea shoots

10-12 leaves of spanish mint

4 cups of water (or 2 cups stock + 2 cups water
)
1 t olive oil
1 t ghee (clarified butter)

salt for seasoning

freshly ground pepper
grated aged cheddar for garnish


Peel and thinly slice the onion. Heat the olive oil in a pot and saute the onions till translucent.

Add the mint and saute for another minute.
Throw in the fava beans along with 2 cups of water/stock and cook partially covered, on medium, for 6-8 minutes till the beans are cooked.

Set aside a few pea shoots for garnish and toss the rest into the soup. Cook for a few more minutes till the pea shoots are wilted before taking the pot off the heat.

Once the contents have cooled a bit, puree the soup to a relatively smooth consistency - the pea vines may still remain stringy/chopped up, that's totally fine - it actually adds a neat texture to the soup.


Season with salt and a slew of freshly ground pepper!

Heat the ghee in a pan and lightly saute the leftover pea shoots till wilted.

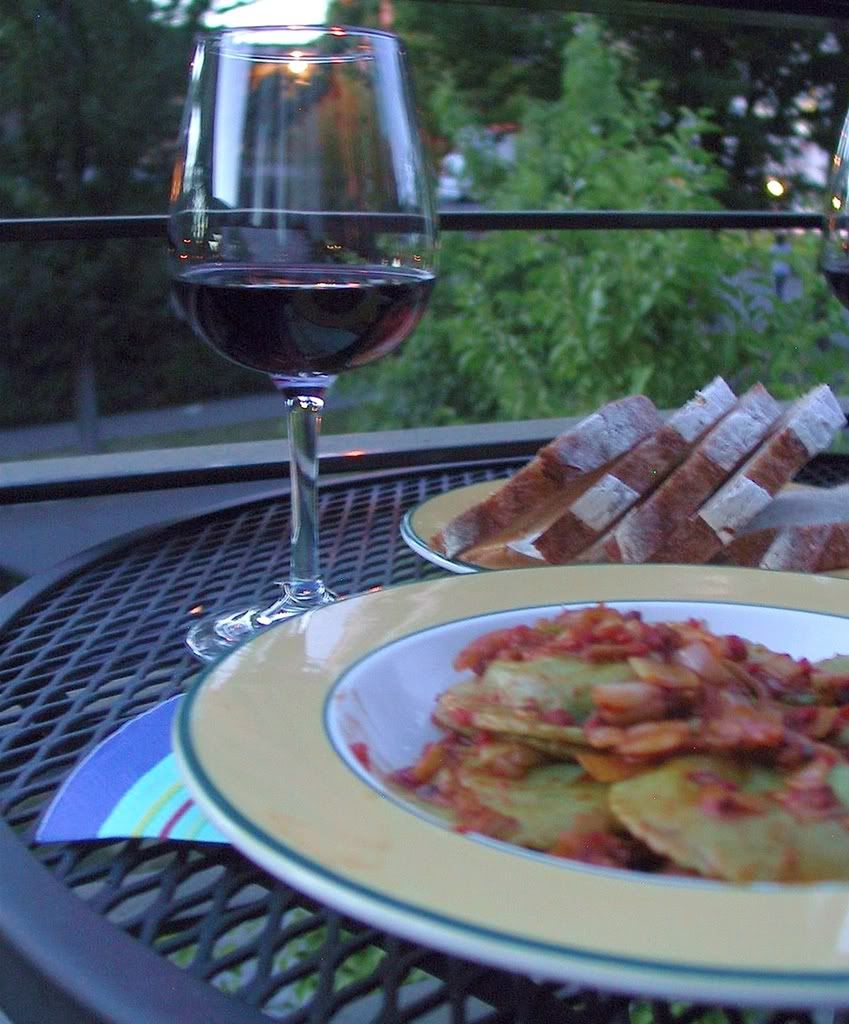
Ladle the soup into a bowl and garnish with the crispy pea shoots and some grated aged cheddar cheese.


Opinion?

We wolfed up this soup with some toasted whole wheat pita bread - an earthy and chewy complement to the fresh, smooth soup. The fava beans lent a creamy, nutty flavour to the soup. And the pea vines made it taste really fresh - all that green goodness!


Ok, so this *has* to go to the current edition of Weekend Herb Blogging (Kalyn's brainchild) - hosted this week by Zorra from Kochtopf - thanks to both of you for starting/hosting this event!

Friday, September 12, 2008

Magical 'shroom soup

Well, hello! Magical 'shroom catch your eye? :)

As tantalizing as that sounds, we're really talking about the soup here. Fabulous tasty mushrooms that made for a magical soup!

So, the mushroom love is stronger than ever around here - even Vodka is on mushrooms now! His holistic vet suggested, no, insisted that he start consuming a medicinal mushroom mix - beefs up the immune system, restores body balance, support natural killer cell activity, all that good stuff. In fact, there are volumes of research about medicinal mushrooms here, here ... and here. I'm sure there are a zillion other sites out there talking about similar stuff.

So, I'll eventually get around to talking more about holistic meds and pooches and immunity and chinese herbs and all that good stuff pretty soon. In the meantime, let's just focus on this simple and delightful mushroom soup :)

Deborah Madison has a yummy Cream of Mushroom Soup recipe in Vegetarian Cooking for Everyone - sounded a tad bit heavy, so I decided to rework it a bit. Obviously, the white mushrooms were replaced by criminis - so much richer and earthier, don't you think? And the cream was quickly replaced by some fabulous Quark.

Quark is pretty prevalent in Europe, but is still hard to come by in the U.S. Luckily, for us in the Pacific Northwest, we have Appel Farms in Ferndale, WA - they sell their Quark at PCC. This midly, creamy curd cheese is so flavourful and makes for a fabulous cheesecake [take that as an impending recipe warning! :)] Plus, Vodka is pretty much hooked onto it, what with its high protein content and anecdotal cancer-fighting properties when combined with flax-seed oil [take that an impending pooch-nutrition blog warning!]

Finally, a handful of fresh herbs perfectly complimented the 'shroom flavours and balanced out the earthiness.


'Shroom Soup with Curd Cheese
'Creamy shroomy goodness!

Servings: 4-6

1 lb crimini mushrooms
1 t butter
1 cup chopped leeks
4 garlic cloves - chopped
4 sprigs of lemon thyme - stripped from the stems
1 T flour
1 quart of water (OR water+nonfat milk OR mushroom stock)
1/2-1 cup nonfat Quark cheese
Finely chopped parsley and chives
1 T goat cheese
salt and freshly ground pepper


Mix up the goat cheese with the chives and parsley and set aside while the soup is being made. This gives the goat cheese enough time to absorb the flavours of the herbs.

Coarsely chop the lot of mushrooms, after setting a few aside for garnish (if desired).
Melt the butter in a soup pot and lightly sauté the leeks, garlic and thyme in it for a few minutes.
Throw in 1/2 t salt and 1/2 cup of water and cook covered over medium heat for 3-4 minutes.

Raise the heat, throw in the chopped mushrooms and cook for 4-5 minutes.
Now, stir in the flour, add the water (or stock) and bring to a boil.
Lower the heat and simmer, partially covered, for about 15-20 minutes.

Coarsely puree the soup, return it to the pot and stir in the Quark cheese. Season with salt and pepper while keeping the soup warm.

If you set aside some mushrooms for garnish, now is a good time to sauté them over high heat in a bit of butter - it should take 4-5 minutes for the mushrooms to get colored and mildly crispy [this is seriously tasty stuff!]

Check for seasoning before serving topped with the herbed goat cheese.


Opinion?

A plain-looking soup that explodes with flavour! I can see this being a great winter warmer when made with cream, but the lighter, thinner version was the perfect warmer for a rainy Seattle evening :)


I'd love to say I grew the mushrooms, but I obviously didn't! But I did get the chives and parsley from my veggie patch! Which means I get to ship this post off to Wiffy of Noob Cook for this round of Grow Your Own [that happy event started by Andrea!]

Friday, August 29, 2008

Borek-ing again!


A few months ago, I waxed on and on about Boreks - those awesome Anatolian stuffed breads that I could potentially live on forever (along with a plethora of fruits and wine and cheese and nuts and ...) :)

I have no idea why it took a few month to try make these boreks again - maybe because we indulge in other bread variants so often? These are pretty damn close to the more traditional indian stuffed naans and parathas, they even seem like distant cousins to the calzone. I poked around more trying to find variants of this bread/stuffing and found that the traditional Turkish borek recipe actually uses phyllo dough! Very different from the street food recipes that Anissa talks about in her books.


Borek Edition I used a simple feta-parsley-broccoli filling - somewhat traditional and quite delightful. This time around, I chose to go with an interesting olio of flavours - a slew of onions and leeks, olives, some tomatoes, cheese ... and nuts! I wandered by the delightful Vios Cafe a while ago and picked up some Kasseri cheese and greek olives. Seriously, their Kasseri is probably the best I've found in the seattle area and definitely more well-priced than Whole Foods or any other specialty store! Yay for local ethnic markets :)

I used the same dough recipe outlined in Borek I, just with a different filling.


Onions'n'Olives Borek
Bread is *good*! Stuffed bread is mo' bettah! :)

Servings: for 4 stuffed boreks

Filling:

1/4 red onion - chopped
2 cups leek greens - chopped
3 scallions - chopped (along with the stems)
12-15 olives (mix) - pitted and coarsely chopped
1/2 tomato - chopped
1 cup kasseri cheese - grated
1 T red pepper flakes
1 t salt
3 T - ground almonds
1 t olive oil

1-2 t olive oil for cooking the boreks

Saute the onions, scallions and leeks in the olive oil till lightly browned.
Mix these with the rest of the ingredients and let it sit for about 5-10 minutes.

How to work it

Flour the work surface and a rolling pin.
Take a ball of dough and roll it out as thinly as possible, flouring it all the time till a 12" diameter circle is formed.
Sprinkle a handful of the filling over the lower half of the dough.
Fold the plain side of the dough over the filling to make a half circle.

Heat a nonstick griddle over medium heat.
Place the filled dough on the hot griddle and cook for a couple of minutes on one side.
Brush the dough lightly with olive oil.
Flip the pastry over, brush with oil and cook the other side for another 1-2 minutes. Both side should end up crispy and somewhat golden.


Opinion?

About the same opinion as last time - these KICK ASS! They're so easy to make too! Kasseri rules. Adding the ground almonds lend a great consistency to the filling - that's a real winner. And the generous helping of red pepper flakes totally kicked up the heat - love it!

I think Borek III will be happening pretty soon, these things are addictive :)

Tuesday, August 26, 2008

That long overdue bread pudding!


This is turning out to be a relatively quiet morning ... well, except for the fact that Vodka has played nonstop for an hour and is now demanding food - whining, grovelling, even rubbing his nose against his food bin! But this is the time to be that unyielding dog-momma. He has an appointment in a few hours with the oncologist - and yes, it means he needs to show up on an empty stomach. And yes, that means sheer hell for me trying to keep him distracted.

How on earth do you distract a labrador retriever from food, anyway???

So, what could be a better idea than a blog post for distracting myself from distracting him from food, huh? :)


This is a seriously long overdue post - a few weeks ago, I blogged about this awesome mango yogurt ice that we ended up serving with a quick'n'easy bread pudding - and it totally kicked ass. Well, it is finally time to talk about that bread pudding! The mango yogurt ice was truly refreshing and incredibly flavourful, but it definitely needed some substance to go with it, something a bit dense, chewy, moist. And it seemed like a bread pudding was the most obvious answer.

I've always served my bread pudding with a decadent whiskey sauce, but this time was going to be a little different. I wanted to skip using any cream this time around, opting for indian flavours instead. That's how the cardamom ended up being the primary flavour in the bread along with a honey-based sauce. There really was little need to add a super creamy, rich flavour since we were gunning for a light summery dessert anyway.

Cardamom-Honey Bread Pudding
Replete with flavours and aromas of India!

Servings: 4-6 (or maybe just 1?!!)

6 thick slices of crusty, stale french bread
1 t freshly ground cardamom powder
3 T honey (this was from the Ballard Farmers' Market - among the best I've ever tasted!)
1 t vanilla
2 cups nonfat milk
1 egg or 1/4 cup of egg substitute
1/4 t grated nutmeg
a pinch of salt

Shred the bread into 1" cubes and arrange these pieces, tightly packed into a baking dish (preferably glass). The dish I used was a 6"x6" glass pan, about 2" tall.
[Most recipes call for just packing the slices tightly into the dish, but I prefer to shred the bread into cubes before packing them in - this seems to let the bread take in a lot more of the flavours. Plus you end up with many more crispy ends - Yum!]

In a large bowl, whisk the egg, milk, cardamom, vanilla and nutmeg till well-blended. Now, add the honey and whisk some more till the liquid is frothy.
Pour the liquid over the bread and let it stand for about 1 hour, pressing the top every 10-15 minutes with a spatula (this ensures that the top doesn't dry out).

Bake the pudding for 50 minutes or till the top is puffy and browned. Let it cool on a rack for 20-30 minutes before cutting up.

We skipped the traditional whiskey sauce and served it with somewhat-melty mango yogurt ice.


Opinion?
Deeeeee-liiisshhh! This was so damn good! And so easy to throw together. Mango seriously kicks ass. And it totally danced with the cardamom/nutmeg flavours.

*happy*

Monday, August 18, 2008

Holding a good thought for Vodka ... plus some Cherry Compote

It truly feels like life has come to a standstill.

So much so that I don't expect even blogging to give me any respite. Vodka was diagnosed with mast cell tumors (yes, again!) early last week. He was diagnosed with one of these last year, but it was successfully removed. And it seemed like that was the end of story. A happy ending. But the tumors are back. And there are several small lumps. As well as a large one that has probably penetrated his lymph gland. The next week is going to be filled with visits to various doctors - the oncologist, a holistic vet, a nutritionist ... Basically whatever it takes to try making the kid healthy again.

We're all trying to hold positive thoughts. And right now, the cute monkee deserves every happy wish he can get, so gather all that goodwill and send it his way, please? :)

I'll keep posting about how things go, especially all my learnings about animal nutrition - I've amassed more knowledge in a week than I knew in 9 years. And I'm hoping some of this can be put to good use - hopefully Vodka can be nursed back to health, even if all those tumors can't be eliminated, we're hoping his body will learn to live with them and control them instead of the other way around. And hopefully, all that we learn in the course of his treatment will help other pooch parents out there - in terms of diet-related treatment and preventive options.

That said, here's a pic to bring a smile to anyone's face. Aunt Nupur and Dale sent Vokkee these awesome rawhide chews a few months ago. And he totally revelled in noshing them :)


********************

And, maybe, now that I started writing, I'll even post a recipe to keep the theme of this blog going :)

The last couple of weeks have been insanely hot and even humid here in the Pacific Northwest. So much so that I've been craving icecream even more than ever! It was time to hit an eastside favourite - Thenos Dairy - that serves Vivian's Icecream. Not only do all their flavours kick some serious butt, they have this insanely awesome cantaloupe icecream! It is a seasonal favourite and sells out in no time at all. So, if you're in the 'hood, I would strongly recommend that you hit this icecream joint on SR-202 - trust me, you won't regret it! Weeeeellllllll ... you might regret the waistline, but not the gastronomic pleasure :)

A recent trip to the farmers' market resulted in a bounty of cherries - well, it was one of the last crops of Sweethearts, so that's my excuse for the cherry overload :)

A hot evening + mountains of cherries + maple icecream = a super decadent dessert :)

Poking around that insanely overused Ultimate Desserts book revealed a recipe for a cherry compote. The original recipe called for orange rind and almond extract. I went with a more summerly flavour by using orange blossom water instead. And tossed in a handful of sliced almonds for a good, nutty measure :)


Nutty Cherry Compote
Top that melty icecream or eat it straight! :)

Servings: 6 (if served as a topping)

1/2 cup of dry red wine
1/4 cup succanat (I used this instead of brown sugar)
1 T orange blossom water
1/2 cup sliced almonds
1-1.5 lbs Sweetheart cherries (am sure other varietals would work well too)
Several dollops of Vivian's super awesome maple icecream :)

Remove the pitts from the cherries - I didn't bother to preserve the full cherries and just chopped them up into halves while removing the pits :)

Combine all the ingredients EXCEPT the cherries, almonds and icecream in a saucepan with 1/2 cup of water.
Stir over medium heat till the succanat completely dissolves.
Turn up the heat and boil the liquid till it becomes somewhat thicker and syrupy.

Now throw in the cherries and bring back to boil.
Reduce the heat a bit and simmer for about 10 minutes.
You might end up with some foam, which you can easily skim off the surface.


Serving suggestions:

* Once cooled to lukewarm, spoon over a dollop of icecream.

* On a hot, humid day, chill the compote and serve it over some yummy icecream or with whipped cream :)


Opinion?

Serious cherry heaven. Next time around, I want to try this with a liqueur like Sambuca or Mangalore instead - am sure that's going to be pretty awesome too!

This goes to Sunshine Mom of Tongue Ticklers for her Food In Colour event. The theme for August is Red.

Wednesday, August 13, 2008

Mouthful o' muffin!


Raspberries.

They stain my fingers red. And my teeth. And often, my face is covered in streaks of red as I desperately stuff my face.

And yes, they make me happy. Very happy. They make Vodka super happy too - he can lick all the raspberry juice off my face. *so* much of fun, eh? :)

Today was definitely a raspberry day. I probably ate a couple of those baskets from the farmers' market. The berry appetite was sated, but I still wanted to do something with the rest of them. And I've been trying to come up with several lowfat variants of muffins anyway, so this seemed like a perfect opportunity to try a recipe out. Besides, nothing like a load of juicy berries to make up for any shortcomings in my "lowfattitude". Hey, can I trademark that word?

So, in the spirit of some fabulous lowfattitude, I skipped the eggs, used some fatfree cottage cheese to lend some creaminess to the muffins and added a bit of cinnamon for extra flavour.

If you're using frozen berries instead of fresh ones, thaw and drain them before tossing them into the batter.


Rasberry Cottage Cheese Muffins
Stuffin'. A muffin. Into my mouth :)

Servings: 12 regular sized muffins

2 cups white whole wheat flour (I used King Arthur's organic flour - seriously kicks ass!)
2 t baking powder
1/2 t salt
1/2 cup cottage cheese (fat free)
1/4 cup buttermilk
1/2 cup nonfat milk
2 T butter
1 T Earth Balance (whipped spread)
1/2 cup brown sugar
1 t cinnamon
1-2 cups raspberries
2 t vanilla soy sorbet (lowfat)

Preheat the oven to 375 F. Line a 12-cup muffin tray with paper cups.

Cream the butter, whipped spread and sugar in a bowl till well blended and smooth.
Add the cottage cheese and buttermilk and mix a bit more.
Stir in the cinnamon along with the vanilla sorbet and beat for 2-3 minutes till thick and creamy.

Sift the flour, baking powder and salt into a bowl. Mix the flour mixture into the butter/sugar mix, about 1/2 cup at a time.

Once the ingredients are well blended, stir in the raspberries, trying not to break them too much. They will probably break up, but it is pretty heavenly to bit into a piece of raspberry in a muffin, so try to keep that option alive as much as you can :)

Spoon the batter into the lined muffin tray and smoothen the surfaces. Bake for 30 minutes at 375 F.

Stick a toothpick into the muffins to make sure they're baked before taking them out of the oven. Once removed, let them cool in the tray for 10 minutes before removing the muffins and setting them on a cooling rack. Once they're at room temperature, stick them into an airtight container. Or eat them up :)


Opinion

Chewy - yummy wheat flour - earthy and delicious!
Moist - raspberries and cottage cheese worked wonders.
Juicy - courtesy of the raspberries - *so* good!

As someone says ... "Yom!" :)

*****************

Happy Vodka loves those berries! :)

[Photo Courtesy: Stephanie & Shawn of Dog-E-Central]

Tuesday, August 5, 2008

Orecchiette


Orechetty.

Orechiet.

Oreychett.

Oreccchhhiiiieettiieee.

"Little ears"

:)

I'm definitely going to nail that before we go to Italy :) Until then, guess I'll just go with 'Li'l Ears'!

So, this is another recipe from the backlog - I made this several weeks ago as a quick fix for dinner. I'd only cooked li'l ears a couple of times before and was pleasantly surprised by how easily the pasta picked up flavours and yet didn't get gooey. Guess they're pretty thick ears! :)


The highlight of this recipe was the garlic chives from the veggie patch - they lent a fabulously fresh flavour and aroma to the dish. Garlic rocks! So do chives. So together, they can only kick ass, right? A coarse pesto of sort with these chives, some parsley and pine nuts lent a gamut of flavours. And the cauliflower ... seriously, I'm falling in love with it all over again. The cauliflower picked up all the flavours and still stayed a bit crunchy - guess this was one of those few times when I lucked out and blanched the cauliflower *just* enough!


Li'l Ears and Cauliflower with Chives-Parsley Pesto
Eat a ear or 3, please?

Servings: 3-4 moderate servings or 2 super-hungry servings

4 cups of cooked orecchiette
(I honestly don't remember how long these have to be cooked, all I recall is that I used this fabulously chewy tri-colour orecchiette from Whole Foods - tomato, spinach and no-flavour)

1 T olive oil
a generous handful of garlic chives
another generous handful of italian parsley
2 serrano peppers
15-20 pine nuts
(you could substitute with walnuts here)
1 t sea salt

1 t olive oil
8-10 sundried tomatoes - chopped
(if these are the dry variety, soak them in warm water for 5-10 minutes before chopping them up)
3 scallions with the stalks - chopped
1/2 head of a medium cauliflower - cut into large florets

Heat a pot of water with a T of salt to a roiling boil. Place the cauliflower florets in the hot water, cover and boil till tender (but not mushy) for about 7-9 minutes.
[ Another option here is to just steam the cauliflower - you can place the florets on a steaming rack in a pan over boiling water, cover tightly and steam for 7-10 minutes]

Use a pestle to create a coarse, chunky paste of the pine nuts (or walnuts), parsley and chives, serrano peppers and salt (you could just grind them up instead). Stream in the olive oil slowly and continue crushing the pesto till the oil is soaked in.

Heat the oil in a saucepan and saute the scallions lightly.
Stir in the pesto along with the sun-dried tomatoes and saute for a couple of minutes.
Now throw in the cauliflower and the pasta and stir for a couple more minutes.

Season with salt, maybe garnish with more chives? Or even throw some freshly grated parmesan on top?


Opinion?

Happy, tasty, easy-fix pasta. And replete with home-grown herbs. Yum!

Off this goes to Jessica of Finny Knits who is hosting this round of Grow Your Own (started by Andrea).

Ooo ... this is a bonus! I can even send this to Michelle at Greedy Gourmet for this week's edition of Presto Pasta Nights (that popular pasta event started by Ruth (Once Upon a Feast) :)

Tuesday, July 22, 2008

Drinking to that long-awaited summer!


Summer.

After weeks and weeks of dreary grey skies, chilly mornings, afternoons and evenings, bizarrely cold nights and snowed-out hiking trails, we were pretty much ready to give up on warm weather. Global warming is happening for sure, but it seemed to be ignoring the Pacific Northwest, atleast when it comes to warming my nose and toes!

And just when we pretty much gave up on feeling the sunshine again, blue skies broke out! The grey clouds disappeared, we hit 90 F on more than one day, we've even had a couple of weeks of pristine summer skies. Hell, my crazy brown self has gotten crispier! :)

So, now that summer is finally here, we've got to celebrate it, right? We've been indulging in hanging outdoors a lot, but what's celebration without food or libations, right? :) When a friend gave me a super ripe watermelon, it seemed primed for working into a drink.

So, what do you get when you have a watermelon, some fancy-schmancy liqueur, some san pellegrino, some ice and plenty of sunshine?

A yummy drink that has the full potential to make you quite tipsy! :)

This fancy liqueur we're talking about ... we stumbled upon this during our frequent encounters at the fabulous Vij's in Vancouver. They have two standard cocktails on their menu - Dark Army and Mangalore - the latter drink is a concoction of berries steeped in a mildly spicy liqueur called ... Mangalore (creative, eh?) :) Once I was hooked onto this, I trolled the BC liquor stores till I finally found a bottle at the store on 42nd and Cambie. This store is the Costco equivalent of liquor stores - they have every alcohol and liqueur one could think of ... and then some! So, I returned to Seattle, triumphant in my possession of the elusive Mangalore (which we can't find at any store in the U.S.!). We've sampled this in various cocktails, most of them have turned out really tasty, but this summery drink was especially memorable!


Watermelon Mangalore-ade
For lack of a better name! :)

Servings: 4-6 glasses

1/2 medium watermelon
3 T lemon juice
1 bottle San Pellegrino (you won't need all of this) - you could use any other sparkling water too.
Mangalore liqueur
Crushed ice
A few leaves of spanish mint

Cut the watermelon into sections and remove the rind.
If it has seeds, yank those out too.
Puree the watermelon bits with the lemon juice till smooth.

Take a shaker and throw in a handful of crushed ice into it.
Add 2/3 cup of watermelon puree and a shot of Mangalore liqueur.
Shake it ... then shake it some more!

Pour about 1/4 cup of sparkling water into a glass.
Top with the shaker contents.
Gently jiggle the glass before serving.

Garnish with a leaf or two of spanish mint.

Drink up! :)


Opinion?

Perfect for a summer day. The watermelon was at its prime - ripe, juicy and sweet. The Mangalore added the perfect zing to it and the lemon juice lent the tiny bit of tartness that the drink needed. No need for any simple syrup, the natural flavours totally kicked ass!

Friday, July 18, 2008

Eating local and all that good stuff ...


Local ... sustainable ... organic ... earth-friendly ... call-it-what-you-want ... All the buzzwords making the rounds in the food world recently.

A handful of years ago, the air started teeming with the concept of organic foods. Horrendously expensive, but Oh! so right and healthier and tastier ... I can honestly say that with some fruits and vegetables, we could taste the difference - like tomatoes and peppers and most greens. And cherries for sure! But with others ... nah! Couldn't quite savour the difference. But we loved the idea of hitting the local farmers' markets and buying our produce and starters there. Especially after growing up in India where there are vendors trolling the streets selling their produce and it is so very common to walk to the little store at the end of the street to buy veggies for the evening's dinner, it felt so right to shop local, pick and feel the veggies before dropping them into our baskets. I still remember the first time I bought green beans at a local market -

K strides up confidently to this vendor at the Redmond farmers' market, picks up a green bean or 3 and snaps them between her fingers!
Vendor's jaw drops!
K looks up at him, wondering if he's having a seizure! Isn't that how folks check for good beans? That's how the mum did it, right?
Vendor recovers and starts laughing! And slowly asks with a smile "Do you HAVE to snap the beans before you buy them?"
K turns beet red, realizing her cool "snap-the-bean" tactic is not so cool here! And finally learns to just buy the damn green beans without obsessing about snapping them.

Ok, so what does this incident have to do with all that local, organic goodness? Umm ... nothing. I just felt like telling a story, that's all! :)

Today, it seems like we're way past organic, which I personally believe is a great thing. We're not just trying to live by some ostensibly vaguely defined standard of agriculture, but we're going several steps beyond. We're seeking out local foods, sustainable foods that are developed without monocyclic farming methods. We're looking to form bonds with the local farmers that bring those delicious beets and greens and turnips and garlic snapes to our plates.

Yes, I very much like to have a personal stake in what I'm writing about.
~ Michael Pollan


So, talking about eating local ... we love it! Truly, madly, deeply! Pretty much all our veggies come from the veggie patch or a local market, except for the occasional indulgence in something that has been on a plane. Honestly, we don't know if it helps with all that carbon footprint stuff that is making the rounds everywhere, but it sure makes us feel good. Plus, we have a connection with several local vendors, the tomato guy even asks me how the plants are doing - they're quite happy, thankfully! I would feel terrible to tell him that I did the plant in!!!


So, this meal was one of those mostly local ones. Took all of 15 minutes to throw it together and tasted so blissful, I'm still talking about it! All that it took to make this meal:

Local:

* A slew of garlic and vidalia sweet onions from the market
* Spinach and Roasted Garlic Ravioli from the pasta guy (La Pasta?) at the Madrona farmers' market
* A fabulous sourdough loaf from La Panzanella
* Roasted Red Pepper tapenade from La Buona Tavola
* Yummy Cirrus Camembert from Mt.Townsend Creamery
* Gouda from Golden Glen Creamery

Not so local:

* A really tasty bottle of Tinta de Toro that Abbie heartily recommended - super fruity and luscious!
* And the rest of the glue (spices, oils, etc) We're not obsessively local about our ingredients, but we definitely keep an eye out for fresh local produce and wines as much as we can. Yes, there is definitely a feel-good factor there :) But the biggest kicks (for us) are the insanely awesome quality of the foods and the whole community-bonding thing.

As for this meal, what more could we ask for - fabulous ingredients, perfect company, warm summer evening. Sheer bliss!


And yes, substandard pictures, but whatever! :)

Tuesday, July 15, 2008

Mango-ing away!


Still hot outside, I was still craving a giant creamy milkshake, but I'm really really trying to stick to my regular workout and eating habits ... which pretty much ruled out that GIANT milkshake looming in the back of my mind ... *sigh*.

But the plan was to come up with a suitable alternative ... something that would squash all memories of that GIANT milkshake! It took some poking around my Ultimate Desserts book ... Yes, I will get through all the recipes in that book someday soon! :) I stumbled upon this banana honey yogurt ice recipe ... hmm ... Ain't got no bananas. But we have a mountain of mangoes to wade our way through - never a problem given that I've eaten as many as 8 mangoes in one go :)

So, the idea was to rework this recipe to use mangoes instead. I also had some fabulous labneh - the to-die-for middle eastern yogurt as well as some greek yogurt sitting around. I haven't made icecream in a while, let alone fancy "yogurt ice", so this was approached with some dubiousness. But it turned out to be so damn easy to work with, a ton of fun and super delicious to boot!


Mango Yogurt Ice with Agave Nectar
Mango! Mango! Mango! Need I say more?

Servings: Hmm ... 12+ generous scoops

3 medium sized mangoes (I used the Ecuadorian ones that Costco is currently carrying)
3 T agave nectar
1/2 cup labneh
1/2 cup nonfat greek yogurt
1 t cinnamon
1 T orange blossom water

Peel the mangoes and chop into chunks.
Puree the mango chunks along with the rest of the ingredients till smooth.
Pour into a freezer pan, cover with plastic wrap and seal it with a rubber band.
Set this in the freezer till it starts to harden - takes atleast an hour.
Break up the yogurt ice with a beater till crumbled and there are no chunks remaining.
Smoothen the top, seal with the plastic wrap once more and set in the freezer for another hour.
Repeat this beating and freezing process one more time - this just makes the yogurt ice a lot more creamy and removes any crunchy ice bits that may have formed while freezing.

We served this atop this insanely tasty bread pudding - perfect blending of flavours ... I've got ot run out to go meet the gals, but I'll be posting that recipe in the next day or two (Really!).


Opinion?

I forgot all about that GIANT milkshake once I put this in my mouth! We loved the fact that it was so much lighter than regular icecream, yet much more decadent than sorbet. The orange blossom water lent this really neat mild fragrance to the yogurt, loved it! And we all loved the mango-yogurt creamy combination - reminded us of a frozen mango lassi (guess it is pretty close to that! :))

Off this goes to Meeta for her Mango Mania - a day late, but what else could you expect of me? *sigh*! And I have to agree with her, mango is *so* the queen of fruit! Think I'll go eat one right now ...

**************

Hmm ... guess this post is total paisa-vasool when it comes to event posts! Am shipping this off to Rachna for her JFI-Flowers event (I do use Orange Blossom water here :)) and to Mansi for her Healthy Cooking event - this is a super healthy dessert after all!

Sweeeeetttt!!!

Sunday, July 13, 2008

Nutty Pear Kumquat Chutney


Today was blisteringly hot here ... so much so that one of my first thoughts of the day was of a thick, creamy, icy milkshake! And yet, I spent large parts of the day cooking - which actually ended being a fabulously cathartic experience - making up for all those insane work days that kept me away from cooking and blogging :)

A long, long time ago I promised to make a surprise chutney for our friend Daria - she's the one of the walnut ranch fame, we're still living off her awesome Franquette and Hartley walnuts that she brought back from California a few months ago. Poking around 400 sauces, dips, dresssings, blaahhh, blaahh, blaahhhh ... unearthed a pear and walnut chutney recipe that I figured Daria would be pretty happy with :)

"There are only ten minutes in the life of a pear when it is perfect to eat."
~ Ralph Waldo Emerson

The original recipe asked for firm windfall pears that I substituted with some firm, green D'Anjou pears. I also chose to throw in a gala apple and a handful of kumquats - the latter was a great substitute for the orange juice that the original recipe called for - not only did it add a refreshing citrus bent to the chutney, but totally added to the texture too.


Nutty Pear Kumquat Chutney
Chunky, funky and chockful of flavours! :)

Servings: Makes about 1 lb

3 firm D'Anjou pears
1 gala apple
1/2 sweet yellow onion
10-12 kumquats
1/2 cup white balsamic vinegar
1/2 cup dry sherry
1/2 cup cheap, old red wine :)
1/4 cup brown sugar
1/3 cup succanat (you could just use more brown sugar or go with demerara or muscovado instead)
1 cup walnuts - chopped
1 t ground cinnamon
1 t salt
1 guajillo chilli

Peel and core the fruit and chop them into 1" chunks. Peel and quarter the onions, then chop them up into 1cm bits.

Place the chopped onion and fruit in a preserving pan with the vinegar, sherry and wine.

Slowly bring the ingredients to a boil, then reduce the heat and simmer for 30+ minutes, until the apples, pears and onions are tender, stirring the mixture occasionally.

Brown the guajillo chilli over open fire till blackened. Grind up the kumquats along with the chilli to a coarse puree.

Add this puree along with the sugar to the simmering mixture. Gently heat till the sugar is dissolved, then simmer for about 30 minutes till the chutney is thick and no excess liquid remains. Stir frequently towards the end of cooking to prevent the chutney from sticking to the bottom of the pan.

*sigh*! I know! Lots of simmering here, but trust me, it'll all work out well :)

Gently toast the walnuts for a few minutes until they get a warm brown colour. Stir the nuts into the chutney along with the cinnamon.

Spoon the chutney into warmed canning jars, cover and seal. Store in a cool, dark place and leave to mature for atleast a couple of weeks.

Hmm ... somehow, we decided a couple of hours was about as good as a couple of weeks and dug into this today itself :) Totally worth it!!!


********************

Opinion?
Sweet, spicy, tart ... an awesome olio of flavours -felt like it hit every taste bud and exuded a great aroma too! Obviously, the chutney was great on crackers, but I can't wait to try this with some pilaf or tabbouleh.


***********************

Related posts and recipes:

Thursday, July 10, 2008

Enchilada heaven ...


... is such a happy place to be in. Warm, crispy-edged tortillas filled with all sorts of goodies, drizzled with pungent sauces, topped with cheese ... I could just pack up my bags and move there!

Atleast that's how I felt after experimenting with a couple of enchilada recipes from Deborah Madison's Vegetarian Cooking for Everyone. This book truly seems to have something for everyone - fresh, inviting salads, comforting soups, delicious stews and gratins, many a stir-fry ... the list goes on.

This is a recipe from yestermonth, I originally attempted to post it on June 5th, didn't quite happen. I tried to finish writing it on the 11th ... hmm, another failed attempt! And no, I don't really remember all my incomplete posts, just peeked into my drafts folder :)

So, here we are ... and I'm truly hoping I can remember how I reworked this recipe! The original recipe called for a variety of mushrooms and some squash. We were pretty low on mushrooms and loathe to head towards the store, so it was just time to improvise. Besides, we had a couple of acorn squashes waiting to be used up, can't quite go wrong with those! We finally settled on
a medley of lightly caramelized onions, mushrooms, diced acorn squash, crumbled home-made paneer and a slew of herbs from the garden. The paneer was actually more like chenna and not the usually firm kind, I chose to let it stay crumbled with a wee bit of extra moisture instead of forming a firm slab. Worked out perfect for this recipe.

The herbs that we threw into these enchiladas really kicked up the flavours - mildly sweet cinnamon basil, bergamot-scented orange mint, pungent chives, fennel - a whole bunch of goodness!

The metaphoric icing on the cake was the tomatillo sauce. We dithered a bit between a smoky adobo chilli sauce and a fresher green sauce, but finally settled on using a bunch of tomatillos that had been sitting in the fridge.

*********************


Squash'n'Paneer Enchiladas
With some sauteed mushrooms and caramelized onions to keep everyone happy!

Servings: 8-10

1 packet of whole grain tortillas (medium sized)
1 acorn squash - peeled and diced
1/2 red onion - chopped (not too fine)
3 cloves of garlic - minced
1.5 cups of crumbled paneer
1/2 cup of chopped crimini mushrooms
8-10 leaves of cinnamon basil
6-7 leaves of orange mint
a handful of chives leaves - chopped
4-5 sprigs of fennel leaves - chopped
a handful of italian parsley - chopped
1 T olive oil
1 t brown sugar
1 T cayenne pepper powder

Preheat the oven to 350 F.

Heat the oil in a wok and saute the onions till they start to get translucent.
Throw in the brown sugar and saute a bit more (4-5 minutes) till the onions are caramelized.
Add the squash and mushrooms and saute for about 3-4 minutes.
Add a few tablespoons of water and simmer covered for another 2-3 minutes till the squash is partially cooked.
Take off the stove before adding the paneer bits along with the herbs, cayenne powder and salt.

Take a dollop of this veggie mixture and roll it in a tortilla. Make sure that you roll it really tight and fold the edges in if needed.
Place this in a greased baking tray.
Roll and fill the rest of the tortillas and stack them alongside one another in the baking tray.

*******************


Tomatillo-Cilantro Sauce

Servings: 2 cups

5-6 chubby tomatillos - husks removed and quartered
1/2 vidalia onion - chopped
1 cup cilantro leaves
1 t grated lime zest
1 jalapeno pepper - chopped

Bring a couple of cups of water to boil in a saucepan.
Add the onions, tomatillo and jalapeno to the saucepan.
Simmer for 10-15 minutes, until you basically kill the bright green colour of the tomatillos.
Transfer the vegetables to a food processor or blender, add the cilantro and puree.
Stir in the lime zest and season with salt.

Pour the sauce over the rolled enchiladas.
Sprinkle any remaining veggie filling over the enchiladas.
Set the baking pan in the oven for about 8-10 minutes.

*********************

NOTE:
Watch out! It is hot! Don't scald your tongue trying to gobble up the enchiladas! :)


*********************


Opinion?

Fabulous. Truly. I think I dreamed of attending Deborah Madison's cooking classes the night I made these! Yummy squash'n'paneer filling, delicate herb flavours, tangy-spicy tomatillo sauce, what more could one ask for?

***************

Similar recipes here and beyond

* Spicy Nutty Enchiladas
* Bean-Chilli Enchiladas @ One Hot Stove
* Paneer and Mushroom Enchiladas @ Sunita's World

***************

Off this goes to Andrea for her awesome Grow Your Own event - every herb that went into this recipe came from my garden. W00t!

Wednesday, July 2, 2008

Squash parathas to celebrate ...

a return to blogging?

a manic work life finally easing up?

a fabulous weekend?

summer finally coming to life?

life, in general?

All of the above, I guess! And here's hoping to get through the mountains of recipes waiting to make it out here!


Tonight warranted simple comfort food - something healthy, quick to throw together? Something with desi flavours ... After poking around a bit, I settled on making some parathas. It has been a while since I handled that rolling pin, and I've been missing the cathartic experience of kneading the dough, making those balls, patting them out, rolling them, folding them, rolling them ... *so* relaxing!

Experimenting with stuffings in parathas is always exciting, we often play around with a variety of greens, cheese curds, tomatoes, onions, the works. But a squash variant was a first. I initially contemplated stuffing the parathas with a squash filling, but finally settled for just kneading it into the dough - definitely easier to work with, plus the bread turned out much softer! Also, instead of boiling/cooking the vegetables, I chose to grate the squash, mix it up with some spices and knead it into the dough instead.

I also wanted to play around with the dough a bit - so I threw in some coarse whole wheat pastry flour along with a 1/4 cup of corn flour add some earthiness and texture to the dough - always fun to get that chewy undertone!

“If thou tastest a crust of bread, thou tastest all the stars and all the heavens.”
Robert Browning (1812-1889) English poet


Squash Parathas
Moist, chewy goodness!

Servings: 8-10 parathas

2 cups fine whole wheat flour
1/2 cup coarse whole wheat pastry flour
1/4 cup corn flour
2 T olive oil
1/2 cup buttermilk
warm water as needed for kneading the dough
2 yellow squashes - grated (medium)
salt to taste
1 T ancho chilli powder
1 T sumac powder

Mix the flours in a bowl along with the buttermilk, salt, spices and grated squash.
Start kneading it, adding warm water as needed.
Knead it.
Knead it some more.
And when you think you're done, add the olive oil.
And knead for a few more minutes or till your arm is ready to fall off :)

Cover the bowl with a wet towel and let it sit for atleast 20 minutes.

When your arm has recovered and you're ready to roll out some rotis ...

Take a large ball of dough (about enough to fill your palm), pat it down and roll it out using flour as needed.
Fold the circular roti into a quarter and roll it out again in case you want some funky triangular parathas.

[NOTE]: Every once in a while, I get a hole in my head and forget to complete my thoughts :) Guess that's why I forgot to finish talking about how to make these parathas! Thanks for all the comments remind me to finish my damn sentences :)

Once you've rolled the paratha out, put it onto a greased pan and cook. Once the bottom is mostly cooked, rub the surface with either a bit of butter or some oil (I tend to use grapeseed or sesame oil) and flip over. Grease the other side and cook till somewhat crispy and browned/blackened.

[I tend to store the cooked parathas covered till they're ready to be noshed on.]

Serve with homemade yoghurt and pickles - my choice for tonight was a spicy tomato pickle.


Opinion?
Simple, flavourful, chewy, earthy, very very happy! Adding the corn flour was a killer idea!

*burp*

***********

I know, I know, I'm super late in posting the roundup for Think Spice - Think Wasabi. What can I say, I'm a super lame duck :( But the dust from a manic work life is finally settling, so hopefully I can do justice to this in the next day or two.


***********

Whhoooaaaaa!!! Serious thunder and lightning out here! Very exciting :)

Tuesday, June 24, 2008

Hope springs eternal ... in the garden

Gardening requires lots of water - most of it in the form of perspiration.
~Lou Erickson


It also requires a slew of expletives directed at those slugs and weeds and other obstacles standing in the way of my vegetables' happiness :)

In spite of the vagaries of the weather this year, the abysmal lack of spring and warmth, my veggies have managed to survive. Really well, I might add. And yes, it takes some work to build those beds, plant those starters and tend to them every couple of days. But none of this would've happened without those fabulous saplings to start off with! This year's crop comes with starters from these places:
  • Molbaks - the king of nurseries out here in the greater seattle area. Somewhat pricey, but their quality remains blemishless.
  • Seattle Tilth - a fabulous local non-profit dedicated to urban gardening. Their organic techniques, demonstrations and classes are truly fantastic!
  • Seattle area farmers' markets - Life doesn't quite function without the CSAs and organic gardeners who populate these markets - their seeds, starters and crops are the best, the very best!
So, without further ado, I present a partial snapshot of the vegetable garden as of this evening :)


Thai Chilli Pepper


A few of the zillion tomatoes (heirlooms, sweet million, cherry, plum, roma)


One of the veggie beds, the plants in front are chives, garlic, fennel and basil


Greens - radicchio, braising greens, arugula, butter lettuce ...


First snap pea of the season!


Broccoli, cauliflower, brussel sprouts and other leafy green things!


Yellow squash


Zucchini


Italian Parsley


Rapini flower

These rapini flowers have been a fabulous discovery this season - we stumbled upon them at the Madrona farmers' market and have been hooked on them since. Fragile-looking, but intensely flavourful and refreshing - they remind me of Bri. The incredibly strong and resilient Bri - we're all thinking of you and rooting for you.

Hope does spring eternal.